Cub Cadet PRO Z 160S KW Owners Manual - Page 19
Tires, Battery Information, Using the Transmission Bypass Rods, Hydrostatic Transmission
 |
View all Cub Cadet PRO Z 160S KW manuals
Add to My Manuals
Save this manual to your list of manuals |
Page 19 highlights
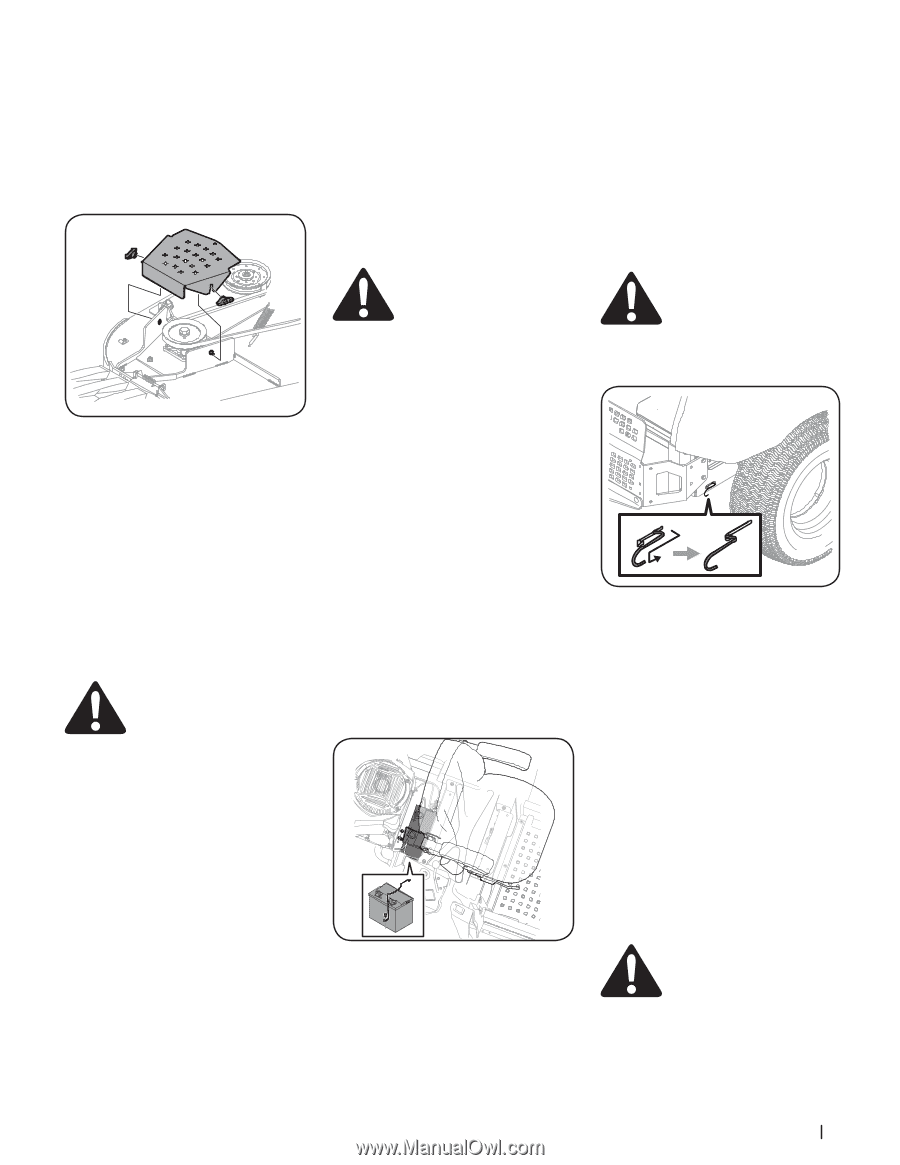
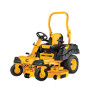
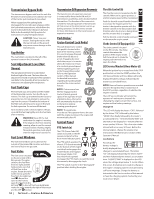
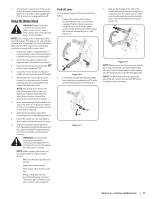
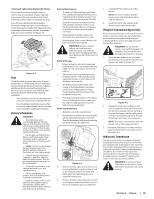
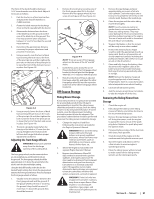
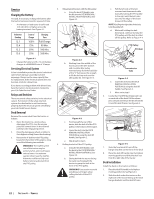
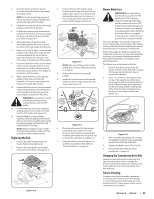
Cleaning & Lubricating the Spindle Pulleys Once a month remove the belt covers to remove any accumulation of grass clippings from around the spindle pulleys and V-belt. Clean more often when mowing tall, dry grass. Every 25 hours, lubricate the deck spindles. Remove the wing knobs (a) to remove the belt covers (b), locate the spindle lube fitting and using a grease gun, lubricate the spindles. The spindle holds 2.3 ounces of grease. See Figure 4-3. (a) (b) (a) Figure 4-3 Tires Check the tire air pressure after every 50 hours of operation or weekly. Keep the tires inflated to the recommended pressures. Improper inflation will shorten the tire service life and produce an uneven cut. See the tire side wall for proper inflation pressures. Observe the following guidelines: • Do not inflate a tire above the maximum pressure shown on the sidewall of the tire. • Do not reinflate a tire that has been run flat or seriously under inflated. Have it inspected and serviced by a qualified tire mechanic. Battery Information WARNING! • Should battery acid accidentally splatter into the eyes or onto the skin, rinse the affected area immediately with clean cold water. If there is any further discomfort, seek prompt medical attention. • If acid spills on clothing, first dilute it with clean water, then neutralize with a solution of ammonia/water or baking soda/ water. • NEVER connect (or disconnect) battery charger clips to the battery while the charger is turned on, as it can cause sparks. • Keep all sources of ignition (cigarettes, matches, lighters) away from the battery. The gas generated during charging can be combustible. • As a further precaution, only charge the battery in a well ventilated area. • Always shield eyes and protect skin and clothing when working near batteries. • Batteries contain sulfuric acid and may emit explosive gases. Use extreme caution when handling batteries. Keep batteries out of the reach of children. Battery Maintenance • The battery is filled with battery acid and then sealed at the factory. However, even a "maintenance free" battery requires some maintenance to ensure its proper life cycle. • Spray the terminals and exposed wire with a battery terminal sealer, or coat the terminals with a thin coat of grease or petroleum jelly, to protect against corrosion. • Always keep the battery cables and terminals clean and free of corrosion. • Avoid tipping. Even a sealed battery will leak electrolyte when tipped. WARNING! Batteries contain sulfuric acid and may emit explosive gases. Use extreme caution when handling batteries. Keep batteries out of the reach of children. Battery Storage 1. When storing the tractor for extended periods, disconnect the negative battery cable. It is not necessary to remove the battery. 2. All batteries discharge during storage. Keep the exterior of the battery clean, especially the top. A dirty battery will discharge more rapidly. 3. The battery must be stored with a full charge. A discharged battery can freeze sooner than a charged battery. A fully charged battery will store longer in cold temperatures than hot. 4. Recharge the battery before returning to service. Although the tractor may start, the engine charging system may not fully recharge the battery. Removing the Battery 1. Slide the seat all the way forward. 2. Remove the hex washer screw securing the battery hold-down bracket to the frame. Then flip the battery hold-down bracket up to free the battery. See Figure 4-4 Figure 4-4 3. Remove the hex cap screw and sems nut securing the black negative battery lead to the negative battery post (marked NEG). Move the cable away from the negative battery post. 4. Remove the hex cap screw and sems nut securing the red positive battery lead to the positive battery post (marked POS). 5. Carefully lift the battery out of the tractor. NOTE: On some models it may be necessary to slide the battery left or right to remove it. 6. Install the battery by repeating the above steps in the reverse order. Using the Transmission Bypass Rods If for any reason the tractor will not drive or you wish to move the tractor, the two hydrostatic transmissions are equipped with a bypass rod that will allow you to manually move the tractor short distances. WARNING! Do not tow the tractor, even with the bypass rod engaged. Serious transmission damage will result from doing so. 1. From the rear of the tractor, just inside the two rear tires, locate the transmission bypass rods. Refer to Figure 4-5. (a) (b) Figure 4-5 2. Engage the transmission bypass rods, one on each side of the tractor, to move the tractor manually without starting it. Engage the bypass rods by pulling each one back (a) and hooking it into the slot (b) to lock it into place. See Figure 4-5. NOTE: The tractor will not drive with the bypass rods in the engage position. 3. Disengage the bypass rods by reversing steps (a) and (b) after moving the tractor. See Figure 4-5. Hydrostatic Transmission Your zero turn tractor is equipped with dual integrated hydrostatic pumps/transaxles that are sealed and are maintenance-free. However, this model is equipped with a transmission oil expansion reservoir. Under normal operating conditions, the oil level in the expansion reservoir does not need to be checked and no additional oil is needed. If checking the reservoir oil level, proceed as follows: WARNING! Check the oil level ONLY before starting the tractor when the transmission oil is fully cooled. Section 4 - Service 19
-
 1
1 -
2
-
3
-
4
-
5
-
6
-
7
-
8
-
9
-
10
-
11
-
12
-
13
-
 14
14 -
 15
15 -
 16
16 -
 17
17 -
 18
18 -
 19
19 -
 20
20 -
 21
21 -
 22
22 -
 23
23 -
 24
24 -
25
-
26
-
27
-
28
 |
 |