Cub Cadet SC 500 EQ Operation Manual - Page 18
Using Mower with Grass Catcher, Vertical Storage Mower
 |
View all Cub Cadet SC 500 EQ manuals
Add to My Manuals
Save this manual to your list of manuals |
Page 18 highlights
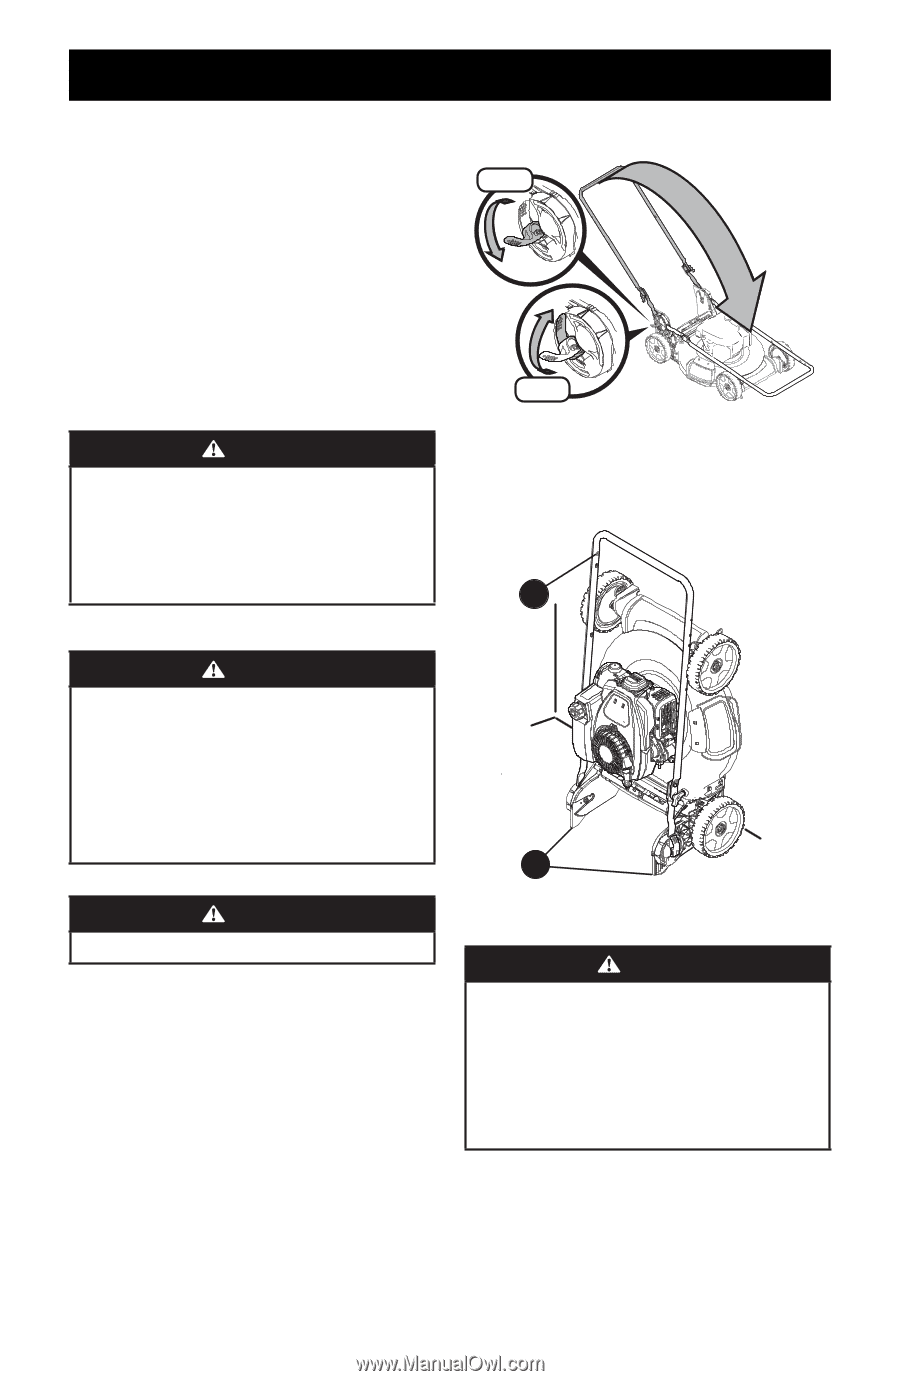
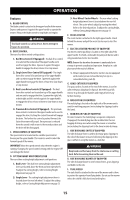
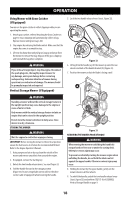
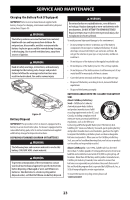
OPERATION Using Mower with Grass Catcher (If Equipped) You can use the grass catcher to collect clippings while you are operating the mower. 1. Attach grass catcher, refer to Attaching the Grass Catcher on page 10. Grass clippings will automatically collect in bag. Operate mower until grass bag is full. 2. Stop engine by releasing the blade control. Make sure that the engine has come to a complete stop. 3. Lift rear discharge door and pull grass bag up and away from the mower to remove the bag. Dispose of the grass clippings and reinstall the bag when complete. WARNING If you strike a foreign object, stop the engine. Disconnect the spark plug wire, thoroughly inspect mower for any damage, and repair damage before restarting and operating. Extensive vibration of mower during operation is an indication of damage. The mower should be promptly inspected and repaired. Vertical Storage Mower (If Equipped) 5. Lock the two handle release levers (inset, Figure 32). Unlock Lock Figure 32 6. Lifting from the handle (a), tilt the mower up onto the rear wheels and back of the handle bracket (b) (Figure 33). 7. Position the mower so that the blade is facing a wall. a WARNING Standing a mower without the vertical storage feature in the upright position may cause damage to the engine or cause a fuel or oil leak. Only mowers with the vertical storage feature include an engine that can be stored in the upright position. Do not store the mower outside or in damp area. Store mower in a dry, clean area. STORING THE MOWER WARNING Wait for engine to cool before wiping or storing. IMPORTANT: Before storing the mower in the vertica l position ensure the fuel level is at or below the recommended fill level. Refer to the Engine Operator's Manual. 1. Using compressed air or dry rag clean the outside of the mower and remove any debris from around the engine. 2. If equipped, remove the starting key. 3. Unlock the two handle release levers. See inset Figure 32. 4. Fold the handle forward to the storage position (Figure 32). Do not crimp blade control cable or the drive control cable (if equipped) while lowering the handle. b Figure 33 REMOVING THE MOWER FROM STORAGE WARNING When moving the mower or unfolding the handle do not put hands or feet near or under the cutting deck. Otherwise serious injury may occur. To prevent accidentally starting the mower engine when unfolding the handle, do not hold the blade control against the upper handle. Otherwise serious injury may occur. 8. Holding the mower by the upper handle, gently set the mower down on all four wheels. 9. To unfold the handle, unlock the two handle release levers (inset, Figure 32) and perform STEPS 5-8 in ASSEMBLY, Vertical Storage Handle on page 9. 18
-
 1
1 -
2
-
3
-
4
-
5
-
6
-
7
-
8
-
9
-
10
-
11
-
12
-
 13
13 -
 14
14 -
 15
15 -
 16
16 -
 17
17 -
 18
18 -
 19
19 -
 20
20 -
 21
21 -
 22
22 -
 23
23 -
24
-
25
-
26
-
27
-
28
-
29
-
30
-
31
-
32
-
33
-
34
-
35
-
36
-
37
-
38
-
39
-
40
-
41
-
42
-
43
-
44
-
45
-
46
-
47
-
48
-
49
-
50
-
51
-
52
-
53
-
54
-
55
-
56
-
57
-
58
-
59
-
60
-
61
-
62
-
63
-
64
-
65
-
66
-
67
-
68
-
69
-
70
-
71
-
72
 |
 |