D-Link DSH-16 User Guide - Page 9
Unpacking, Installation
 |
UPC - 790069215629
View all D-Link DSH-16 manuals
Add to My Manuals
Save this manual to your list of manuals |
Page 9 highlights
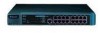
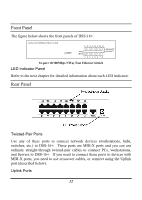
UNPACKING AND INSTALLATION This chapter provides unpacking and setup information for DSS-16+. Unpacking Open the shipping cartons and carefully unpacks its contents. The carton should contain the following items: One 16-port 10/100M NWay Fast Ethernet Switch One external power adapter Four rubber feet to be used for shock cushioning User's Guide If any item is found missing or damaged, please contact your local reseller for replacement. Installation The site where you install DSS-16+ may greatly affect its performance. When installing, consider the following pointers: Install DSS-16+ in a fairly cool and dry place. See Technical Specification for the acceptable operating temperature and humidity ranges. Install DSS-16+ in a site free from strong electromagnetic source, vibration, dust, and direct sunlight. Leave at least 10cm of space at the left and right hand side of DSS-16+ for ventilation. Visually inspect the DC power jack and make sure that it is fully secured to the power adapter. IDENTIFYING EXTERNAL COMPONENTS This section identifies all the major external components of DSS-16+. Both the front and rear panel is shown, followed by a description of each panel's feature. The LED indicator panel is described in detail in the next chapter. 11
-
 1
1 -
2
-
3
-
 4
4 -
 5
5 -
 6
6 -
 7
7 -
 8
8 -
 9
9 -
 10
10 -
 11
11 -
 12
12 -
 13
13 -
 14
14 -
15
-
16
-
17
-
18
-
19
-
20
-
21
-
22
-
23
-
24
 |
 |