D-Link DSN-5110-10 CLI User's Guide for DSN-1100-10 - Page 25
Using the Run Command to Start the CLI
 |
UPC - 790069336447
View all D-Link DSN-5110-10 manuals
Add to My Manuals
Save this manual to your list of manuals |
Page 25 highlights
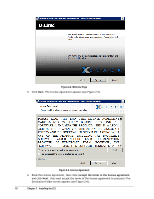
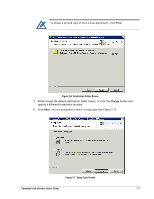
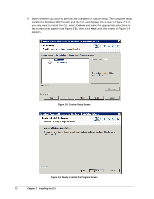
5. Enter a case-sensitive password (the default password is admin) and press Enter. For security, each typed password character appears as an asterisk (*). The following actions occur when you press Enter: A series of numbers count down from 5 to zero. When zero is reached, a Successful login message with the IP address of the array you logged in to appears if the login was successful. In the example below, the user has logged in to an array with an IP address of 192.168.59.25. A prompt appears that consists of the IP address of the array to which you are logged in followed by two colons (for example, 192.168.59.25 ::). You are now at the System level and can issue CLI command lines at the root context, or navigate to and issue commands from subcontexts (see section 1.1). 2.3.2 Using the Run Command to Start the CLI The following procedure describes how to start the CLI using the Windows Run command. With this method, you enter the name of the CLI executable file in the Open field of the Windows Run dialog box. If you know the IP address of the array management port, username, and password, you can add them to the command line following the name of the CLI executable file. If desired, you can also specify the name of a script that you want the CLI to automatically run at login. 1. Click the Start button and click Run. The Run dialog box appears (see Figure 2-12). Figure 2-12. Run Dialog Box 2. In the Open field, click the Browse button. Navigate to the location Program Files/D-Link, Inc./Advanced Features for Windows (or the destination location you specified during the installation). Double-click the name of the CLI executable (cli2.exe). Command Line Interface User's Guide 15
-
 1
1 -
2
-
3
-
4
-
5
-
6
-
7
-
8
-
9
-
10
-
11
-
12
-
13
-
14
-
15
-
16
-
17
-
18
-
19
-
 20
20 -
 21
21 -
 22
22 -
 23
23 -
 24
24 -
 25
25 -
 26
26 -
 27
27 -
 28
28 -
 29
29 -
 30
30 -
31
-
32
-
33
-
34
-
35
-
36
-
37
-
38
-
39
-
40
-
41
-
42
-
43
-
44
-
45
-
46
-
47
-
48
-
49
-
50
-
51
-
52
-
53
-
54
-
55
-
56
-
57
-
58
-
59
-
60
-
61
-
62
-
63
-
64
-
65
-
66
-
67
-
68
-
69
-
70
-
71
-
72
-
73
-
74
-
75
-
76
-
77
-
78
-
79
-
80
-
81
-
82
-
83
-
84
-
85
-
86
-
87
-
88
-
89
-
90
-
91
-
92
-
93
-
94
-
95
-
96
-
97
 |
 |
