DIRECTV R16-300 User Guide - Page 76
Guided, Setup & Activation
 |
View all DIRECTV R16-300 manuals
Add to My Manuals
Save this manual to your list of manuals |
Page 76 highlights
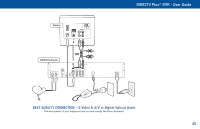
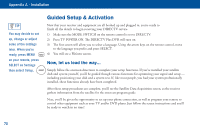
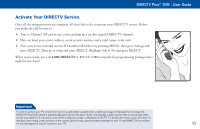
Appendix A - Installation Guided Setup & Activation TIP You may decide to set up, change or adjust some of the settings later. When you're ready, press MENU MENU on your remote, press SELECT on Settings then select Setup. SELECT Now that your receiver and equipment are all hooked up and plugged in, you're ready to finish all the details to begin receiving your DIRECTV service. 1) Make sure the MODE SWITCH on the remote control is set to DIRECTV. 2) Press TV POWER ON. The DIRECTV Plus DVR will turn on. 3) The first screen will allow you to select a language. Using the arrow keys on the remote control, move to the language you prefer and press SELECT. 4) You will see a Welcome screen. Now, let us lead the way... Simply follow the onscreen directions to complete your setup functions. If you've installed your satellite dish and system yourself, you'll be guided though various functions for optimizing your signal and setup - including positioning your dish and a system test. If, like most people, you had your system professionally installed, these functions already have been completed. After these setup procedures are complete, you'll see the Satellite Data Acquisition screen, as the receiver gathers information from the satellite for the onscreen program guide. Next, you'll be given the opportunity to set up your phone connection, as well as program your remote to control other equipment such as your TV and/or DVD player. Just follow the screen instructions and you'll be ready to watch in no time! 70
-
 1
1 -
2
-
3
-
4
-
5
-
6
-
7
-
8
-
9
-
10
-
11
-
12
-
13
-
14
-
15
-
16
-
17
-
18
-
19
-
20
-
21
-
22
-
23
-
24
-
25
-
26
-
27
-
28
-
29
-
30
-
31
-
32
-
33
-
34
-
35
-
36
-
37
-
38
-
39
-
40
-
41
-
42
-
43
-
44
-
45
-
46
-
47
-
48
-
49
-
50
-
51
-
52
-
53
-
54
-
55
-
56
-
57
-
58
-
59
-
60
-
61
-
62
-
63
-
64
-
65
-
66
-
67
-
68
-
69
-
70
-
 71
71 -
 72
72 -
 73
73 -
 74
74 -
 75
75 -
 76
76 -
 77
77 -
 78
78 -
 79
79 -
 80
80 -
 81
81 -
82
-
83
-
84
-
85
-
86
 |
 |