Dacor MRES30S Use & Care Manuals - Page 10
Multiple Rack Baking, GlideRack, Oven Rack
 |
View all Dacor MRES30S manuals
Add to My Manuals
Save this manual to your list of manuals |
Page 10 highlights
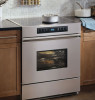
Oven Operation Setting the Oven When Using the Temperature Probe (Continued): 5. Press the PROBE pad. The Display will flash "PRB" and beep if the probe is not inserted properly. 6. Adjust the temperature to the desired setting using the TIME•TEMPERATURE ( + or - ) pads. A jump-in temperature of 160˚F will appear when the TIME•TEMPERATURE pad is first pressed. To change to the desired temperature, press the TIME•TEMPERATURE pad until you reach the desired temperature. The temperature can be set from 100-200˚F. Minimum Safe Internal Temperatures for Various Foods Type and Cut Internal Temp. (°F) Pork, ham, sausage and bacon 180°F All foods previously served and cooled that are reheated 165°F within two hours All poultry and game birds (turkey, chicken, cornish game hen, duck, etc.) 180°F Stuffed meats Stuffing 165°F 165°F Ground beef and ground pork Fish and most other potentially hazardous food not listed in this table Beef roasts (rare) 165°F 145°F 145°F Beef steaks (rare) 145°F After the temperature has been set, the control panel temperature readout will default to 95˚F, even if the food has not reached that temperature. The temperature readout will increase in 1˚F increments until the food reaches the set temperature. 7. The oven will go into the "hold" mode for 2 hours after the internal temperature of the food has reached the desired temperature and will hold the oven temperature at 150˚F. The residual heat of the oven will cause the internal temperature of the food to continue to climb. Use hot pads to remove the temperature probe from the food. To prevent damage, do not use tongs to pull on the probe. NOTES: • After meat is pulled out of the oven, it will continue to cook. "Carry-over" cooking affects all foods. The larger the item, the longer the carry-over. It is best to let the meat rest after it comes out of the oven for 10 to 15 minutes. Doing so will allow the meat to retain its juices and continue to set, making it easier to carve. • If the probe plug is left inserted in the probe outlet when not in use, the control panel will beep and flash "PRB" until the probe is unplugged. Multiple Rack Baking The uniform air circulation provided by Pure Convection cooking enables more oven capacity to be utilized. Many foods, such as pizzas, cakes, cookies, biscuits, muffins, rolls and frozen convenience foods can be successfully prepared on either two or three racks at the same time. Additionally, complete meals can be prepared by using multiple racks. See below for specific recommendations. Follow the steps in the Oven Modes section to manually operate the oven, or refer to the Delay Timed Cooking section for automatic operation. MULTIPLE RACK BAKING TIPS: • Typically, when baking on two racks, use rack positions 2 and 4 or 3 and 5. When baking on three racks, use rack positions 1, 3 and 5. • When adapting a single rack recipe to multiple rack baking, it may be necessary to add to the baking time. This is due to the extra bulk of the food in the oven. GlideRack™ Oven Rack Dacor's GlideRack oven rack is designed to install and glide to full extension effortlessly. When using Dacor's pizza stone (model number ABS20), the full extension of the rack allows you to slide the pizza on and off the stone with great ease. It is also great for large roasts in large roasting pans. This easy-slide rack allows you to baste more easily and check temperatures of the food more safely and quickly. Proper Installation of the GlideRack Oven Rack: 1. Fully extend the two side guides. Align the two small clips on the bottom at the rear of the GlideRack oven rack with the black porcelain rack guides in the oven. 2. Begin to slide the rack in, then lift up. The rack must be in between the two clips on the upper and lower side of the rack rear. 3. Push the rack all the way to the back. 4. Grasp the rack in the front center and pull. The rack should come forward while the side guides remain in place. Rack Guide Glide Clips GlideRack Oven Rack 8
-
 1
1 -
2
-
3
-
4
-
 5
5 -
 6
6 -
 7
7 -
 8
8 -
 9
9 -
 10
10 -
 11
11 -
 12
12 -
 13
13 -
 14
14 -
 15
15 -
16
-
17
-
18
-
19
-
20
-
21
-
22
-
23
-
24
 |
 |
