Dacor MRES30S Use & Care Manuals - Page 16
Replacing the Oven Light, Calibrating the Oven Temperature - electric range
 |
View all Dacor MRES30S manuals
Add to My Manuals
Save this manual to your list of manuals |
Page 16 highlights
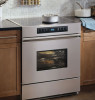
Care and Cleaning Instructions Self-Cleaning Tips • If any soil remains in the oven after completion of a Self-Clean cycle, repeat the cycle if desired. Increase the cleaning time during future cycles. • Clean the oven regularly to prevent excessive soil build-up. This will increase the efficiency of the Self-Clean cycle and reduce the amount of smoke and odors generated. • Self-clean in the cooler evening hours after cooking is complete and when electricity rates are lower. Calibrating the Oven Temperature The user may find the temperature in their new oven to be different from that of their previously-owned appliance. Familiarity with the old appliance sometimes makes it difficult to get used to a new oven. If you feel that the oven temperature is consistently high or low, the temperature of the new oven can be adjusted. The adjustment needs to be done only once. NOTE: The temperature adjustment only affects Standard Bake and convection modes. Broil and self-clean temperatures cannot be adjusted. The oven temperature may be adjusted (calibrated) by following these steps: 1. Press the BAKE pad. 2. Press the TIME•TEMP+ pad to set a temperature of 500˚F or higher. 3. Press and hold the BAKE selector pad. After approximately 5 seconds the temperature display is replaced by "00." The BAKE pad can now be released. The calibration mode has been accessed. 4. Press the TIME•TEMP+ or - pad to set the amount of temperature adjustment. The temperature can be changed a maximum of 35˚F higher or lower. Set the adjustment to positive (+) numbers to increase the oven temperature; set the adjustment to negative (-) numbers to reduce the oven temperature. Temperatures can be adjusted up or down in increments of 5˚F. 5. After setting the desired temperature adjustment, press the CANCEL•SECURE pad to exit the calibration mode and to reset the clock display. NOTES: • If CANCEL•SECURE is not pressed after setting the adjustment, the clock display will automatically reset in 6 seconds. • The amount of temperature adjustment may be changed again by repeating the calibration procedure. The oven will only retain the amount of the most recent temperature adjustment. • The temperature adjustment is not affected by an electrical power failure. Replacing the Oven Light Your new range has an oven light to enhance the view into the oven. The light assembly consists of a removable lens cover and 40-watt 120VAC appliance bulb, as well as a light fixture housing. Light bulb replacement is considered to be a homeowner maintenance operation. warning To prevent electrical shock and/or personal injury: • Make certain that the oven and light bulb are cool to the touch and that power to the oven has been turned off before replacing the light bulb. • Always ensure that the lens cover is in place when using the oven. The lens cover protects the bulb from breakage caused by high oven temperatures or mechanical shock. To replace a light bulb, follow these steps: 1. Turn off the power at the main power supply. 2. Remove the threaded lens cover from the housing by rotating counter-clockwise. 3. Rotate the light bulb counter-clockwise and out. Insert the new bulb and turn clockwise. 4. Reinstall the threaded lens cover by rotating clockwise. 5. Turn the power back on at the main power supply. 6. Reset the time of day. Refer to the Setting the Time of Day section in this booklet. Oven Light Assembly 14
-
 1
1 -
2
-
3
-
4
-
5
-
6
-
7
-
8
-
9
-
10
-
 11
11 -
 12
12 -
 13
13 -
 14
14 -
 15
15 -
 16
16 -
 17
17 -
 18
18 -
 19
19 -
 20
20 -
 21
21 -
22
-
23
-
24
 |
 |
