Dacor RV30 Installation Instructions - Page 14
Electrical Installation
 |
View all Dacor RV30 manuals
Add to My Manuals
Save this manual to your list of manuals |
Page 14 highlights
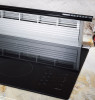
Installation Instructions Duct Work Installation • Install the duct work from the raised vent to the point where it exits the building according to the Installation Specifications. Use sheet metal screws and duct tape to connect and seal all of the pieces. Support the duct weight as necessary to ensure sealed joints. • On installations using a ILHSF or REMP series blower, run the three conductor wiring required to power the blower parallel to the duct work from the raised vent to the blower. The wiring must meet the electrical specifications on page 4 and local codes and ordinances. Connect it as specified below. Electrical Installation warning • ELECTRIC SHOCK HAZARD - Turn off power at the circuit breaker panel or fuse box prior to connecting the unit to the electrical circuit. • Do not ground the appliance with the neutral (white) house supply wire. A separate ground wire must be utilized. • Failure to complete electrical connections properly may result in an electric shock hazard or a damaged or non-functional system. Follow the wiring diagrams carefully to ensure a proper installation. Do not change the factory wired terminal connections inside the electrical access panel for the raised vent or the blower. • To avoid an electric shock hazard and to prevent damage route all wiring away from hot surfaces. 1. Make sure power to the junction box that will supply power to the raised vent is turned off at the circuit breaker or fuse box. 2. Remove the screws from the front of the raised vent electrical access cover and remove it. 3. Connect the raised vent to the junction box according to Wiring Diagram B on the facing page and local codes and ordinances. Make sure all terminal connections, including the factory wired connections, are tight. 4. On installations using an cabinet blower (CABP3): • Remove the electrical access cover from the front of the blower. • Cut a piece of wire/conduit long enough to reach from the power terminals inside the raised vent to the power terminals inside the CABP3 blower, via the electrical access holes on both units. The location of the access hole on the CABP3 varies depending on the blower orientation. 5. Connect the wiring/conduit that supplies power to the remote/in-line blower or cabinet blower (as applicable) as shown in Wiring Diagram B on the facing page. 6. Replace the electrical access panel on the raised vent. 7. Connect the blower power supply wiring from the raised vent to the blower: • On installations using a ILHSF or REMP series blower, connect the wiring according to the blower installation instructions. • On installations using an cabinet blower, (CABP3) connect the wiring according to Wiring Diagram A on the facing page. Replace the blower electrical access cover. Make sure all terminal connections, including the factory wired connections, are tight. 12
-
 1
1 -
2
-
3
-
4
-
5
-
6
-
7
-
8
-
 9
9 -
 10
10 -
 11
11 -
 12
12 -
 13
13 -
 14
14 -
 15
15 -
 16
16 -
 17
17 -
 18
18 -
 19
19 -
20
 |
 |
