Danby DAC15009EE Product Manual - Page 11
Install Window Lock and Sash Seal
 |
View all Danby DAC15009EE manuals
Add to My Manuals
Save this manual to your list of manuals |
Page 11 highlights
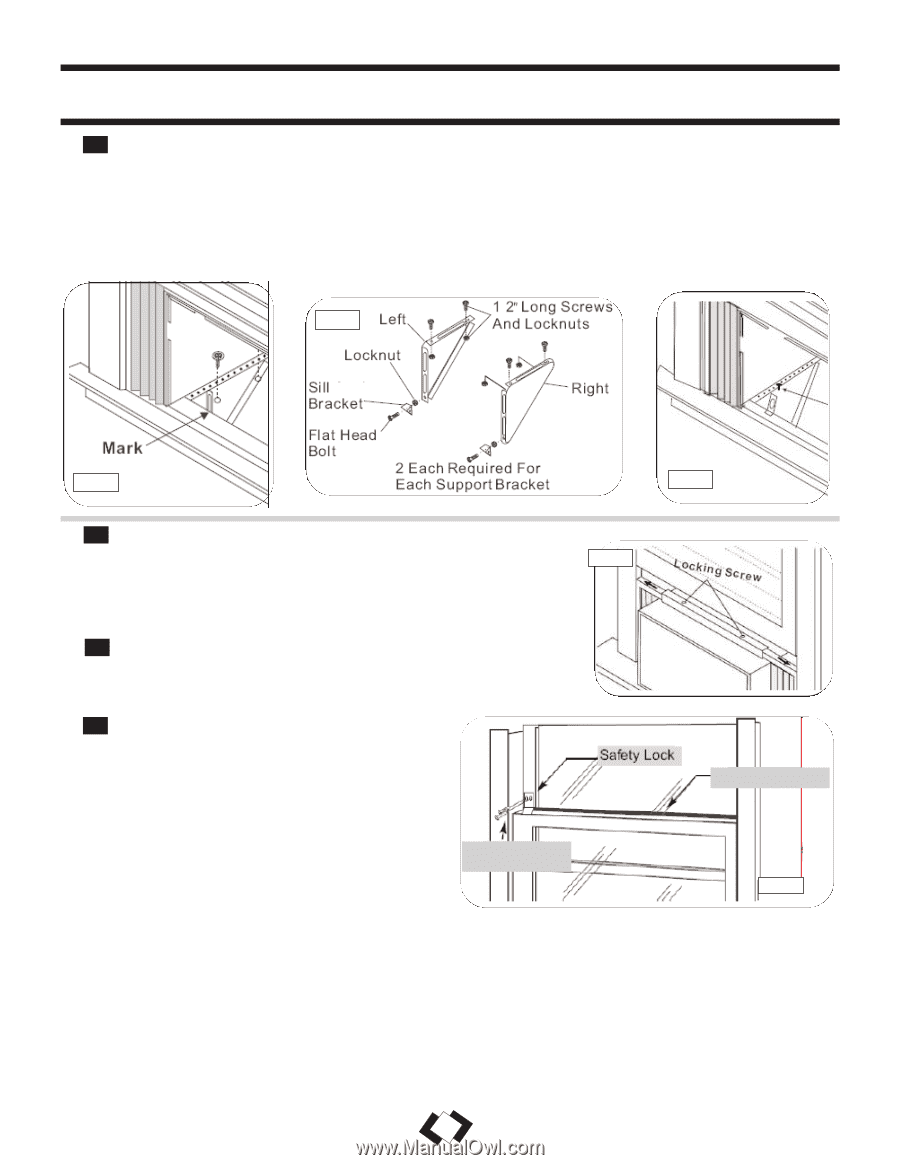
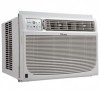
INSTALLATION (cont'd) 5 Install Support Bracket 1) Hold each support bracket flush against outside of sill, and tighten to bottom of cabinet as shown in Fig. I. Mark brackets at top level of sill, and remove. 2) Assemble sill anchor bracket to outside support legs at the market positon, as seen in Fig. J. Hand tighten, but allow for any changes later. 3) Install support brackets (with sill anchor brackets attached) to correct hole in bottom of cabinet as shown in Fig. K. 4) Tighten all 6 bolts securely. Fig. J Anchor Fig. I Fig. K 6 Extend Window Filler Panels 1) Extend panels to fill window opening completely. Secure the shutter Fig. L clamp on each side of the (upper)shutter and secure to window sill using one 7/16in.(11.1mm) locking screw & flat washer on each side. (Fig.L) 2) Attach frame lock to window sill using one 1-3/16in. (20mm) screw on each side as shown in Fig. L 7 Install Window Lock and Sash Seal 1) Trim sash seal to fit window width. Insert into space between upper and lower sashes (Fig. M). 2) Attach right angle safety lock as shown in Fig. M. 8 Install Chassis into Cabinet and Install Front to Unit 1) Lift chassis and carefully slide into cabinet, leaving 6 inches protruding. 2) DO NOT push on controls or coils. 3) Be sure the chassis is firmly seated towards rear of cabinet. 4) Installation of front is the reverse of removal, outlined in section 1 ("Remove Chassis"). 3/4" long Hex-head screw Window Sash Seal Fig. M 10
-
 1
1 -
2
-
3
-
4
-
5
-
 6
6 -
 7
7 -
 8
8 -
 9
9 -
 10
10 -
 11
11 -
 12
12 -
 13
13 -
 14
14 -
 15
15 -
 16
16 -
17
-
18
-
19
-
20
-
21
-
22
-
23
-
24
-
25
-
26
 |
 |