Danby DAC15009EE Product Manual - Page 9
INSTALLATION cont'd - model
 |
View all Danby DAC15009EE manuals
Add to My Manuals
Save this manual to your list of manuals |
Page 9 highlights
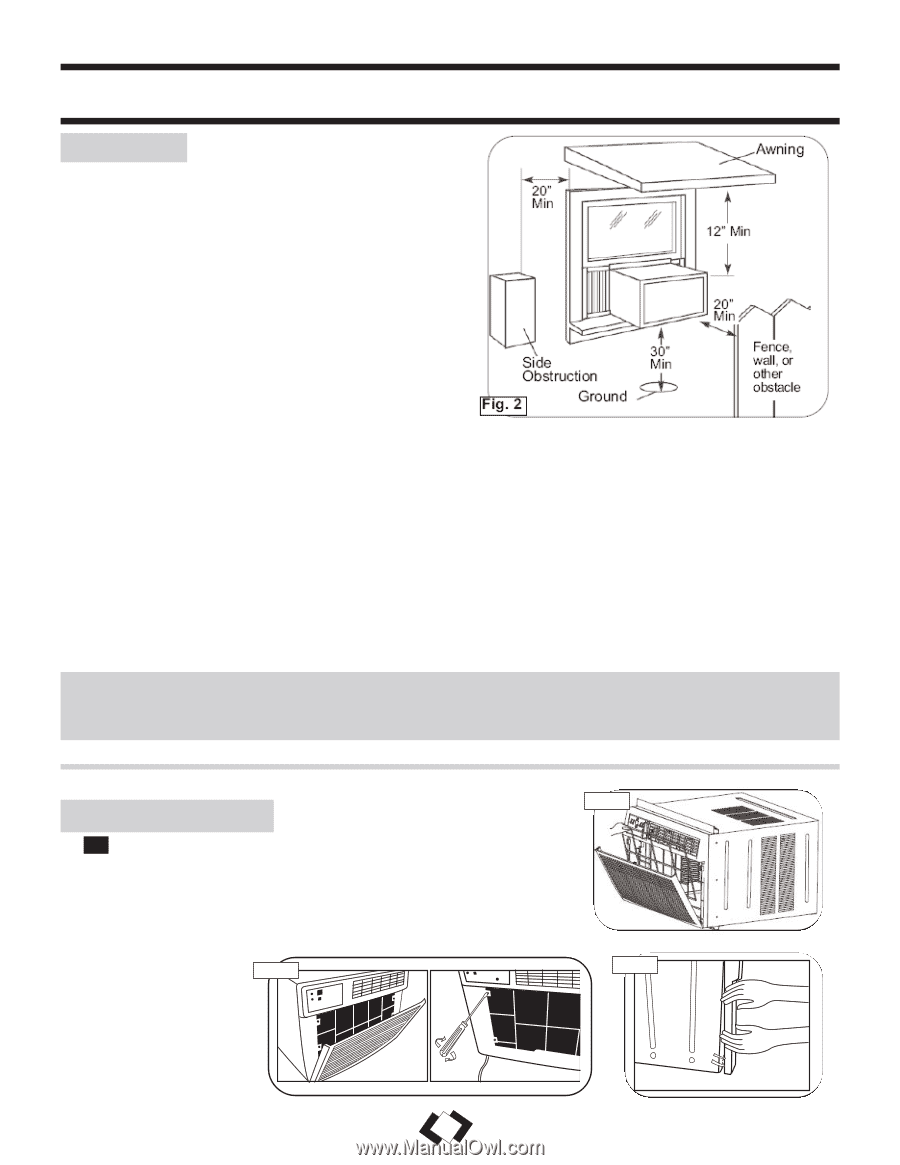
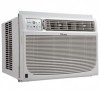
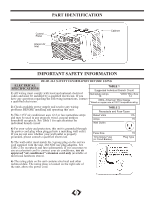
INSTALLATION (cont'd) LOCATION A) This room air conditioner is designed to fit easily into a double hung window. However, since window designs vary, it may be necessary to make some modifications for safe, proper installation. B) For maximum efficiency, install the air conditioner on a side of the house or building which favours more shade than sunlight. If the unit is in direct sunlight, it is advisable to provide an awning over the unit. C) Provide sufficient clearance around the cabinet to allow for ample air circulation through the unit (See Fig. 2). The rear of the unit should be outdoors and not in a garage nor inside a building. Keep unit as far away as possible from obstacles/obstructions and at least 30" above the floor or ground. Curtains and other objects within a room should be prevented from blocking the air flow. D) Be certain the proper electrical outlet is within reach of the installation. Use only a single outlet circuit rated at 15 amps. All wiring should be in accordance with local and national electrical codes. Note: This unit is NOT designed for vertical (slider type) windows and/or through-the-wall applications. Save the shipping carton and packing materials for future storage or transport of the unit. From carton, remove the plastic bag containing the installation hardware kit necessary for the installation of your air conditioner. Please check the contents of hardware kit against the corresponding model check list, prior to installation of the unit (See Fig. 1 pg 6). CAUTION: Because the compressor is located on the controls side of the unit, this side will be heavier and more awkward to manipulate. Inadequate support on control side of the unit can result in personal injury and damage to your unit and property. Therefore, it is recommended that you have someone assist you during the installation of this unit. E) DO NOT install unit where leakage of combustible gas is suspected. Your air conditioner may fail to operate in air containing oils (including machine oils), sulfide gas, near hot springs, etc. NOTE: Your unit is designed to evaporate condensation under normal conditions. However, under extreme humidity conditions, excess condensation may cause basepan to overflow to the outside. The unit should be installed where condensation run-off cannot drip on pedestrains or neighbouring properties. WINDOW MOUNTING 1 Remove Chassis: 1) Pull down front panel and remove filter (See Fig. A) 2) Lift front panel upwards and place to one side. 3) Locate the four (4) front screws and remove (Fig B). These screws will be needed to re-install the front later. 4) Pry away front panel from cabinet sides as show in Fig.C. Fig. B Fig. A Fig. C 8
-
 1
1 -
2
-
3
-
 4
4 -
 5
5 -
 6
6 -
 7
7 -
 8
8 -
 9
9 -
 10
10 -
 11
11 -
 12
12 -
 13
13 -
 14
14 -
15
-
16
-
17
-
18
-
19
-
20
-
21
-
22
-
23
-
24
-
25
-
26
 |
 |