Dell 2135cn Color Laser Printer User Guide - Page 107
Faxing
 |
View all Dell 2135cn Color Laser Printer manuals
Add to My Manuals
Save this manual to your list of manuals |
Page 107 highlights
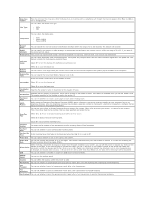
Back to Contents Page Faxing FAX Country Setting Setting the Printer ID Using the Number Keypad to Enter Characters Setting the Time and Date Changing the Clock Mode Setting Sounds Specifying the Fax Settings Sending a Fax Sending a Delayed Fax Sending a Fax from the Driver (Direct Fax) Receiving a Fax Automatic Dialing Other Ways to Fax Printing a Report Changing Setting Options FAX Country Setting The FAX country setting is used to set the country where your printer is used. This is a requirement for using the FAX service on the printer. There are two ways to set the country settings: l Fax Initial Setup - a part of the installation software l Printer operator panel - follow "FAX Country Setting Procedure" You will have to use the operator panel and follow the instructions below, if: l You purchased your printer with a new Dell computer l You have finished Windows Installer setup without completing FAX Initial Setup l You wish to change the country settings of where your printer is used FAX Country Setting Procedure To set the country settings from the printer operator panel: 1. Press until >SETUP appears, and then press . 2. Press until >Admin Menu appears, and then press . 3. Press until >Fax Settings appears, and then press . 4. Press until >Country appears, and then press . 5. Select the country where the printer is used. The printer must be rebooted after you set the country settings. When a message prompting you to reboot the printer appears, select Yes. After the reboot, the top menu is displayed on the operator panel. 6. Press until >SETUP appears, and then press . 7. Press until >Admin Menu appears, and then press . 8. Press until >System Settings appears, and then press . 9. Press until >Clock Settings appears, and then press .
-
 1
1 -
2
-
3
-
4
-
5
-
6
-
7
-
8
-
9
-
10
-
11
-
12
-
13
-
14
-
15
-
16
-
17
-
18
-
19
-
20
-
21
-
22
-
23
-
24
-
25
-
26
-
27
-
28
-
29
-
30
-
31
-
32
-
33
-
34
-
35
-
36
-
37
-
38
-
39
-
40
-
41
-
42
-
43
-
44
-
45
-
46
-
47
-
48
-
49
-
50
-
51
-
52
-
53
-
54
-
55
-
56
-
57
-
58
-
59
-
60
-
61
-
62
-
63
-
64
-
65
-
66
-
67
-
68
-
69
-
70
-
71
-
72
-
73
-
74
-
75
-
76
-
77
-
78
-
79
-
80
-
81
-
82
-
83
-
84
-
85
-
86
-
87
-
88
-
89
-
90
-
91
-
92
-
93
-
94
-
95
-
96
-
97
-
98
-
99
-
100
-
101
-
 102
102 -
 103
103 -
 104
104 -
 105
105 -
 106
106 -
 107
107 -
 108
108 -
 109
109 -
 110
110 -
 111
111 -
 112
112 -
113
-
114
-
115
-
116
-
117
-
118
-
119
-
120
-
121
-
122
-
123
-
124
-
125
-
126
-
127
-
128
-
129
-
130
-
131
-
132
-
133
-
134
-
135
-
136
-
137
-
138
-
139
-
140
-
141
-
142
-
143
-
144
-
145
-
146
-
147
-
148
-
149
-
150
-
151
-
152
-
153
-
154
-
155
-
156
-
157
-
158
-
159
-
160
-
161
-
162
-
163
-
164
-
165
-
166
-
167
-
168
-
169
-
170
-
171
-
172
-
173
-
174
-
175
-
176
-
177
-
178
-
179
-
180
-
181
-
182
-
183
-
184
-
185
-
186
-
187
-
188
-
189
-
190
-
191
-
192
-
193
-
194
-
195
-
196
-
197
-
198
-
199
-
200
-
201
-
202
-
203
-
204
-
205
-
206
-
207
-
208
-
209
-
210
-
211
-
212
-
213
-
214
-
215
-
216
-
217
-
218
-
219
-
220
-
221
-
222
-
223
-
224
-
225
-
226
-
227
-
228
-
229
-
230
-
231
-
232
-
233
-
234
-
235
-
236
-
237
-
238
-
239
-
240
-
241
-
242
-
243
-
244
-
245
-
246
-
247
-
248
-
249
-
250
-
251
-
252
-
253
-
254
-
255
-
256
-
257
-
258
-
259
-
260
 |
 |
