Dell 2355dn Multifunction Mono Laser Printer Wireless and Network Guide - Page 22
Appendix:, Network Connections, Properties, Internet Protocol TCP/IP, Use the following IP address
 |
View all Dell 2355dn Multifunction Mono Laser Printer manuals
Add to My Manuals
Save this manual to your list of manuals |
Page 22 highlights
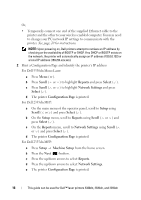
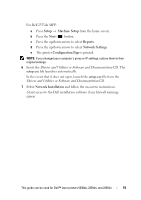
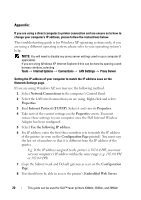
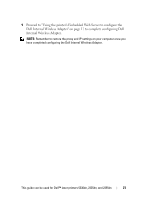
Appendix: If you are using a direct computer to printer connection and are unsure as to how to change your computer's IP address, please follow the instructions below. This troubleshooting guide is for Windows XP operating systems only; if you are using a different operating system, please refer to your operating system's help. NOTE: You will need to disable any proxy server settings used in your computer (if applicable). If you are using Windows XP Internet Explorer 6 this can be done by opening a web browser window, selecting Tools Internet Options Connections LAN Settings Proxy Server. Setting the IP address of your computer to match the IP address seen on the Network Settings page. If you are using Windows XP, you may use the following method. 1 Select Network Connections in the computer's Control Panel. 2 Select the LAN wired connection you are using. Right-click and select Properties. 3 Find Internet Protocol (TCP/IP). Select it and view its Properties. 4 Take note of the current settings on the Properties screen. You must restore these settings to your computer once the Dell Internal Wireless Adapter has been configured. 5 Select Use the following IP address. 6 For IP address, enter the first three numbers sets to match the IP address of the printer (as seen on the Configuration Page printed). You must vary the last set of numbers so that it is different from the IP address of the printer. E.g. If the IP address assigned to the printer is 192.0.0.192, you must set your computer's IP address within the same range (e.g. 192.0.0.191 or 192.0.0.193) 7 Copy the Subnet mask and Default gateway as seen on the Configuration Page. 8 You should now be able to access the printer's Embedded Web Server. 20 This guide can be used for Dell™ laser printers 5330dn, 2335dn, and 2355dn
-
 1
1 -
2
-
3
-
4
-
5
-
6
-
7
-
8
-
9
-
10
-
11
-
12
-
13
-
14
-
15
-
16
-
 17
17 -
 18
18 -
 19
19 -
 20
20 -
 21
21 -
 22
22 -
 23
23 -
 24
24 -
 25
25 -
 26
26 -
 27
27 -
28
-
29
-
30
-
31
-
32
-
33
-
34
-
35
-
36
-
37
-
38
-
39
-
40
-
41
-
42
-
43
-
44
-
45
-
46
-
47
-
48
-
49
-
50
-
51
-
52
-
53
-
54
-
55
-
56
-
57
-
58
-
59
-
60
-
61
-
62
-
63
-
64
-
65
-
66
-
67
-
68
 |
 |
