Dell 3100cn Owner's Manual - Page 24
Network Set-Up, Print and Check the Printer Settings Run the Installation Software - password
 |
UPC - 807027504777
View all Dell 3100cn manuals
Add to My Manuals
Save this manual to your list of manuals |
Page 24 highlights
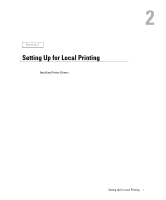
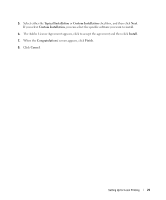
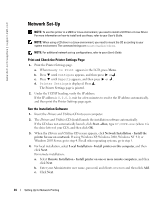
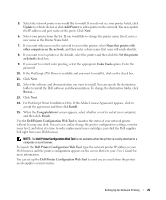
www.dell.com/supplies | support.dell.com Network Set-Up NOTE: To use this printer in a UNIX or Linux environment, you need to install a UX Filter or Linux Driver. For more information on how to install and use these, refer to your User's Guide. NOTE: When using a CD drive in a Linux environment, you need to mount the CD according to your system environment. The command strings are mount/media/cdrom. NOTE: For additional network set-up configurations, refer to your User's Guide. Print and Check the Printer Settings Page 1. Print the Printer Settings page. a. When Ready to Print appears in the LCD, press Menu. b. Press until Configure appears, and then press or . c. Press until Reports appears, and then press or . d. Printer Settings is displayed. Press . The Printer Settings page is printed. 2. Under the TCP/IP heading, verify the IP address. If the IP address is 0.0.0.0, wait for a few minutes to resolve the IP address automatically, and then print the Printer Settings page again. Run the Installation Software 1. Insert the Drivers and Utilities CD into your computer. 2. The Drivers and Utilities CD should launch the installation software automatically. If the CD does not automatically launch, click Start →Run, type D:\CDFE.exe (where D is the drive letter of your CD), and then click OK. 3. When the Drivers and Utilities CD screen appears, click Network Installation - Install the printer for use on a network. If using Windows XP, Windows 2000, Windows NT 4.0, or Windows 2003 Server, go to step 4. For all other operating systems, go to step 5. 4. For local installation, select Local Installation - Install printer on this computer, and then click Next. For remote installation: a. Select Remote Installation - Install printer on one or more remote computers, and then click Next. b. Enter your Administrator user name, password, and clients or servers and then click Add. c. Click Next. 24 Setting Up for Network Printing
-
 1
1 -
2
-
3
-
4
-
5
-
6
-
7
-
8
-
9
-
10
-
11
-
12
-
13
-
14
-
15
-
16
-
17
-
18
-
 19
19 -
 20
20 -
 21
21 -
 22
22 -
 23
23 -
 24
24 -
 25
25 -
 26
26 -
 27
27 -
 28
28 -
 29
29 -
30
-
31
-
32
-
33
-
34
-
35
-
36
-
37
-
38
-
39
-
40
-
41
-
42
-
43
-
44
-
45
-
46
-
47
-
48
-
49
-
50
-
51
-
52
-
53
-
54
-
55
-
56
-
57
-
58
-
59
-
60
-
61
-
62
-
63
-
64
-
65
-
66
-
67
-
68
-
69
-
70
-
71
-
72
-
73
-
74
-
75
-
76
-
77
-
78
-
79
-
80
-
81
-
82
-
83
-
84
-
85
-
86
-
87
-
88
-
89
-
90
 |
 |