Dell 3100cn Owner's Manual - Page 30
Setting the Printer Driver (for LPR Connection), Configuring Settings - drivers
 |
UPC - 807027504777
View all Dell 3100cn manuals
Add to My Manuals
Save this manual to your list of manuals |
Page 30 highlights
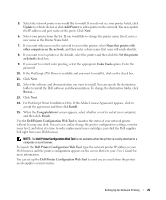
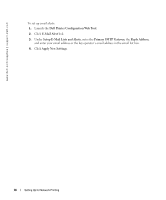
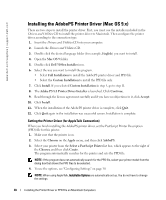
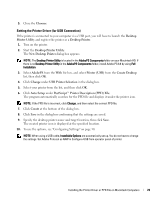
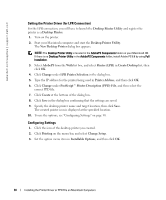
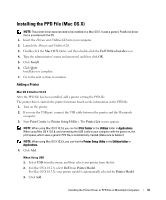
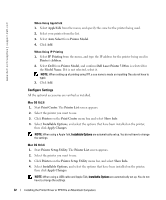
www.dell.com/supplies | support.dell.com Setting the Printer Driver (for LPR Connection) For the LPR connection, you will have to launch the Desktop Printer Utility and register the printer as a Desktop Printer. 1. Turn on the printer. 2. Start your Macintosh computer and start the Desktop Printer Utility. The New Desktop Printer dialog box appears. NOTE: The Desktop Printer Utility is located in the AdobePS Components folder on your Macintosh HD. If there is no Desktop Printer Utility in the AdobePS Components folder, install Adobe PS 8.8 by using Full Installation. 3. Select AdobePS from the With list box, and select Printer (LPR) in Create Desktop list, then click OK. 4. Click Change under LPR Printer Selection in the dialog box. 5. Type the IP address for the printer being used in Printer Address, and then click OK. 6. Click Change under PostScript™ Printer Description (PPD) File, and then select the correct PPD file. 7. Click Create at the bottom of the dialog box. 8. Click Save in the dialog box confirming that the settings are saved. 9. Specify the desktop printer name and target location, then click Save. The created printer icon is displayed at the specified location. 10. To use the options, see "Configuring Settings" on page 30. Configuring Settings 1. Click the icon of the desktop printer you created. 2. Click Printing on the menu bar, and select Change Setup. 3. Set the option menu item in Installable Options, and then click OK. 30 Installing the Printer Driver or PPD File on Macintosh Computers
-
 1
1 -
2
-
3
-
4
-
5
-
6
-
7
-
8
-
9
-
10
-
11
-
12
-
13
-
14
-
15
-
16
-
17
-
18
-
19
-
20
-
21
-
22
-
23
-
24
-
 25
25 -
 26
26 -
 27
27 -
 28
28 -
 29
29 -
 30
30 -
 31
31 -
 32
32 -
 33
33 -
 34
34 -
 35
35 -
36
-
37
-
38
-
39
-
40
-
41
-
42
-
43
-
44
-
45
-
46
-
47
-
48
-
49
-
50
-
51
-
52
-
53
-
54
-
55
-
56
-
57
-
58
-
59
-
60
-
61
-
62
-
63
-
64
-
65
-
66
-
67
-
68
-
69
-
70
-
71
-
72
-
73
-
74
-
75
-
76
-
77
-
78
-
79
-
80
-
81
-
82
-
83
-
84
-
85
-
86
-
87
-
88
-
89
-
90
 |
 |