Dell 320N Quick Reference Guide
Dell 320N Manual
 |
View all Dell 320N manuals
Add to My Manuals
Save this manual to your list of manuals |
Dell 320N manual content summary:
- Dell 320N | Quick Reference Guide - Page 1
Dell™ OptiPlex™ 320 Quick Reference Guide Models DCSM, DCNE www.dell.com | support.dell.com - Dell 320N | Quick Reference Guide - Page 2
to avoid the problem. CAUTION: A CAUTION indicates a potential for property damage, personal injury, or death. If you purchased a Dell™ n Series computer, any references of Dell Inc. is strictly forbidden. Trademarks used in this text: Dell, OptiPlex, and the DELL logo are trademarks of Dell Inc.; - Dell 320N | Quick Reference Guide - Page 3
Computer - Front View 16 Desktop Computer - Back View 17 Desktop Computer - Back-Panel Connectors 18 Removing the Computer Cover 20 Before You Begin 20 Mini Tower Computer 21 Desktop Computer 23 Inside Your Computer 24 Mini Tower Computer 24 Desktop Computer 27 Solving Problems 30 Dell - Dell 320N | Quick Reference Guide - Page 4
4 Contents - Dell 320N | Quick Reference Guide - Page 5
users. • Warranty information • Terms and Conditions (U.S. only) • Safety instructions • Regulatory information • Ergonomics information • End User License Agreement NOTE: Drivers and documentation updates can be found at support.dell.com. Dell™ Product Information Guide Quick Reference - Dell 320N | Quick Reference Guide - Page 6
parts • Specifications • How to configure system settings • How to troubleshoot and solve problems • Service Tag and Express Service Code • Microsoft Windows License Label • How to reinstall my operating system 6 Quick Reference Guide Find It Here Dell™ OptiPlex™ User's Guide Microsoft Windows - Dell 320N | Quick Reference Guide - Page 7
Dell customers • Upgrades - Upgrade information for components, such as memory, the hard drive, and the operating system • Customer Care - Contact information, service call and order status, warranty, and repair information • Service and support - Service call status and support history, service - Dell 320N | Quick Reference Guide - Page 8
: Before performing any of the procedures in this section, follow the safety instructions in Product Information Guide. NOTICE: If your computer has an expansion card installed (such as a modem card), connect the appropriate cable to the card, not to the connector on the back panel. NOTICE: To help - Dell 320N | Quick Reference Guide - Page 9
back of the screen. See the documentation that came with your monitor for its connector locations. Set Up Your Monitor 4 Connect the speakers. 5 Connect power cables to the computer, monitor, and devices and connect the other ends of the power cables to electrical outlets. Quick Reference Guide 9 - Dell 320N | Quick Reference Guide - Page 10
Power Connections NOTICE: To avoid damaging a computer with a manual voltage-selection switch, set the switch for the voltage that most closely matches the AC power available in your location. NOTICE: In Japan, the voltage selection switch must be set to the 115-V position even though the AC power - Dell 320N | Quick Reference Guide - Page 11
8 1 location of Service Tag Use the Service Tag to identify your computer when you access the Dell Support website or call technical support. 2 CD/DVD drive Insert a CD or DVD (if supported) into this drive. 3 floppy drive Insert a floppy disk into this drive. 4 hard-drive activity light This - Dell 320N | Quick Reference Guide - Page 12
connected, such as printers and keyboards. 6 diagnostic lights Use the lights to help you troubleshoot a computer problem based on the diagnostic code (for more information, see "Diagnostic Lights" on page 34). 7 power button Press this button to turn on the computer. NOTICE: To avoid losing - Dell 320N | Quick Reference Guide - Page 13
Mini Tower Computer - Back View 1 2 3 4 5 6 1 cover release latch 2 padlock ring 3 power connector This latch allows you to open the computer cover. Insert a padlock to lock the computer cover. Insert the power cable into this connector. Quick Reference Guide 13 - Dell 320N | Quick Reference Guide - Page 14
devices are electrically rated to operate with the AC power available in your location. 5 back-panel connectors Plug serial, USB, and other devices into the appropriate connector. See "Mini Tower Computer - Back-Panel Connectors" on page 14. 6 card slots Access connectors for any installed PCI - Dell 320N | Quick Reference Guide - Page 15
by a cap. Connect your monitor to the connector on the graphics card. Do not remove the cap. Connect a serial device, such as a handheld device, to the serial port. The default designation is COM1 for serial connector 1. For more information, see your online User's Guide. Quick Reference Guide 15 - Dell 320N | Quick Reference Guide - Page 16
typically remain connected, such as printers and keyboards. 2 hard-drive activity light This light flickers when the hard drive is being accessed. 3 power button Press this button to turn on the computer. NOTICE: To avoid losing data, do not turn off the computer by pressing the power button for - Dell 320N | Quick Reference Guide - Page 17
drive. Use the Service Tag to identify your computer when you access the Dell Support website or call technical support. Desktop Computer - Back View 1 2 3 4 5 6 1 card slots 2 back-panel connectors 3 power connector Access connectors for any installed PCI and PCI Express Cards. Plug serial - Dell 320N | Quick Reference Guide - Page 18
4 voltage selection switch Your computer is equipped with a manual voltage-selection switch. To avoid damaging a computer with a manual voltage-selection switch, set the switch for the voltage that most closely matches the AC power available in your location. NOTICE: In Japan, the voltage-selection - Dell 320N | Quick Reference Guide - Page 19
by a cap. Connect your monitor to the connector on the graphics card. Do not remove the cap. Connect a serial device, such as a handheld device, to the serial port. The default designation is COM1 for serial connector 1. For more information, see your online User's Guide. Quick Reference Guide 19 - Dell 320N | Quick Reference Guide - Page 20
guidelines to help protect your computer from potential damage and to help ensure your own personal safety. CAUTION: Before you begin any of the procedures in this section, follow the safety instructions in the Product Information Guide. CAUTION: Handle components and cards with care. Do not touch - Dell 320N | Quick Reference Guide - Page 21
begin any of the procedures in this section, follow the safety instructions in the Product Information Guide. CAUTION: To guard against electrical shock, always unplug your computer from the electrical outlet before removing the computer cover. 1 Follow the procedures in "Before You Begin" on page - Dell 320N | Quick Reference Guide - Page 22
1 2 3 1 security cable slot 2 cover release latch 3 padlock ring 22 Quick Reference Guide - Dell 320N | Quick Reference Guide - Page 23
begin any of the procedures in this section, follow the safety instructions in the Product Information Guide. CAUTION: To guard against electrical shock, always unplug your computer from the electrical outlet before removing the computer cover. 1 Follow the procedures in "Before You Begin" on page - Dell 320N | Quick Reference Guide - Page 24
Inside Your Computer Mini Tower Computer 3 2 1 1 CD/DVD drive 2 floppy drive 3 power supply 6 4 system board 5 heat sink assembly 6 hard drive 4 5 24 Quick Reference Guide - Dell 320N | Quick Reference Guide - Page 25
System Board Components 1 2 17 16 15 14 13 12 11 10 9 3 4 5 6 7 8 Quick Reference Guide 25 - Dell 320N | Quick Reference Guide - Page 26
Mini Tower Computer 10 internal buzzer (SPKR1) 11 password jumper (PSWD) 12 real time clock reset jumper (RTCRST) 13 battery socket (BATT) 14 PCI Express x16 card connector 15 PCI card connectors (2) 16 floppy drive connector (FLOPPY) 17 serial/ PS/2 connector (PS2/SER2) 26 Quick Reference Guide - Dell 320N | Quick Reference Guide - Page 27
setting). Password features are disabled. RTCRST 1 The real-time clock has been enabled (default setting). jumpered The real-time clock is being reset (jumpered temporarily). unjumpered Desktop Computer 2 1 3 4 6 5 1 drive bay (CD/DVD, floppy, 4 card slots and hard drive) 2 power supply - Dell 320N | Quick Reference Guide - Page 28
System Board Components 1 2 17 16 15 14 13 12 11 10 9 3 4 5 6 7 8 28 Quick Reference Guide - Dell 320N | Quick Reference Guide - Page 29
connector (CPU) 11 password jumper (PSWD) 3 processor power connector (12VPOWER) 12 RTC reset jumper (RTCRST) 4 front-panel connector (FNT_PANEL) 13 battery socket (BATT) 5 memory module connectors (DIMM_1, DIMM_2) 14 PCI Express x16 card connector 6 serial ATA drive connectors (SATA0, SATA1 - Dell 320N | Quick Reference Guide - Page 30
the latest troubleshooting information available for your computer, see the Dell Support website at support.dell.com. If computer problems occur that require help from Dell, write a detailed description of the error, beep codes, or diagnostics light patterns, record your Express Service Code and - Dell 320N | Quick Reference Guide - Page 31
see "System Setup" in your online User's Guide for instructions), review your computer's configuration information, and ensure that the device you want to test displays in system setup and is active. Start the Dell Diagnostics from either your hard drive or from the optional Drivers and Utilities CD - Dell 320N | Quick Reference Guide - Page 32
. Write down the error code and problem description and follow the instructions on the screen. If you cannot resolve the error condition, contact Dell. For information on contacting Dell, see your online User's Guide. NOTE: The Service Tag for your computer is located at the top of each test screen - Dell 320N | Quick Reference Guide - Page 33
Diagnostic Lights to see if the specific problem is identified (see "Diagnostic Lights" on page 34). If the computer does not boot, contact Dell for technical assistance. For information on contacting Dell, see your online User's Guide. Blinking yellow A power supply or system board failure has - Dell 320N | Quick Reference Guide - Page 34
this section, follow the safety instructions in the Product Information Guide. To help you troubleshoot a problem, your computer has four lights labeled "1," the computer into a working electrical outlet and press the power button. The diagnostic lights are not lit after the computer successfully - Dell 320N | Quick Reference Guide - Page 35
exists, install a graphics card that you know works and restart the computer. • If the problem persists or the computer has integrated graphics, contact Dell. For information on contacting Dell, see your online User's Guide. A possible floppy or hard drive failure has Reseat all power and data - Dell 320N | Quick Reference Guide - Page 36
the cables are properly connected to the system board from the hard drive, CD drive, and DVD drive. • Check the computer message that appears on your monitor screen. • If the problem persists, contact Dell. For information on contacting Dell, see your online User's Guide. After POST is complete - Dell 320N | Quick Reference Guide - Page 37
possible beep code (code 1-3-1) consists of one beep, a burst of three beeps, and then one beep. This beep code tells you that the computer encountered a memory problem. If your computer beeps during start-up: 1 Write down the beep code. 2 See "Dell Diagnostics" on page 30 to identify a more serious - Dell 320N | Quick Reference Guide - Page 38
Troubleshooter to resolve the incompatibility. 1 Click the Start button and click Help and Support. 2 Type hardware troubleshooter Support. 2 Click System Restore. 3 Follow the instructions on the screen. Restoring the Computer to an Earlier Operating State NOTICE: Before you restore the computer one - Dell 320N | Quick Reference Guide - Page 39
Windows XP Before You Begin NOTE: The procedures in this document were written for the Windows default view in Windows XP Home Edition, so the steps will differ if you set your Dell computer to the Windows Classic view or are using Windows XP Professional. If you are considering reinstalling - Dell 320N | Quick Reference Guide - Page 40
Rollback does not resolve the problem, then use System Restore to hard drive. Therefore, do not reinstall Windows XP unless a Dell technical support representative instructs you to do so. NOTICE: To prevent conflicts with Windows XP, disable any virus protection software installed on your computer - Dell 320N | Quick Reference Guide - Page 41
and follow the instructions on the screen. The Windows XP Setup screen appears, and the operating system begins to copy files and install the devices. The computer automatically restarts multiple times. NOTE: The time required to complete the setup depends on the size of the hard drive and the speed - Dell 320N | Quick Reference Guide - Page 42
Utilities CD into the CD drive. If you are using the Drivers and Utilities CD for the first time on this computer, the ResourceCD Installation window opens driver and follow the instructions to download the driver to your computer. To view all available drivers for your computer, click Drivers from - Dell 320N | Quick Reference Guide - Page 43
, 6 Service Tag, 6 lights diagnostic, 34 power, 17 system, 33 M motherboard. See system board O operating system reinstalling, 6 reinstalling Windows XP, 39 Operating System CD, 6 P power light, 17 power light diagnosing problems with, 33 problems. See troubleshooting Product Information Guide - Dell 320N | Quick Reference Guide - Page 44
and Support Center, 7 reinstalling, 6, 39 setup, 41 System Restore, 38 T troubleshooting beep codes, 37 conflicts, 38 Dell Diagnostics, 30 diagnostic lights, 34 Hardware Troubleshooter, 38 Help and Support Center, 7 restore computer to previous operating state, 38 system lights, 33 U User's Guide - Dell 320N | Quick Reference Guide - Page 45
Dell™ OptiPlex™ 320 Guide de référence rapide Modèles DCSM, DCNE www.dell.com | support.dell.com - Dell 320N | Quick Reference Guide - Page 46
de ce document, de quelque manière que ce soit, sans l'autorisation écrite de Dell Inc. est strictement interdite. Marques utilisées dans ce document : Dell, OptiPlex et le logo DELL sont des marques de Dell Inc. ; Microsoft et Windows sont des marques déposées de Microsoft Corporation ; Intel et - Dell 320N | Quick Reference Guide - Page 47
de bureau 67 L'intérieur de votre ordinateur 68 Ordinateur mini-tour 68 Ordinateur de bureau 71 Résolution des problèmes 74 Dell Diagnostics 74 Voyants du système 77 Voyants de diagnostic 78 Codes sonores 81 Résolution des incompatibilités logicielles et matérielles 82 Utilisation - Dell 320N | Quick Reference Guide - Page 48
48 Table des matières - Dell 320N | Quick Reference Guide - Page 49
Dell Diagnosticsics (reportez-vous à la section « Dell Diagnostics » à la page 74) ou pour accéder à votre documentation. Des fichiers « Lisez-moi » peuvent être inclus sur votre CD afin de fournir les informations les plus support.dell.com. Guide d'information sur le produit Dell™ Guide de réfé - Dell 320N | Quick Reference Guide - Page 50
èmes • Numéro de service et code de service express • Étiquette de licence Microsoft Windows Cherchez ici Guide d'utilisation du Dell™ OptiPlex™ Centre d'aide et de support Microsoft Windows XP 1 Cliquez sur Démarrer→ Aide et Support→ Guides d'utilisation du système→ Guides du système. 2 Cliquez - Dell 320N | Quick Reference Guide - Page 51
-vous ? Cherchez ici • Solutions - Conseils et astuces de dépannage, articles de techniciens, questions fréquemment posées et cours en ligne Site Web du service de support de Dell - support.dell.com REMARQUE : Sélectionnez votre région ou votre secteur d'activité pour afficher le site de - Dell 320N | Quick Reference Guide - Page 52
toute procédure de cette section, lisez les consignes de sécurité du Guide d'information sur le produit. AVIS : Si votre ordinateur est doté d'une seront réalisées. Reportez-vous aux illustrations appropriées qui suivent les instructions. AVIS : N'utilisez pas simultanément une souris PS/2 et une - Dell 320N | Quick Reference Guide - Page 53
-parleurs. 5 Branchez les câbles d'alimentation à l'ordinateur, au moniteur et aux périphériques, puis insérez les autres extrémités des câbles dans des prises électriques. Guide de référence rapide 53 - Dell 320N | Quick Reference Guide - Page 54
AVIS : Si vous utilisez un sélecteur de tension manuel, réglez le commutateur sur la tension la plus proche de l'alimentation en CA de votre région afin d'éviter d'endommager l'ordinateur. AVIS : Au Japon être réglés manuellement, en fonction de la tension disponible. 54 Guide de référence rapide - Dell 320N | Quick Reference Guide - Page 55
-tour - Vue frontale 1 2 3 10 4 9 5 6 7 8 1 emplacement du numéro Utilisez le numéro de service pour identifier votre ordinateur lorsque vous accédez de service au site Web de support de Dell ou que vous contactez le support technique. 2 lecteur de CD/DVD Permet d'insérer un CD ou un DVD - Dell 320N | Quick Reference Guide - Page 56
re de l'ordinateur pour les périphériques connectés en permanence, comme l'imprimante et le clavier le Gestionnaire de périphériques Windows. Pour plus d'informations sur les modes de mise en veille et conomie d'énergie, reportez-vous à la section Guide d'utilisation en ligne. Pour obtenir une - Dell 320N | Quick Reference Guide - Page 57
le capot de l'ordinateur. 2 anneau pour cadenas Insérez un cadenas pour verrouiller le capot de l'ordinateur. 3 connecteur d'alimentation Permet de brancher le câble d'alimentation. Guide de référence rapide 57 - Dell 320N | Quick Reference Guide - Page 58
8 1 connecteur parallèle 2 voyant d'intégrité de la liaison Permet de connecter un périphérique parallèle, tel qu'une imprimante. Si vous avez une imprimante èle configuré sur la même adresse. Pour plus d'informations, reportez-vous à la section Guide d'utilisation en ligne. • Vert - Une bonne - Dell 320N | Quick Reference Guide - Page 59
(4) Utilisez les connecteurs USB situés à l'arrière pour les périphériques connectés en permanence, comme l'imprimante et le clavier. 9 connecteur vidéo Branchez le est COM1 pour le connecteur série 1. Pour plus d'informations, reportez-vous au Guide d'utilisation. Guide de référence rapide 59 - Dell 320N | Quick Reference Guide - Page 60
connecter les périphériques dont vous ne vous servez qu'occasionnellement, tels qu'une manette de jeu ou une caméra, ou des périphériques USB amorçables (reportez-vous au Guide d'utilisation pour de plus secondes ou plus. Procédez plutôt à un arrêt du système d'exploitation. 4 badge Dell AVIS : Si - Dell 320N | Quick Reference Guide - Page 61
ou un DVD (si cela est pris en charge). Utilisez le numéro de service pour identifier votre ordinateur lorsque vous accédez au site Web de support de Dell ou que vous contactez le support technique. Ordinateur de bureau - Vue arrière 1 2 3 4 5 6 1 logements de carte Permettent d'accéder aux - Dell 320N | Quick Reference Guide - Page 62
7 8 1 connecteur parallèle 2 voyant d'intégrité de la liaison Permet de connecter un périphérique parallèle, tel qu'une imprimante. Si vous avez une imprimante parallèle configuré sur la même adresse. Pour plus d'informations, reportez-vous au Guide d'utilisation. • Vert - Une bonne connexion est é - Dell 320N | Quick Reference Guide - Page 63
(4) Utilisez les connecteurs USB situés à l'arrière pour les périphériques connectés en permanence, comme l'imprimante et le clavier. 9 connecteur vidéo Branchez le est COM1 pour le connecteur série 1. Pour plus d'informations, reportez-vous au Guide d'utilisation. Guide de référence rapide 63 - Dell 320N | Quick Reference Guide - Page 64
et respectez les consignes de sécurité du Guide d'information sur le produit. PRÉCAUTION : Les dommages causés par une personne non agréée par Dell ne sont pas couverts par votre garantie. AVIS : de verrouillage vers l'intérieur avant de déconnecter le câble. Quand vous séparez les connecteurs - Dell 320N | Quick Reference Guide - Page 65
, le cas échéant, le socle inclinable de l'ordinateur (pour les instructions, reportez-vous à la documentation fournie avec le socle inclinable). PRÉCAUTION : de cette section, consultez et respectez les consignes de sécurité du Guide d'information sur le produit. PRÉCAUTION : Pour éviter tout choc - Dell 320N | Quick Reference Guide - Page 66
1 2 3 1 emplacement pour câble de sécurité 2 loquet de fermeture du capot 3 anneau pour cadenas 66 Guide de référence rapide - Dell 320N | Quick Reference Guide - Page 67
Ordinateur de bureau PRÉCAUTION : Avant de commencer toute procédure de cette section, consultez et respectez les consignes de sécurité du Guide d'information sur le produit. PRÉCAUTION : Pour éviter tout choc électrique, débranchez toujours la prise secteur de votre ordinateur avant de retirer le - Dell 320N | Quick Reference Guide - Page 68
L'intérieur de votre ordinateur Ordinateur mini-tour 3 2 1 4 1 lecteur de CD/DVD 2 lecteur de disquette 3 bloc d'alimentation 5 6 4 carte système 5 assemblage du dissipateur de chaleur 6 unité de disque dur 68 Guide de référence rapide - Dell 320N | Quick Reference Guide - Page 69
Composants de la carte système 1 2 17 16 15 14 13 12 11 10 9 3 4 5 6 7 8 Guide de référence rapide 69 - Dell 320N | Quick Reference Guide - Page 70
de l'horloge temps réel) 4 connecteur du panneau avant (FNT_PANEL) 13 support de pile (BATT) 5 connecteurs de module de mémoire (DIMM_1, 14 SATA0, SATA1) 15 connecteurs de carte PCI (2) 7 connecteur d'alimentation (POWER) 16 connecteur pour lecteur de disquette (FLOPPY) 8 connecteur du lecteur - Dell 320N | Quick Reference Guide - Page 71
é temporairement). 2 3 4 6 5 1 baie de lecteurs (CD/DVD, 4 logements de carte disquette et disque dur) 2 bloc d'alimentation 5 assemblage du dissipateur de chaleur 3 carte système 6 panneau d'E/S avant Guide de référence rapide 71 - Dell 320N | Quick Reference Guide - Page 72
Composants de la carte système 1 2 17 16 15 14 13 12 11 10 9 3 4 5 6 7 8 72 Guide de référence rapide - Dell 320N | Quick Reference Guide - Page 73
panneau avant (FNT_PANEL) 13 support de pile (BATT) 5 POWER) 16 connecteur pour lecteur de disquette (FLOPPY) 8 connecteur du lecteur de CD/DVD (IDE) 17 connecteur série/PS/2 (PS2/SER2) 9 connecteurs de lecteur ATA série (SATA2, SATA3) Paramètres des cavaliers Ordinateur de bureau Guide - Dell 320N | Quick Reference Guide - Page 74
site Web de support de Dell à l'adresse support.dell.com. Si des problèmes nécessitant l'aide de Dell surviennent, ré service express et votre numéro de service ci-dessous, puis contactez Dell depuis l'endroit où se trouve votre ordinateur. Pour savoir comment contacter Dell, reportez-vous au Guide - Dell 320N | Quick Reference Guide - Page 75
-bit Diagnostics (Exécuter Dell Diagnostics 32 bits) dans la liste numérotée. Si plusieurs versions sont répertoriées, sélectionnez la version appropriée pour votre ordinateur. 9 Lorsque le menu principal de Dell Diagnostics s'affiche, sélectionnez le test à effectuer. Guide de référence rapide 75 - Dell 320N | Quick Reference Guide - Page 76
instructions à l'écran. Si vous ne pouvez pas résoudre le problème, contactez Dell. Pour savoir comment contacter Dell, reportez-vous au Guide d'utilisation en ligne. REMARQUE : Le numéro de service de votre ordinateur est situé en haut de chaque écran de test. Lorsque vous contacterez le support - Dell 320N | Quick Reference Guide - Page 77
démarre pas, contactez Dell pour obtenir une assistance technique. Pour savoir comment contacter Dell, reportez-vous au Guide d'utilisation en ligne. vidéo durant le POST Un problème a été détecté pendant Pour des instructions sur le diagnostic du code l'exécution du BIOS. sonore, reportez-vous à - Dell 320N | Quick Reference Guide - Page 78
Voyants de diagnostic PRÉCAUTION : Avant de commencer toute procédure de cette section, consultez et respectez les consignes de sécurité du Guide d'information sur le produit. Afin de vous aider à résoudre les problèmes, l'ordinateur est équipé de quatre voyants situés sur le panneau avant ou arriè - Dell 320N | Quick Reference Guide - Page 79
redémarrez l'ordinateur. • Si le problème persiste ou que votre ordinateur dispose de fonctions vidéo intégrées, contactez Dell. Pour savoir comment contacter Dell, reportez-vous au Guide d'utilisation en ligne. Panne possible de lecteur de disquette ou Réinstallez tous les câbles de données et de - Dell 320N | Quick Reference Guide - Page 80
câbles sont correctement connectés entre le disque dur, le lecteur de CD-ROM, le lecteur de DVD-ROM et la carte système. • Lisez le message qui s'affiche sur l'écran du moniteur. • Si le problème persiste, contactez Dell. Pour savoir comment contacter Dell, reportez-vous au Guide d'utilisation en - Dell 320N | Quick Reference Guide - Page 81
signal lors du démarrage : 1 Notez le code sonore. 2 Pour identifier une cause plus sérieuse, reportez-vous à la section « Dell Diagnostics » à la page 74. 3 Contactez Dell pour obtenir une assistance technique. Pour savoir comment contacter Dell, reportezvous au Guide d'utilisation en ligne. Code - Dell 320N | Quick Reference Guide - Page 82
aide et de support Windows pour plus d'informations sur l'utilisation de la fonction puis sur Aide et support. 2 Cliquez sur Restauration du système. 3 Suivez les instructions qui s'affichent. . 2 Vérifiez que l'option Restore my computer to an earlier time (restaurer mon ordinateur Guide de référence rapide - Dell 320N | Quick Reference Guide - Page 83
vue Windows par défaut dans Windows XP Home Edition ; les étapes diffèrent lorsque l'ordinateur Dell™ est défini sur la vue classique de Windows ou qu'il fonctionne sous Windows XP Professional. catégorie, cliquez sur Performances et maintenance. 3 Cliquez sur Système. Guide de référence rapide 83 - Dell 320N | Quick Reference Guide - Page 84
avec le Service Pack 1 du support technique de Dell ne vous le demande. AVIS : Pour éviter des conflits avec Windows XP, vous devez désactiver tout logiciel de protection antivirus installé sur l'ordinateur avant de réinstaller le système d'exploitation. Pour plus Guide de référence rapide - Dell 320N | Quick Reference Guide - Page 85
Appuyez sur dès l'apparition du logo DELL. Si le logo du système d'exploitation pour sélectionner la partition en surbrillance (recommandé), puis suivez les instructions à l'écran. L'écran Installation de Windows XP s'affiche et le syst à partir du CD). Guide de référence rapide 85 - Dell 320N | Quick Reference Guide - Page 86
Lorsque le message Comment cet ordinateur sera-t-il connecté à Internet ? apparaît, cliquez sur Ignorer Dans l'écran Welcome Dell System Owner (Vous êtes propriétaire d'un système Dell, bienvenue), cliquez sur sur le pilote approprié et suivez les instructions pour le télécharger sur votre ordinateur. - Dell 320N | Quick Reference Guide - Page 87
pour utilisateur final, 49 D Dell Diagnostics, 74 dépannage Centre d'aide et de support, 51 codes sonores, 81 conflits, 82 Dell Diagnostics, 74 Dépanneur des éro de service, 50 F fichier d'aide Centre d'aide et de support de Windows, 51 G Guide d'information sur le produit, 49 Guide d'utilisation, - Dell 320N | Quick Reference Guide - Page 88
R réinstallation Windows XP, 83 Restauration du système, 82 W Windows XP Centre d'aide et de support, 51 Dépanneur des conflits matériels, 82 installation, 85 réinstallation, 50, 83 Restauration du système, 82 S site du service de support de Dell, 51 site Web du service de support, 51 88 Index - Dell 320N | Quick Reference Guide - Page 89
Dell™ OptiPlex™ 320 Schnellreferenzhandbuch Modelle DCSM, DCNE www.dell.com | support.dell.com - Dell 320N | Quick Reference Guide - Page 90
sogar den Tod von Personen zur Folge haben können. Wenn Sie einen Dell™-Computer der Serie N besitzen, treffen alle Referenzen in diesem Dokument auf die von Dell Inc. sind strengstens untersagt. In diesem Text verwendete Marken: Dell, OptiPlex und das DELL-Logo sind Marken von Dell Inc.; - Dell 320N | Quick Reference Guide - Page 91
ckseite 106 Abnehmen der Computerabdeckung 108 Vorbereitung 108 Mini-Tower-Computer 109 Desktop-Computer 111 Im Innern des Computers 112 Mini-Tower-Computer 112 Desktop-Computer 115 Problemlösung 118 Dell Diagnostics 119 Systemanzeigen 121 Diagnoseanzeigen 123 Signaltoncodes 126 Beheben - Dell 320N | Quick Reference Guide - Page 92
92 Inhalt - Dell 320N | Quick Reference Guide - Page 93
ist möglicherweise nicht im Lieferumfang Ihres Computers enthalten. Dokumentation und Treiber, sind bereits auf dem Computer installiert. Verwenden Sie diese CD, um finden Sie unter support.dell.com. • Garantieinformationen Dell™ Produktinformationshandbuch • Verkaufs - Dell 320N | Quick Reference Guide - Page 94
Windows-Lizenzetikett Diese Aufkleber sind am Computer angebracht. • Geben Sie die Service-Tag- Nummer auf der Website support.dell.com oder beim Anruf beim Support an, um den Computer zu identifizieren. • Geben Sie beim Anruf beim Technischen Support den Express-Servicecode an, um zum - Dell 320N | Quick Reference Guide - Page 95
Dell-Computers erforderlich. Die Software erkennt 1 Wählen Sie auf der Website support.dell.com Ihre Region oder Ihren Geschäftsbereich, und geben Sie Ihre Service Sie auf Start→ Hilfe und Support. 2 Geben Sie ein Wort oder einen Ausdruck ein, das bzw. der Ihr Problem beschreibt, und klicken Sie - Dell 320N | Quick Reference Guide - Page 96
ßen Sie das entsprechende Kabel an die Netzwerkkarte an, und nicht an den Anschluss auf der Computerrückseite. HINWEIS: Sie können den Computer dabei unterstützen, das System bei optimaler Betriebstemperatur zu betreiben und eine ständige Luftzirkulation um das Gehäuse sicherzustellen, indem Sie den - Dell 320N | Quick Reference Guide - Page 97
Sie den Monitor, entweder mithilfe des weißen DVI-Kabels oder des blauen VGA-Kabels an (schließen Sie nicht beide Kabel an denselben Computer an). Richten Sie das Monitorkabel aus und schieben Sie es vorsichtig ein, damit die Anschlussstifte nicht verbogen werden. Ziehen Sie die Flügelschrauben an - Dell 320N | Quick Reference Guide - Page 98
am Spannungswahlschalter 115 V eingestellt sein. 6 Stellen Sie sicher, dass der Spannungswahlschalter der Einstellung für Ihren Standort entspricht. Ihr Computer ist mit einen manuellen Spannungswahlschalter ausgestattet. Bei Computern mit Spannungswahlschalter auf der Rückseite muss die richtige - Dell 320N | Quick Reference Guide - Page 99
-Nummer 2 CD-/DVD-Laufwerk 3 Diskettenlaufwerk 4 Aktivitätsanzeige Festplattenlaufwerk Die Service-Tag-Nummer wird zur Identifizierung des Computers beim Zugriff auf die Support-Website von Dell oder bei Anrufen beim technischen Support verwendet. Legen Sie eine CD oder eine DVD (falls unterstützt - Dell 320N | Quick Reference Guide - Page 100
sich in einem Energiesparmodus. • Blinkend oder stetig gelb - Der Computer wird zwar mit Strom versorgt, aber es besteht möglicherweise ein Problem mit der internen Stromversorgung. Informationen finden Sie unter „Probleme mit der Stromversorgung" in Ihrem Online-Benutzerhandbuch. Zum Beenden des - Dell 320N | Quick Reference Guide - Page 101
Mini-Tower-Computer - Rückansicht 1 2 3 4 5 6 1 Abdeckungsfreigabevorrichtung Mithilfe dieses Riegels können Sie die Computerabdeckung öffnen. 2 Halbringförmiger Bügel Bringen Sie ein Vorhängeschloss an, um die Computerabdeckung zu verriegeln. für ein - Dell 320N | Quick Reference Guide - Page 102
USB-Drucker wird an einen USB-Anschluss angeschlossen. ANMERKUNG: Der integrierte parallele Anschluss wird automatisch deaktiviert, wenn der Computer eine installierte Karte mit einem parallelen Anschluss ermittelt, der für die gleiche Adresse konfiguriert wurde. Weitere Informationen hierzu finden - Dell 320N | Quick Reference Guide - Page 103
ssen, erzwingen Sie eine Netzwerkgeschwindigkeit von 10 Mbit/s, um zuverlässigen Betrieb zu gewährleisten. Die Anzeige blinkt gelb, wenn der Computer Netzwerkdaten sendet oder empfängt. Hohe Netzwerkbelastung hat möglicherweise zur Folge, dass diese Anzeige stetig leuchtet. Verwenden Sie den blauen - Dell 320N | Quick Reference Guide - Page 104
länger drücken. Fahren Sie stattdessen das Betriebssystem herunter. 4 Dell-Emblem HINWEIS: Wenn ACPI (Erweiterte Konfigurations- und Energieverwaltungsschnittstelle) beim Betriebssystem aktiviert ist, fährt der Computer das Betriebssystem herunter, wenn Sie den Betriebsschalter drücken. Dieses - Dell 320N | Quick Reference Guide - Page 105
Laufwerk ein. 11 Position der Service-Tag- Die Service-Tag-Nummer wird zur Identifizierung des Computers beim Zugriff Nummer auf die Support-Website von Dell oder bei Anrufen beim technischen Support verwendet. Desktop-Computer - Rückansicht 1 2 3 4 5 6 1 Kartensteckplätze 2 Anschlüsse - Dell 320N | Quick Reference Guide - Page 106
Ein USB-Drucker wird an einen USB-Anschluss angeschlossen. ANMERKUNG: Der integrierte parallele Anschluss wird automatisch deaktiviert, wenn der Computer eine installierte Karte mit einem parallelen Anschluss ermittelt, der für die gleiche Adresse konfiguriert wurde. Weitere Informationen finden Sie - Dell 320N | Quick Reference Guide - Page 107
ssen, erzwingen Sie eine Netzwerkgeschwindigkeit von 10 Mbit/s, um zuverlässigen Betrieb zu gewährleisten. Die Anzeige blinkt gelb, wenn der Computer Netzwerkdaten sendet oder empfängt. Hohe Netzwerkbelastung hat möglicherweise zur Folge, dass diese Anzeige stetig leuchtet. Verwenden Sie den blauen - Dell 320N | Quick Reference Guide - Page 108
ätzlich an den Kanten und niemals an den Stiften an. HINWEIS: Reparaturen an Ihrem Computer sollten nur von einem zertifizierten Service-Techniker ausgeführt werden. Schäden durch nicht von Dell genehmigte Wartungsversuche werden nicht durch die Garantie abgedeckt. HINWEIS: Ziehen Sie beim Trennen - Dell 320N | Quick Reference Guide - Page 109
zu erden. 4 Entfernen Sie, falls vorhanden, den Computer-Standrahmen (weitere Anweisungen finden Sie in der mit dem Standrahmen den Ring geschoben wurde, entfernen Sie das Vorhängeschloss. 3 Legen Sie den Computer auf die Seite. 4 Drücken Sie die Freigabevorrichtung für die Abdeckung nach hinten - Dell 320N | Quick Reference Guide - Page 110
1 2 3 1 Sicherheitskabeleinschub 2 Abdeckungsfreigabevorrichtung 3 Halbringförmiger Bügel für ein Vorhängeschloss 110 Schnellreferenzhandbuch - Dell 320N | Quick Reference Guide - Page 111
Sie erst die Sicherheitshinweise im Produktinformationshandbuch. VORSICHT: Um elektrische Schläge zu vermeiden, trennen Sie vor dem Entfernen der Computerabdeckung den Computer immer von der Steckdose. 1 Folgen Sie den Anweisungen unter „Vorbereitung" auf Seite 108. 2 Wenn an der Rückseite ein Vorh - Dell 320N | Quick Reference Guide - Page 112
Im Innern des Computers Mini-Tower-Computer 3 2 1 4 5 1 CD-/DVD-Laufwerk 2 Diskettenlaufwerk 3 Netzteil 6 4 Systemplatine 5 Kühlkörperbaugruppe 6 Festplatte 112 Schnellreferenzhandbuch - Dell 320N | Quick Reference Guide - Page 113
Komponenten der Systemplatine 1 2 17 16 15 14 13 12 11 10 9 3 4 5 6 7 8 Schnellreferenzhandbuch 113 - Dell 320N | Quick Reference Guide - Page 114
2 Mikroprozessoranschluss (CPU) 11 Kennwort-Jumper (PSWD) 3 Netzanschluss des Prozessors (12V POWER) 12 Jumper zum Zurücksetzen der Echtzeituhr (RTCRST) 4 Frontblendenanschluss (FNT_PANEL) 13 Batteriesockel (BATTERY) 5 Speichermodulanschlüsse (DIMM_1, DIMM_2) 14 Anschluss für PCI-Express x16 - Dell 320N | Quick Reference Guide - Page 115
(Standardeinstellung). überbrückt Die Echtzeituhr wurde zurückgesetzt (zeitweise überbrückt). nicht überbrückt Desktop-Computer 2 1 3 4 6 5 1 Laufwerkschacht (CD/DVD, Diskette und Festplatte) 4 Kartensteckplätze 2 Netzteil 5 Kühlkörperbaugruppe 3 Systemplatine 6 Vordere E/A-Leiste - Dell 320N | Quick Reference Guide - Page 116
Komponenten der Systemplatine 1 2 17 16 15 14 13 12 11 10 9 3 4 5 6 7 8 116 Schnellreferenzhandbuch - Dell 320N | Quick Reference Guide - Page 117
(SATA0, SATA1) 7 Netzanschluss (POWER) 16 Diskettenlaufwerkanschluss (FLOPPY) 8 Anschluss für CD-/DVD-Laufwerk (IDE) 17 serieller/ PS/2-Anschluss (PS2/SER2) 9 Anschlüsse für serielles ATA-Festplattenlaufwerk (SATA2, SATA3) Jumper-Einstellungen Desktop-Computer Schnellreferenzhandbuch 117 - Dell 320N | Quick Reference Guide - Page 118
-Website von Dell unter support.dell.com. Wenn Probleme mit dem Computer auftreten, für deren Lösung Sie die Hilfe von Dell benötigen, erstellen Sie eine detaillierte Beschreibung des Fehlers, des Signaltoncodes oder der Diagnoseanzeige. Tragen Sie unten den Express-Servicecode und die Service-Tag - Dell 320N | Quick Reference Guide - Page 119
den Arbeiten in diesem Abschnitt beginnen, befolgen Sie erst die Sicherheitshinweise im Produktinformationshandbuch. Wann wird das Programm Dell Diagnostics eingesetzt? Wenn eine Störung am Computer auftritt, führen Sie zuerst die Tests unter „Beheben von Störungen" in Ihrem Online-Benutzerhandbuch - Dell 320N | Quick Reference Guide - Page 120
Problem nicht gelöst werden, wenden Sie sich an Dell. Informationen zur Kontaktaufnahme mit Dell finden Sie im Online-Benutzerhandbuch. ANMERKUNG: Die Service-Tag-Nummer des Computers finden Sie im oberen Bereich der einzelnen Testanzeigen. Wenn Sie bei Dell anrufen, fragt Sie der Technische Support - Dell 320N | Quick Reference Guide - Page 121
zum Hauptmenü zurück. Schließen Sie zum Beenden von Dell Diagnostics und zum Neustart des Computers das Hauptmenü. Systemanzeigen Die Stromversorgungsanzeige könnte auf ein Problem mit dem Computer hinweisen. Stromversorgungslicht Problembeschreibung Lösungsvorschlag Stetig grün leuchtend Der - Dell 320N | Quick Reference Guide - Page 122
ndig abgeschlossen sind. Prüfen Sie die Diagnoseanzeigen, um festzustellen, ob sich das genaue Problem ausfindig machen lässt (siehe „Diagnoseanzeigen" auf Seite 123). Startet der Computer nicht, wenden Sie sich an Dell, um technische Unterstützung anzufordern. Informationen zur Kontaktaufnahme mit - Dell 320N | Quick Reference Guide - Page 123
geben die von den LEDs angezeigten Muster einen Hinweis auf den Vorgang, bei dem der Fehler aufgetreten ist. Wenn der Computer nach dem Einschalt-Selbsttest eine Fehlfunktion aufweist, zeigen die Diagnoseanzeigen nicht die Ursache der Fehlfunktion an. ANMERKUNG: Die Ausrichtung der Diagnoseanzeigen - Dell 320N | Quick Reference Guide - Page 124
haben. • Installieren Sie gegebenenfalls ordnungsgemäß funktionierende Speichermodule des gleichen Typs in Ihrem Computer. • Wenn das Problem fortbesteht, wenden Sie sich an Dell. Informationen zur Kontaktaufnahme mit Dell finden Sie im Online-Benutzerhandbuch. Möglicherweise ist ein Fehler bei der - Dell 320N | Quick Reference Guide - Page 125
sse bestehen. • Prüfen Sie, ob die von Ihnen installierten Speichermodule mit dem Computer kompatibel sind. • Besteht das Problem weiterhin, wenden Sie sich an Dell. Informationen zur Kontaktaufnahme mit Dell finden Sie im Online-Benutzerhandbuch. Ein Fehler ist aufgetreten. Dieses Muster wird auch - Dell 320N | Quick Reference Guide - Page 126
wieder einem einzelnen Signalton. Dieser Signaltoncode weist auf ein Speicherproblem beim Computer hin. Wenn Ihr Computer während des Startvorgangs Signaltöne ausgibt: 1 Notieren Sie den Signaltoncode. 2 Lesen Sie „Dell Diagnostics" auf Seite 119, um eine gravierendere Ursache zu ermitteln. 3 Wenden - Dell 320N | Quick Reference Guide - Page 127
" beheben. 1 Klicken Sie auf die Schaltfläche Start und auf Hilfe und Support. 2 Geben Sie im Feld Suchen den Begriff Ratgeber bei Hardware-Konflikten ein, und Support. 2 Klicken Sie auf Systemwiederherstellung. 3 Folgen Sie den Anweisungen auf dem Bildschirm. Zurückversetzen des Computers in einen - Dell 320N | Quick Reference Guide - Page 128
ANMERKUNG: Die Anweisungen in diesem Dokument wurden für die Windows Standardansicht in Windows XP Home Edition geschrieben. Die Schritte werden daher anders sein, wenn Sie Ihren Dell-Computer zur klassischen Ansicht wechseln oder Windows XP Professional verwenden. 128 Schnellreferenzhandbuch - Dell 320N | Quick Reference Guide - Page 129
für Gerätetreiber das Problem nicht löst (siehe erforderlichen Treiber, wenn Sie über einen Computer mit RAID-Controller verfügen. Neu installieren, müssen Sie das Windows XP Service Pack 1 oder höher verwenden. von einem Mitarbeiter des technischen Supports von Dell dazu angewiesen wurden. HINWEIS: - Dell 320N | Quick Reference Guide - Page 130
angezeigt wird. 3 Starten Sie den Computer neu. 4 Drücken Sie sofort nachdem das Logo von DELL erscheint. Falls bereits das Logo des end auf Weiter. 8 Weisen Sie im Fenster Computer Name and Administrator Password (Computername und Administrator-Kennwort) einen Computernamen zu ( - Dell 320N | Quick Reference Guide - Page 131
CD. 13 Wenn der Begrüßungs-Bildschirm von Microsoft angezeigt wird, klicken Sie auf Weiter. 14 Wenn die Meldung Wie wird auf diesem Computer die Verbindung mit dem Internet hergestellt? angezeigt wird, klicken Sie auf Überspringen. 15 Wenn der Bildschirm Ready to register with Microsoft? (Sich jetzt - Dell 320N | Quick Reference Guide - Page 132
Bildschirm Herzlichen Glückwunsch zum Kauf Ihres Dell Systems! auf Weiter. 5 Treffen Sie eine geeignete Auswahl für Systemmodell, Betriebssystem, Gerätetyp und Thema. Treiber für Ihren Computer So erhalten Sie eine Liste der Gerätetreiber für Ihren Computer: 1 Klicken Sie auf Meine Treiber im Drop - Dell 320N | Quick Reference Guide - Page 133
Störungen Computer auf früheren Systemzustand wiederherstellen, 127 Dell Diagnostics, D Dell Dell Diagnostics, 119 Support-Website, 95 Diagnose Dell, 119 Service-Tag-Nummer, 94 F Fehlermeldungen Diagnoseanzeigen, 123 Signaltoncodes, 126 Systemanzeigen, 121 G Garantieinformationen, 93 H Hardware Dell - Dell 320N | Quick Reference Guide - Page 134
Probleme Dell Diagnostics, 119 Probleme. Siehe Beheben von Störungen Produktinformationshandbuc h, 93 R Ratgeber bei HardwareKonflikten, 127 Stromversorgung Anzeige, 105 Stromversorgungslicht Probleme diagnostizieren, 121 Support Zulassungsinformationen, 93 S Service-Tag-Nummer, 94 - Dell 320N | Quick Reference Guide - Page 135
Dell™ OptiPlex™ 320 Guida di consultazione rapida Modelli DCSM, DCNE www.dell.com | support.dell.com - Dell 320N | Quick Reference Guide - Page 136
materiali, lesioni personali o morte. Se si è acquistato un computer Dell™ Serie n, qualsiasi riferimento in questo documento ai sistemi operativi Microsoft scritta di Dell Inc.. Marchi commerciali utilizzati in questo testo: Dell, OptiPlex e il logo DELL sono marchi commerciali di Dell Inc.; - Dell 320N | Quick Reference Guide - Page 137
posteriore 152 Rimozione del coperchio del computer 154 Operazioni preliminari 154 Computer minitorre 155 Computer desktop 157 Esplorazione dell'interno del computer 158 Computer minitorre 158 Computer desktop 161 Soluzione dei problemi 164 Dell Diagnostics 164 Indicatori di sistema 167 - Dell 320N | Quick Reference Guide - Page 138
138 Sommario - Dell 320N | Quick Reference Guide - Page 139
e potrebbe non essere spedito col computer. La documentazione dell'utente e i driver sono preinstallati sul computer. È possibile utilizzare il CD per della documentazione sono disponibili all'indirizzo support.dell.com. Guida alle informazioni sul prodotto Dell™ Guida di consultazione rapida 139 - Dell 320N | Quick Reference Guide - Page 140
Si trova qui Guida dell'utente di Dell™ OptiPlex™ Guida in linea e supporto tecnico di Microsoft Windows XP 1 Fare clic su Start→ Guida in linea e supporto tecnico→ Guide dell'utente e di sistema→ Guide dell'utente. 2 Fare clic sulla Guida dell'utente del computer. La Guida dell'utente è anche - Dell 320N | Quick Reference Guide - Page 141
necessaria per il corretto funzionamento del computer Dell. Il software rileva automaticamente il computer e il sistema operativo e installa gli aggiornamenti adeguati alla propria configurazione. Per scaricare Desktop System Software: 1 Visitare support.dell.com, selezionare il Paese o il settore - Dell 320N | Quick Reference Guide - Page 142
non al connettore sul pannello posteriore. AVVISO: Per consentire al computer di mantenere una temperatura di esercizio ottimale, assicurarsi di collocare il computer lontano da pareti o scaffali che potrebbero impedire la circolazione dell'aria attorno al telaio. N.B. Prima di installare qualsiasi - Dell 320N | Quick Reference Guide - Page 143
VGA blu (non collegare entrambi i cavi). Inserire delicatamente il connettore del cavo del monitor allineandolo correttamente con il connettore sul computer per evitare di piegare i piedini. Stringere le viti a testa zigrinata dei connettori del cavo. N.B. Alcuni monitor hanno il connettore video - Dell 320N | Quick Reference Guide - Page 144
sulla posizione 115 V anche se il valore dell'alimentazione c.a. disponibile è 100 V. 6 Verificare che il selettore di tensione sia impostato correttamente per la propria ubicazione. Il computer ha un selettore di tensione manuale. I computer con un selettore di tensione sul pannello posteriore - Dell 320N | Quick Reference Guide - Page 145
- Vista anteriore 1 2 3 10 4 9 5 6 7 8 1 posizione del Numero Utilizzare il Numero di servizio per identificare il computer quando si accede al sito di servizio Web del supporto tecnico della Dell o chiamare il supporto tecnico. 2 unità CD/DVD Inserire un CD o DVD (se supportati) in questa - Dell 320N | Quick Reference Guide - Page 146
e su come uscire da una modalità di risparmio energia, consultare la Guida dell'utente in linea. Per una descrizione dei codici luminosi che possono contribuire a risolvere problemi relativi al computer, consultare "Indicatori di sistema" a pagina 167. 9 connettore della cuffia Usare il connettore - Dell 320N | Quick Reference Guide - Page 147
2 anello del lucchetto 3 connettore di alimentazione Questo dispositivo di chiusura consente di aprire il coperchio del computer. Inserire un lucchetto per impedire l'apertura del coperchio del computer. Inserire un cavo di alimentazione in questo connettore. Guida di consultazione rapida 147 - Dell 320N | Quick Reference Guide - Page 148
un selettore di tensione manuale. Per evitare di danneggiare il computer con un selettore di tensione manuale, impostare il selettore schede Questi slot consentono di accedere ai connettori delle schede PCI e PCI Express installate. Computer minitorre - Connettori del pannello posteriore 1 2 - Dell 320N | Quick Reference Guide - Page 149
di altoparlanti con amplificatori integrati. Sui computer dotati di una scheda audio, usare seriale Collegare una periferica seriale, quale ad esempio un palmare, alla porta seriale. La designazione predefinita è COM1 per il connettore seriale 1. Per maggiori informazioni, consultare la Guida dell - Dell 320N | Quick Reference Guide - Page 150
nel sistema operativo, quando si preme il pulsante di alimentazione il computer esegue l'arresto del sistema operativo. 4 marchio Dell Questo marchio può essere ruotato in modo da corrispondere all'orientamento del computer. Per ruotare il marchio, collocare le dita attorno alla parte esterna - Dell 320N | Quick Reference Guide - Page 151
. • Arancione - È presente una connessione funzionante tra una rete a 100 Mbps e il computer. • Spento - Il computer non rileva alcuna connessione fisica alla rete. 8 connettore della cuffia Usare il connettore delle cuffie per collegare le cuffie. 9 unità disco floppy Inserire un disco floppy in - Dell 320N | Quick Reference Guide - Page 152
Il computer è dotato di un selettore di tensione manuale. Per evitare di danneggiare il computer con un selettore di tensione manuale, del coperchio Accertarsi inoltre che le caratteristiche elettriche del monitor e delle periferiche collegate siano adeguate per il tipo di alimentazione c.a. - Dell 320N | Quick Reference Guide - Page 153
connettori USB 2.0 (4) 9 connettore video 10 connettore seriale Su computer con una scheda audio, il connettore del microfono seriale, quale ad esempio un palmare, alla porta seriale. La designazione predefinita è COM1 per il connettore seriale 1. Per maggiori informazioni, consultare la Guida dell - Dell 320N | Quick Reference Guide - Page 154
processore, dai bordi, non dai piedini. AVVISO: Solo un tecnico di assistenza qualificato dovrebbe eseguire le riparazioni del computer. Danni dovuti a riparazioni non autorizzate da Dell non sono coperte dalla garanzia. AVVISO: Per scollegare un cavo, afferrare il connettore o il serracavi, non il - Dell 320N | Quick Reference Guide - Page 155
proprio lato. 4 Far scorrere la chiusura a scatto del coperchio all'indietro quando si solleva il coperchio. 5 Afferrare i lati del coperchio del computer e ruotare il coperchio verso l'alto utilizzando le linguette dei cardini come punti di leva. 6 Rimuovere il coperchio dalle linguette dei cardini - Dell 320N | Quick Reference Guide - Page 156
1 2 3 1 slot per cavo di sicurezza 2 chiusura a scatto del coperchio 3 anello del lucchetto 156 Guida di consultazione rapida - Dell 320N | Quick Reference Guide - Page 157
alle informazioni sul prodotto. ATTENZIONE: Per evitare il rischio di scariche elettriche, scollegare sempre il computer dalla presa elettrica prima di rimuovere il coperchio del computer. 1 Seguire le procedure descritte in "Operazioni preliminari" a pagina 154. 2 Se si è installato un lucchetto - Dell 320N | Quick Reference Guide - Page 158
Esplorazione dell'interno del computer Computer minitorre 3 2 1 1 unità CD/DVD 2 unità disco floppy 3 alimentatore 4 5 6 4 scheda di sistema 5 gruppo del dissipatore di calore 6 disco rigido 158 Guida di consultazione rapida - Dell 320N | Quick Reference Guide - Page 159
Componenti della scheda di sistema 1 2 17 16 15 14 13 12 11 10 9 3 4 5 6 7 8 Guida di consultazione rapida 159 - Dell 320N | Quick Reference Guide - Page 160
7 connettore di alimentazione (POWER) 8 connettore dell'unità CD/DVD (IDE) 9 connettori dell'unità SATA (SATA2, SATA3) Impostazioni dei ponticelli Computer minitorre 10 cicalino interno (SPKR1) 11 ponticello di ripristino password (PSWD) 12 ponticello di reimpostazione dell'orologio in tempo reale - Dell 320N | Quick Reference Guide - Page 161
1 Le funzionalità delle password sono disattivate. L'orologio in tempo reale è stato attivato (impostazione predefinita). collegato mediante ponticello L'orologio in tempo reale è in corso di ripristino (collegato temporaneamente mediante ponticello). collegato senza ponticello Computer desktop - Dell 320N | Quick Reference Guide - Page 162
Componenti della scheda di sistema 1 2 17 16 15 14 13 12 11 10 9 3 4 5 6 7 8 162 Guida di consultazione rapida - Dell 320N | Quick Reference Guide - Page 163
(CPU) 11 ponticello di ripristino password (PSWD) 3 connettore di alimentazione POWER) 16 connettore dell'unità floppy (FLOPPY) 8 connettore dell'unità CD/DVD (IDE) 17 connettore PS/2/seriale (PS2/SER2) 9 connettori dell'unità ATA seriale (SATA2, SATA3) Impostazioni dei ponticelli Computer - Dell 320N | Quick Reference Guide - Page 164
Le funzionalità della password sono attivate (impostazione predefinita). RTCRST 1 Le funzionalità delle password sono disattivate. della Dell all'indirizzo support.dell.com. Se i problemi relativi al computer riscontrati richiedono l'intervento di Dell, scrivere una descrizione dettagliata dell' - Dell 320N | Quick Reference Guide - Page 165
sistema" nella Guida dell'utente in linea), leggere le informazioni sulla configurazione del computer e assicurarsi che la specificate nell'Installazione del sistema. 3 Quando appare l'elenco delle periferiche di avvio, evidenziare l'unità CD/DVD e premere . 4 Selezionare l'opzione dell' - Dell 320N | Quick Reference Guide - Page 166
istruzioni visualizzate. Se non è possibile risolvere la condizione di errore, contattare la Dell. Per informazioni su come contattare la Dell, consultare la Guida dell'utente in linea. N.B. Il Numero di servizio per il computer si trova nella parte superiore di ciascuna schermata della prova. Se si - Dell 320N | Quick Reference Guide - Page 167
CD. 5 Chiudere la schermata di verifica per ritornare alla schermata Main Menu (Menu principale). Per uscire dal programma Dell Diagnostics e riavviare il computer, chiudere la schermata Main Menu (Menu principale). Indicatori di sistema L'indicatore di alimentazione potrebbe indicare un problema al - Dell 320N | Quick Reference Guide - Page 168
di sistema sia e nessun codice bip, ma il danneggiata. computer si blocca durante il POST Soluzione consigliata Verificare gli indicatori della il problema, contattare la Dell per supporto tecnico. Per informazioni su come contattare la Dell, consultare la Guida dell'utente in linea. Indicatori - Dell 320N | Quick Reference Guide - Page 169
una scheda grafica funzionante e riavviare il sistema. • Se il problema persiste o il computer dispone di grafica integrata, contattare la Dell.Per informazioni su come contattare la Dell, consultare la Guida dell'utente in linea. Si è verificata una possibile anomalia nell'unità disco floppy - Dell 320N | Quick Reference Guide - Page 170
di memoria. • Verificare che i moduli di memoria installati siano compatibili con il computer. • Se il problema persiste, contattare la Dell. Per informazioni su come contattare la Dell, consultare la Guida dell'utente in linea. Si è verificata un'anomalia. Questa combinazione viene visualizzata - Dell 320N | Quick Reference Guide - Page 171
non valida Errore della prova Video Memory (Memoria video) Errore di inizializzazione dello schermo Errore di ritraccia dello schermo Ricerca di errore della memoria ROM video Nessun timer tick Errore dell'arresto Errore di verifica della porta seriale o parallela Errore di decompressione del codice - Dell 320N | Quick Reference Guide - Page 172
Risoluzione di incompatibilità del software e dell'hardware Se durante l'installazione del sistema operativo una all'hardware, al software o ad altre impostazioni di sistema che hanno reso il computer instabile. Consultare la Guida in linea e supporto tecnico di Windows per informazioni sull - Dell 320N | Quick Reference Guide - Page 173
sono state scritte per la visualizzazione predefinita di Windows XP Home Edition, quindi la procedura sarà diversa se si imposta il computer Dell™ sulla visualizzazione classica di Windows o se si sta utilizzando Windows XP Professional. Prima di reinstallare il sistema operativo Windows XP per - Dell 320N | Quick Reference Guide - Page 174
il computer ha un controller RAID. Reinstallazione di Windows XP AVVISO: Quando si reinstalla Windows XP, utilizzare Windows XP Service Pack il sistema. 4 Premere immediatamente dopo che appare il logo DELL. Se viene visualizzato il logo del sistema operativo, attendere la visualizzazione del - Dell 320N | Quick Reference Guide - Page 175
avviato il processo di copia dei file e di installazione delle periferiche del sistema operativo. Il sistema si riavvierà automaticamente pi 8 Immettere il nome del computer (o accettare quello predefinito) e una password nella finestra Nome computer e password di amministratore, quindi fare clic - Dell 320N | Quick Reference Guide - Page 176
(Driver di periferica) nel menu a discesa Topic (Argomento). Il CD Drivers and Utilities (opzionale) esegue un'analisi dell'hardware del sistema operativo del computer e, al termine, viene visualizzato l'elenco dei driver di periferica per l'attuale configurazione del sistema. 2 Fare clic sul - Dell 320N | Quick Reference Guide - Page 177
, 172 conflitti IRQ, 172 Contratto di licenza con l'utente finale, 139 coperchio rimozione, 154 garanzia, 139 Guida alle informazioni sul prodotto, 139 Guida dell'utente, 140 in linea, 141 normativa, 139 sicurezza, 139 driver elenco di, 176 E etichette Microsoft Windows, 140 Numero di servizio, 140 - Dell 320N | Quick Reference Guide - Page 178
140 reinstallazione di Windows XP, 173 sito del supporto tecnico della Dell, 141 sito Web del supporto tecnico, 141 R reinstallazione Windows 172 Dell Diagnostics, 164 Guida in linea e supporto tecnico, 141 indicatori della diagnostica, 168 indicatori di sistema, 167 ripristinare il computer ad uno - Dell 320N | Quick Reference Guide - Page 179
Dell™ OptiPlex™ 320 Guía de referencia rápida Modelos DCSM, DCNE www.dell.com | support.dell.com - Dell 320N | Quick Reference Guide - Page 180
de este documento de cualquier manera sin la autorización por escrito de Dell Inc. queda estrictamente prohibida. Marcas comerciales utilizadas en este texto: Dell, OptiPlex y el logotipo de DELL son marcas comerciales de Dell Inc.; Microsoft y Windows son marcas comerciales registradas de Microsoft - Dell 320N | Quick Reference Guide - Page 181
Ordenador de sobremesa 201 Interior de su ordenador 202 Ordenador de minitorre 202 Ordenador de sobremesa 205 Solución de problemas 208 Dell Diagnostics 208 Indicadores luminosos del sistema 211 Diagnóstico 212 Códigos de sonido 215 Cómo resolver incompatibilidades de software y hardware - Dell 320N | Quick Reference Guide - Page 182
182 Contenido - Dell 320N | Quick Reference Guide - Page 183
utilidades" en la Guía del usuario en línea). Para ejecutar los Dell Diagnostics (consulte el apartado "Dell Diagnostics" en la página 208) o para tener acceso a la Los controladores y las actualizaciones de la documentación se pueden encontrar en support.dell.com. Guía de información del producto de - Dell 320N | Quick Reference Guide - Page 184
184 Guía de referencia rápida Aquí lo encontrará Guía del usuario Dell™ OptiPlex™ Centro de Ayuda y Soporte de Microsoft Windows XP 1 Haga clic en • Utilice la etiqueta de servicio para identificar el ordenador cuando utilice support.dell.com o se ponga en contacto con el servicio de asistencia. - Dell 320N | Quick Reference Guide - Page 185
configuración. 3 Haga clic en el sistema operativo y busque la palabra clave Desktop System Software. NOTA: La interfaz para el usuario support.dell.com puede variar dependiendo de las selecciones que efectúe. • Cómo utilizar Windows XP • Cómo trabajar con programas y archivos • Cómo personalizar - Dell 320N | Quick Reference Guide - Page 186
Configuración del ordenador PRECAUCIÓN: Antes de realizar cualquiera de los procedimientos de esta sección, siga las instrucciones de seguridad que se encuentran en la Guía de información del producto. AVISO: Si el ordenador tiene instalada una tarjeta de expansión (como una tarjeta de módem), - Dell 320N | Quick Reference Guide - Page 187
3 Conecte el monitor utilizando el cable DVI blanco o el cable VGA azul (no conecte ambos cables). Alinee e inserte suavemente el cable del monitor para evitar que se doblen las patas del conector. Apriete los tornillos mariposa de los conectores del cable. NOTA: En algunos monitores el conector de - Dell 320N | Quick Reference Guide - Page 188
V. 6 Verifique que el conmutador de selección de voltaje es la adecuada para su país. El ordenador tiene un interruptor de selección de voltaje manual. Los ordenadores con un interruptor de selección de voltaje en el panel posterior se deben ajustar manualmente para que funcionen con el voltaje de - Dell 320N | Quick Reference Guide - Page 189
2 3 10 4 9 5 6 7 8 1 Ubicación de la etiqueta Utilice la etiqueta de servicio para identificar el ordenador al acceder al sitio web de servicio Dell Support o al llamar al servicio de soporte técnico. 2 Unidad de CD/DVD Inserte un CD o DVD (si lo admite) en esta unidad. 3 Unidad de disco - Dell 320N | Quick Reference Guide - Page 190
5 Conectores USB 2.0 (2) Use los conectores USB situados en la parte anterior del ordenador para los dispositivos que se conectan ocasionalmente, como, por ejemplo, palancas de mando o cámaras, o para dispositivos USB de inicio. Se recomienda la utilización de los conectores USB en la parte - Dell 320N | Quick Reference Guide - Page 191
Ordenador de minitorre - Vista posterior 1 2 3 4 5 6 1 Pestillo de liberación de la cubierta Este seguro le permite abrir la cubierta de su ordenador. 2 Anillo del candado Inserte un candado para bloquear la cubierta del ordenador. 3 Conector de alimentación Inserte el cable de alimentación en - Dell 320N | Quick Reference Guide - Page 192
de selección de voltaje Su ordenador está equipado con un interruptor de selección de voltaje manual. Con el fin de evitar dañar un ordenador que tenga un interruptor de selección de voltaje manual, coloque dicho interruptor en la posición que más se parezca a la de la potencia de corriente - Dell 320N | Quick Reference Guide - Page 193
3 Conector del adaptador Para conectar el ordenador a una red o a un dispositivo de banda ancha, conecte de red un extremo de un cable de red a un enchufe de red o a su dispositivo de banda ancha. Conecte el otro extremo del cable de red al conector del adaptador de red, situado en el panel - Dell 320N | Quick Reference Guide - Page 194
pulsando el botón de encendido durante 6 segundos o más. En su lugar, apague el ordenador mediante el sistema operativo. 4 Placa de identificación de Dell AVISO: Si su sistema operativo tiene ACPI activado, al pulsar el botón de alimentación el ordenador se apagará mediante el sistema operativo - Dell 320N | Quick Reference Guide - Page 195
Ubicación de la etiqueta Utilice la etiqueta de servicio para identificar el ordenador al acceder al sitio web de servicio Dell Support o al llamar al servicio de soporte técnico. Ordenador de sobremesa - Vista posterior 1 2 3 4 5 6 1 Ranuras para tarjetas 2 Conectores del panel posterior - Dell 320N | Quick Reference Guide - Page 196
de liberación de la cubierta Su ordenador está equipado con un interruptor de selección de voltaje manual. Con el fin de evitar dañar un ordenador que tenga un interruptor de selección de voltaje manual, coloque dicho interruptor en la posición que más se parezca a la de la potencia de corriente - Dell 320N | Quick Reference Guide - Page 197
3 Conector del adaptador Para conectar el ordenador a una red o a un dispositivo de banda ancha, conecte de red un extremo de un cable de red a un enchufe de red o a su dispositivo de banda ancha. Conecte el otro extremo del cable de red al conector del adaptador de red, situado en el panel - Dell 320N | Quick Reference Guide - Page 198
patas. AVISO: Sólo un técnico certificado debe realizar reparaciones en el ordenador. La garantía no cubre los daños por reparaciones no autorizadas por Dell. AVISO: Cuando desconecte un cable, tire de su conector o de su lazo liberador de tensión, y no del cable mismo. Algunos cables cuentan con un - Dell 320N | Quick Reference Guide - Page 199
3 Desconecte el ordenador y todos los dispositivos conectados de las tomas de alimentación eléctrica correspondientes y, a continuación, pulse el botón de encendido para conectar a tierra la placa base. 4 Si fuera aplicable, retire la base del ordenador (para obtener más instrucciones, consulte la - Dell 320N | Quick Reference Guide - Page 200
1 2 3 1 Ranura para cable de seguridad 2 Pestillo de liberación de la cubierta 3 Anillo del candado 200 Guía de referencia rápida - Dell 320N | Quick Reference Guide - Page 201
Ordenador de sobremesa PRECAUCIÓN: Antes de comenzar cualquiera de los procedimientos de esta sección, siga las instrucciones de seguridad que se encuentran en la Guía de información del producto. PRECAUCIÓN: Para protegerse de las descargas eléctricas, desconecte el ordenador de la toma de - Dell 320N | Quick Reference Guide - Page 202
Interior de su ordenador Ordenador de minitorre 3 2 1 4 5 6 1 Unidad de CD/DVD 2 Unidad de disco flexible 3 Fuente de alimentación 4 Tarjeta del sistema 5 Ensamblaje de disipador de calor 6 Unidad de disco duro 202 Guía de referencia rápida - Dell 320N | Quick Reference Guide - Page 203
Componentes de la placa base 1 2 17 16 15 14 13 12 11 10 9 3 4 5 6 7 8 Guía de referencia rápida 203 - Dell 320N | Quick Reference Guide - Page 204
(FNT_PANEL) 13 5 Conectores del módulo de memoria 14 (DIMM_1, DIMM_2) 6 Conectores de unidad SATA (SATA0, SATA1) 15 7 Conector de alimentación (POWER) 16 8 Conector de unidad de CD/DVD (IDE) 17 9 Conectores de unidad SATA (SATA2, SATA3) Configuración de puentes Ordenador de minitorre - Dell 320N | Quick Reference Guide - Page 205
Puente PSWD Posición 1 RTCRST 1 puenteado Descripción Las funciones de contraseña están activadas (valor predeterminado). Las funciones de contraseña están desactivadas. El reloj de tiempo real se ha activado (valor predeterminado). El reloj de tiempo real se está restableciendo (puenteado - Dell 320N | Quick Reference Guide - Page 206
Componentes de la placa base 1 2 17 16 15 14 13 12 11 10 9 3 4 5 6 7 8 206 Guía de referencia rápida - Dell 320N | Quick Reference Guide - Page 207
Conectores del módulo de memoria (DIMM_1, DIMM_2) 14 Conector de tarjeta PCI Express x16 6 Conectores de unidad serie ATA (SATA0, SATA1) 15 Conector de tarjeta PCI (2) 7 Conector de alimentación (POWER) 16 Conector de la unidad de disco flexible (FLOPPY) 8 Conector de unidad de CD/DVD (IDE) 17 - Dell 320N | Quick Reference Guide - Page 208
el ordenador no funcione como es de esperar. Para obtener la información más actualizada sobre la solución de problemas de su ordenador, consulte el sitio web Dell Support en support.dell.com. Si se produce algún problema en el ordenador para el que necesite la ayuda de - Dell 320N | Quick Reference Guide - Page 209
la opción CD/DVD Drive (Unidad de CD/DVD) en el menú de inicio del CD. 6 Escriba 1 para iniciar el menú del CD Drivers and Utilities (Controladores y utilidades). 7 Escriba 2 para iniciar los Dell Diagnostics. 8 Seleccione Run the 32 Bit Dell Diagnostics (Ejecutar los Dell Diagnostics de 32 bits - Dell 320N | Quick Reference Guide - Page 210
: La etiqueta de servicio para su ordenador está situada en la parte superior de cada pantalla de prueba. Si se pone en contacto con Dell, el servicio de asistencia técnica le pedirá su etiqueta de servicio. 3 Si ejecuta una prueba desde la opción Custom Test (Prueba personalizada) o Symptom Tree - Dell 320N | Quick Reference Guide - Page 211
diagnóstico para intentar identificar el problema específico (consulte el apartado "Diagnóstico" en la página 212). Amarillo constante Los Dell Diagnostics están ejecutando una prueba, o un dispositivo de la placa base puede estar averiado o instalado incorrectamente. Si están ejecutándose los - Dell 320N | Quick Reference Guide - Page 212
el problema específico. Si fallando. todavía no se ha identificado el problema, diríjase a Dell para obtener asistencia técnica. Para obtener información acerca de cómo ponerse en contacto con Dell, consulte la Guía del usuario en línea. Diagnóstico PRECAUCIÓN: Antes de comenzar cualquiera de - Dell 320N | Quick Reference Guide - Page 213
una memoria del mismo tipo que funcione correctamente en el ordenador. • Si el problema persiste, póngase en contacto con Dell. Para obtener información acerca de cómo ponerse en contacto con Dell, consulte la Guía del usuario en línea. Se ha producido un posible fallo de la tarjeta de gráficos - Dell 320N | Quick Reference Guide - Page 214
módulos de memoria que va a instalar son compatibles con el ordenador. • Si el problema persiste, póngase en contacto con Dell. Para obtener información acerca de cómo ponerse en contacto con Dell, consulte la Guía del usuario en línea. • Compruebe que los cables de las unidades de disco duro, de CD - Dell 320N | Quick Reference Guide - Page 215
memoria. Si el ordenador emite sonidos durante el inicio: 1 Anote el código de sonido. 2 Consulte el apartado "Dell Diagnostics" en la página 208 para identificar una causa más grave. 3 Diríjase a Dell para obtener asistencia técnica. Para obtener información acerca de cómo ponerse en contacto con - Dell 320N | Quick Reference Guide - Page 216
Cómo resolver incompatibilidades de software y hardware Si un dispositivo no se detecta durante la configuración del sistema operativo o se detecta pero no está configurado correctamente, puede utilizar el Agente de solución de errores de hardware para solucionar la incompatibilidad. 1 Haga clic en - Dell 320N | Quick Reference Guide - Page 217
escritos para la vista predefinida de Windows en Windows XP Home Edition, por lo que los pasos serán diferentes si configura su ordenador Dell con la vista clásica de Windows o está utilizando Windows XP Professional. Si está considerando reinstalar el sistema operativo Windows XP para corregir - Dell 320N | Quick Reference Guide - Page 218
RAID. Reinstalación de Windows XP AVISO: Debe utilizar Windows XP Service Pack 1 o posterior cuando vuelva a instalar Windows XP. AVISO: a menos que se lo indique un representante de asistencia técnica de Dell. AVISO: Para evitar conflictos con Windows XP, desactive el software antivirus que - Dell 320N | Quick Reference Guide - Page 219
5 Pulse las teclas de flecha para seleccionar el CD-ROM y pulse . 6 Cuando aparezca el mensaje Pulse cualquier tecla para arrancar desde el CD, pulse cualquier tecla. Configuración de Windows XP 1 Cuando aparezca la pantalla Programa de instalación de Windows XP, presione para - Dell 320N | Quick Reference Guide - Page 220
a las peticiones ofrecidas por el programa de instalación. 4 Haga clic en Next (Siguiente) en la pantalla Welcome Dell System Owner (Bienvenida al propietario del sistema Dell). 5 Seleccione el System Model (Modelo del sistema), Operating System (Sistema operativo), DeviceType (Tipo de dispositivo - Dell 320N | Quick Reference Guide - Page 221
, 184 Microsoft Windows, 184 G Guía de información del producto, 183 Guía del usuario, 184 H hardware códigos de sonido, 215 Dell Diagnostics, 208 I indicador de alimentación diagnosticar problemas con, 211 indicadores alimentación, 195 indicadores luminosos diagnóstico, 212 sistema, 211 informaci - Dell 320N | Quick Reference Guide - Page 222
digos de sonido, 215 conflictos de hardware y software, 216 Dell Diagnostics, 208 indicadores luminosos de diagnóstico, 212 indicadores luminosos restaurar al estado de funcionamiento anterior, 216 Solucionador de problemas de hard, 216 Solucionador de problemas de hardware, 216 V volver a instalar - Dell 320N | Quick Reference Guide - Page 223
Dell™ OptiPlex™ 320 Hızlı Başvuru Kılavuzu Modeller DCSM, DCNE www.dell.com | support.dell.com - Dell 320N | Quick Reference Guide - Page 224
ndan verilmiş yazılı izin olmadan herhangi bir şekilde çoğaltılması kesinlikle yasaktır. Bu metinde kullanılan ticari markalar: Dell, OptiPlex ve DELL logosu Dell Inc.'in ticari markaları; Microsoft ve Windows, Microsoft Corporation'ın tescilli ticari markaları ve Intel ve Pentium, Intel Corporation - Dell 320N | Quick Reference Guide - Page 225
242 Mini Tower Bilgisayar 243 Masaüstü Bilgisayar 245 Bilgisayarınızın İçi 246 Mini Tower Bilgisayar 246 Masaüstü Bilgisayar 249 Sorun Çözme 252 Dell Diagnostics 252 Sistem Işıklar 255 Tanılama Işıklar 256 Bip Kodlar 258 Yazılım ve Donanım Uyuşmazlıklarını Çözümleme 259 Microsoft Windows - Dell 320N | Quick Reference Guide - Page 226
226 İçerik - Dell 320N | Quick Reference Guide - Page 227
• Garanti bilgileri • Hükümler ve Koşullar (sadece ABD) • Güvenlik yönergeleri • Düzenleyici bilgiler • Ergonomi bilgileri • Son Kullanıcı Lisans Sözleşmesi NOT: Sürücü ve belge güncelleştirmeleri support.dell.com web sitesinde bulunabilir. Dell™ Ürün Bilgisi Kilavuzu Hızlı Başvuru Kılavuzu 227 - Dell 320N | Quick Reference Guide - Page 228
klatın. 2 Bilgisayarınızla ilgili User's Guide seçeneğini tıklatın. User's Guide ayrıca isteğe bağlı Drivers and Utilities CD'sinde de bulunur. Service Tag ve Microsoft® Windows® Lisansı Bu etiketleri, bilgisayarınızın üzerinde bulabilirsiniz. • support.dell.com adresini kullanırken veya desteğe ba - Dell 320N | Quick Reference Guide - Page 229
. DSS İşletim sisteminiz için çok Desktop System Software'i karşıdan yüklemek için: 1 support.dell.com adresine gidin, bölgenizi veya iş kolunuzu seçin ve Service Tag'i girin. önemli güncelleştirmeler sağlar ve Dell™ 3.5-inç USB disket sürücüleri, Intel® işlemciler, optik sürücüler ve 2 Drivers - Dell 320N | Quick Reference Guide - Page 230
Bilgisayarınızı Ayarlama UYARI: Bu bölümdeki yordamları uygulamadan önce, Ürün Bilgisi Kilavuzu'ndaki güvenlik yönergelerine bakın. DİKKAT: Bilgisayarınızda genişletme kartı (örneğin bir modem kartı) takılıysa, ilgili kabloyu arka paneldeki konektöre değil, karta takın. DİKKAT: Bilgisayarın uygun ç - Dell 320N | Quick Reference Guide - Page 231
3 Monitörü ya beyaz DVI kablosunu veya mavi VGA kablosunu (her iki kabloyu birden bağlamayın) kullanarak bağlayın. Konektör pinlerinin eğilmemesine dikkat ederek, monitör kablosunu hizalayın ve hafifçe takın. Kablo konektörlerindeki kelebek başlı vidaları sıkın. NOT: Bazı monitörlerde, ekranın arkas - Dell 320N | Quick Reference Guide - Page 232
ını el ile ayarlamadan bilgisayarınızın zarar görmemesi için, anahtarı bulunduğunuz bölgedeki voltaja en yakın değere ayarlayın. DİKKAT: Japonya'da AC gücü 100 V olmasına karşın, voltaj seçim anahtarı 115 V olarak ayarlanmalıdır. 6 Voltaj seçim anahtarının bölgenize uygun şekilde ayarlandığını do - Dell 320N | Quick Reference Guide - Page 233
Tag yeri 2 CD/DVD sürücüsü 3 disket sürücüsü 4 sabit disk etkinlik ışığı Dell Support web sitesine eriştiğinizde veya teknik desteği aradığınızda bilgisayarınızı tanıtmak için Service Tag'i kullanın. Bu sürücüye CD veya DVD (destekleniyorsa) takın. Bu sürücüye disket takın. Bu ışık, sabit disk - Dell 320N | Quick Reference Guide - Page 234
5 USB 2.0 konektörleri (2) Oyun çubuğu veya kamera gibi seyrek kullandığınız aygıtlar veya önyüklenebilir USB aygıtları için bilgisayarın ön tarafındaki USB konektörlerini kullanın. Yazıcı ve klavye gibi genellikle bağlı kalan aygıtlar için bilgisayarın arkasındaki USB konektörlerini kullanmanız ö - Dell 320N | Quick Reference Guide - Page 235
Mini Tower Bilgisayar - Arkadan Görünüş 1 2 3 4 5 6 1 kapak serbest bırakma mandalı 2 asma kilit halkası 3 güç konektörü Bu mandal, bilgisayar kapağını açmanızı sağlar. Bilgisayar kapağını kilitlemek için bir asma kilit takın. Güç kablosunu bu konektöre takın. Hızlı Başvuru Kılavuzu 235 - Dell 320N | Quick Reference Guide - Page 236
Japonya'da, voltaj seçim anahtarı 115-V pozisyonuna ayarlanmalıdır. Ayrıca monitörünüzün ve bağlı aygıtlarınızın nominal elektrik değerlerinin bölgenizde kullanılan AC gücüyle çalışmaya uygun olduğundan emin olun. 5 arka panel konektörleri Seri, USB veya diğer aygıtları uygun konektöre takın. Bkz - Dell 320N | Quick Reference Guide - Page 237
3 ağ bağdaştırıcısı konektörü 4 ağ etkinlik ışığı 5 giriş konektörü 6 çıkış konektörü 7 mikrofon konektörü 8 USB 2.0 konektörleri (4) video konektörü 10 seri bağlantı konektörü Bilgisayarınızı bir ağa veya geniş bant aygıtına bağlamak için, ağ kablosunun bir ucunu bir ağ prizine veya ağınıza ya da - Dell 320N | Quick Reference Guide - Page 238
kapatmayın. Bunun yerine, işletim sisteminden kapatın. DİKKAT: Işletim sisteminizde ACPI etkinse, güç düğmesine bastığınızda bilgisayar işletim sisteminden kapanır. 4 Dell rozeti Bu rozet bilgisayarınızın yönüyle eşleşecek şekilde döndürülebilir. Rozeti döndürmek için, rozetin kenarlarından tutun - Dell 320N | Quick Reference Guide - Page 239
ın. Bu sürücüye disket takın. Bu sürücüye CD veya DVD (destekleniyorsa) takın. Dell Support web sitesine eriştiğinizde veya teknik desteği aradığınızda bilgisayarınızı tanıtmak için Service Tag'i kullanın. Masaüstü Bilgisayar - Arkadan Görünüş 1 2 3 4 5 6 1 kart yuvaları 2 arka panel konekt - Dell 320N | Quick Reference Guide - Page 240
voltaj seçim anahtarı 115-V pozisyonuna ayarlanmış olmalıdır. Ayrıca monitörünüzün ve bağlı aygıtlarınızın nominal elektrik değerlerinin bölgenizde kullanılan AC gücüyle çalışmaya uygun olduğundan emin olun. Bilgisayar kapağını kilitlemek için bir asma kilit takın. Bilgisayar kapağını açmak için bu - Dell 320N | Quick Reference Guide - Page 241
3 ağ bağdaştırıcısı konektörü 4 ağ etkinlik ışığı 5 giriş konektörü 6 çıkış konektörü 7 mikrofon konektörü 8 USB 2.0 konektörleri (4) 9 video konektörü 10 seri bağlantı konektörü Bilgisayarınızı ağa veya geniş bant aygıtına bağlamak için, ağ kablosunun bir ucunu ağ prizine veya ağ ya da geniş bant - Dell 320N | Quick Reference Guide - Page 242
ğin bir işlemciyi pinlerinden değil kenarlarından tutun. DİKKAT: Yalnızca yetkili bir servis teknisyeni bilgisayarınızda onarım yapmalıdır. Dell tarafından yetkilendirilmemiş servislerden kaynaklanan zararlar garantinizin kapsamında değildir. DİKKAT: Bir kabloyu çıkarırken kablonun kendisini değil - Dell 320N | Quick Reference Guide - Page 243
3 Bilgisayarınızı ve takılı tüm aygıtları elektrik prizlerinden çıkarın ve ardından sistem kartını topraklamak için güç düğmesine basın. 4 Uygunsa, bilgisayarın standını çıkarın (yönergeler için, standla birlikte gelen belgelere bakın). UYARI: Elektrik çarpmalarına karşı korunmak için, kapağı çı - Dell 320N | Quick Reference Guide - Page 244
1 2 3 1 güvenlik kablosu yuvası 2 kapak serbest bırakma mandalı 3 asma kilit halkası 244 Hızlı Başvuru Kılavuzu - Dell 320N | Quick Reference Guide - Page 245
Masaüstü Bilgisayar UYARI: Bu bölümdeki yordamlara başlamadan önce, Ürün Bilgisi Kilavuzu'ndaki güvenlik yönergelerini izleyin. UYARI: Elektrik çarpmalarına karşı korunmak için, kapağı çıkarmadan önce bilgisayarınızın fişini elektrik prizinden çekin. 1 "Başlamadan Önce" sayfa 242 konusundaki yö - Dell 320N | Quick Reference Guide - Page 246
Bilgisayarınızın İçi Mini Tower Bilgisayar 3 2 1 1 CD/DVD sürücüsü 2 disket sürücüsü 3 güç kaynağı 6 4 sistem kartı 5 ısı emicisi birimi 6 sabit sürücü 4 5 246 Hızlı Başvuru Kılavuzu - Dell 320N | Quick Reference Guide - Page 247
Sistem Kartı Bileşenleri 1 2 17 16 15 14 13 12 11 10 9 3 4 5 6 7 8 Hızlı Başvuru Kılavuzu 247 - Dell 320N | Quick Reference Guide - Page 248
örü (12VPOWER) 4 ön panel konektörü (FNTPANEL) 5 bellek modülü konektörleri (DIMM1, DIMM2) 6 SATA sürücü konektörleri (SATA0, SATA1) 7 güç konektörü (POWER) 8 CD/DVD sürücüsü konektörü (IDE) 9 SATA sürücü konektörleri (SATA2, SATA3) Atlatıcı Ayarları Mini Tower Bilgisayar 10 iç hoparlör (SPKR1) 11 - Dell 320N | Quick Reference Guide - Page 249
Atlatıcı Ayar PSWD 1 RTCRST 1 atlatmalı Masaüstü Bilgisayar Açıklama Parola özellikleri etkindir (varsayılan ayar). Parola özellikleri devre dışıdır. Gerçek zamanlı saat etkindir (varsayılan ayar). Gerçek zamanlı saat sıfırlanır (geçici atlatmalı). atlatmasız 2 1 3 4 6 5 1 sürücü yuvası - Dell 320N | Quick Reference Guide - Page 250
Sistem Kartı Bileşenleri 1 2 17 16 15 14 13 12 11 10 9 3 4 5 6 7 8 250 Hızlı Başvuru Kılavuzu - Dell 320N | Quick Reference Guide - Page 251
12VPOWER) 4 ön panel konektörü (FNTPANEL) 5 bellek modülü konektörleri (DIMM1, DIMM2) 6 seri ATA sürücü konektörleri (SATA0, SATA1) 7 güç konektörü (POWER) 8 CD/DVD sürücüsü konektörü (IDE) 9 seri ATA sürücüsü konektörleri (SATA2, SATA3) Jumper Ayarları Masaüstü Bilgisayar 10 iç hoparlör (SPKR1) 11 - Dell 320N | Quick Reference Guide - Page 252
giderme bilgileri için, support.dell.com adresindeki Dell Destek web sitesine bakın. Bilgisayarınızda Dell'den yardım almanızı Dell'i aramadan önce çevrimiçi User's Guide'daki "Solving Problems" konusunda geçen denetimleri gerçekleştirin ve sonra Dell Diagnostics programını çalıştırın. Dell - Dell 320N | Quick Reference Guide - Page 253
: Tanılayıcı program disk bölümü bulunamadığını bildiren bir iletiyle karşılaşırsanız, isteğe bağlı Drivers and Utilities CD'sinden Dell Diagnostics'i çalıştırın (bkz. "Dell Diagnostics Programını Drivers and Utilities CD'sinden Başlatma" sayfa 253). Fazla uzun süre beklediyseniz ve işletim sistemi - Dell 320N | Quick Reference Guide - Page 254
Tag numarası, her sınama ekranının en üstünde bulunur. Dell'e başvurduğunuzda, teknik destek bölümü Service Tag numaranızı sorar. 3 Custom Test (Özel Sınama) veya Symptom Tree (Belirti Ağacı) seçeneğinden bir sınama yürütürseniz, daha fazla bilgi için aşağıdaki tabloda açıklanan ilgili sekmeyi - Dell 320N | Quick Reference Guide - Page 255
Işıkları G nız, bir bilgisayar sorununu belirtebilir. Güç Işığı Problem Tanımı Önerilen Çözüm Sabit yeşil Güç açık ve Işıkları" sayfa 256). Bilgisayar önyükleme yapmıyorsa, teknik yardım için Dell'e başvurun. Dell'e başvurma hakkında bilgi için, çevrimiçi Kullanım Kılavuzu'nuza bakın. - Dell 320N | Quick Reference Guide - Page 256
Tanılama ışıkları yatay veya dikey yönde olabilir. Işık Deseni Problem Tanımı Önerilen Çözüm Bilgisayar normal "kapalı" durumda veya Bilgisayarı ç zgün çalışan bir bellek takın. • Sorun devam ederse, Dell'e başvurun. Dell'e başvurma hakkında bilgi için, çevrimiçi Kullanım Kılavuzu'nuza bakın. - Dell 320N | Quick Reference Guide - Page 257
Işık Deseni Problem Tanımı Önerilen Çözüm Bir grafik kartı hatası oluşmuş olabilir. • Bilgisayarda bilgisayarınıza aynı türde, düzgün çalışan bir bellek takın. • Sorun devam ederse, Dell'e başvurun. Dell'e başvurma hakkında bilgi için, çevrimiçi Kullanım Kılavuzu'nuza bakın. Bellek modülleri - Dell 320N | Quick Reference Guide - Page 258
Işık Deseni Problem Tanımı Önerilen Çözüm Bir hata oluştu. Bu desen, sistem ayarları emin olun. • Monitörünüzün ekranında görünen bilgisayar iletisini kontrol edin. • Sorun devam ederse, Dell'e başvurun. Dell'e başvurma hakkında bilgi için, çevrimiçi Kullanım Kılavuzu'nuza bakın. POST tamamlandı - Dell 320N | Quick Reference Guide - Page 259
, uyumsuzluğu çözmek için Donanım Sorun Gidericisi'ni kullanabilirsiniz. 1 Başlat düğmesini ve Yardım ve Destek'i tıklatın. 2 Ara alanına hardware troubleshooter (donanım sorun gidericisi) yazın ve ardından aramayı başlatmak için oku tıklatın. 3 Arama Sonuçları listesinde Donanım Sorun Gidericisi'ni - Dell 320N | Quick Reference Guide - Page 260
1 Başlat düğmesini tıklatın, Tüm Programlar→ Donatılar→ Sistem Araçları'nın üzerine gelin ve ardından Sistem Geri Yükleme'yi tıklatın. 2 Bilgisayarımı daha önceki bir tarihe geri yükle'nin seçildiğinden emin olun ve Devam'ı tıklatın. 3 Bilgisayarınızı geri yüklemek istediğiniz bir takvim tarihini tı - Dell 320N | Quick Reference Guide - Page 261
Home Edition'daki varsayılan Windows görünümü için yazılmıştır; Dell bilgisayarınızı Windows Klasik görünümüne ayarlarsanız veya Windows XP Professional kullan kleme DİKKAT: Windows XP'yi yeniden yüklemek için, Windows XP Service Pack 1 veya daha üstünü kullanmanız gerekir. DİKKAT: Kurulumu yapmadan - Dell 320N | Quick Reference Guide - Page 262
'yi yeniden yükleme seçenekleri sunar. Bu seçenekler, dosyaların üzerine yazabilir ve sabit sürücünüzde yüklü programları etkileyebilir. Bu yüzden, bir Dell teknik destek temsilcisi bunu yapmanızı söylemedikçe Windows XP'yi yeniden yüklemeyin. DİKKAT: Windows XP ile çakışmaları önlemek için, Windows - Dell 320N | Quick Reference Guide - Page 263
ekranı görüntülendiğinde İleri'yi tıklatın. 14 How will this computer connect to the Internet? (Bu bilgisayar Internet'e nasıl bağlansın?) iletisi görünt için yükleme programının istediklerini yanıtlayın. 4 Welcome Dell System Owner (Hoş Geldiniz Dell Sistemi Sahibi) ekranında İleri 'yi tıklatın. - Dell 320N | Quick Reference Guide - Page 264
Bilgisayarınızın Sürücüleri Bilgisayarınız için bir aygıt sürücüleri listesi görüntülemek için: 1 Topic (Konu) açılan menüsünde My Drivers'ı (Sürücülerim) tıklatın. Drivers and Utilities CD'si (isteğe bağlı) bilgisayarınızın donanımını ve işletim sistemini tarar ve sistem yapılandırmanız için aygıt - Dell 320N | Quick Reference Guide - Page 265
ı, 259 D Dell Diagnostics, 252 Dell support site, 229 documentation online, 229 User's Guide, 228 donanım çakışmalar, 259 Dell Diagnostics, 252 Support Center, 229 I işletim sistemi Windows XP'yi yeniden yükleme, 261 IRQ çakışmaları, 259 K kapak çıkarma, 242 L labels Microsoft Windows, 228 Service - Dell 320N | Quick Reference Guide - Page 266
kları, 255 tanılama ışıkları, 256 sorunlar. Bkz. sorun giderme support website, 229 sürücüler liste, 264 T tanılama Dell Diagnostics, 252 sesli uyarı kodları, 258 troubleshooting Help and Support Center, 229 U User's Guide, 228 Ü Ürün Bilgileri Kılavuzu, 227 W Windows XP Donanım Sorun Giderici, 259
-
 1
1 -
 2
2 -
 3
3 -
 4
4 -
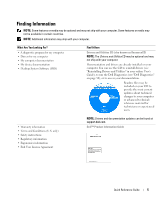 5
5 -
 6
6 -
 7
7 -
8
-
9
-
10
-
11
-
12
-
13
-
14
-
15
-
16
-
17
-
18
-
19
-
20
-
21
-
22
-
23
-
24
-
25
-
26
-
27
-
28
-
29
-
30
-
31
-
32
-
33
-
34
-
35
-
36
-
37
-
38
-
39
-
40
-
41
-
42
-
43
-
44
-
45
-
46
-
47
-
48
-
49
-
50
-
51
-
52
-
53
-
54
-
55
-
56
-
57
-
58
-
59
-
60
-
61
-
62
-
63
-
64
-
65
-
66
-
67
-
68
-
69
-
70
-
71
-
72
-
73
-
74
-
75
-
76
-
77
-
78
-
79
-
80
-
81
-
82
-
83
-
84
-
85
-
86
-
87
-
88
-
89
-
90
-
91
-
92
-
93
-
94
-
95
-
96
-
97
-
98
-
99
-
100
-
101
-
102
-
103
-
104
-
105
-
106
-
107
-
108
-
109
-
110
-
111
-
112
-
113
-
114
-
115
-
116
-
117
-
118
-
119
-
120
-
121
-
122
-
123
-
124
-
125
-
126
-
127
-
128
-
129
-
130
-
131
-
132
-
133
-
134
-
135
-
136
-
137
-
138
-
139
-
140
-
141
-
142
-
143
-
144
-
145
-
146
-
147
-
148
-
149
-
150
-
151
-
152
-
153
-
154
-
155
-
156
-
157
-
158
-
159
-
160
-
161
-
162
-
163
-
164
-
165
-
166
-
167
-
168
-
169
-
170
-
171
-
172
-
173
-
174
-
175
-
176
-
177
-
178
-
179
-
180
-
181
-
182
-
183
-
184
-
185
-
186
-
187
-
188
-
189
-
190
-
191
-
192
-
193
-
194
-
195
-
196
-
197
-
198
-
199
-
200
-
201
-
202
-
203
-
204
-
205
-
206
-
207
-
208
-
209
-
210
-
211
-
212
-
213
-
214
-
215
-
216
-
217
-
218
-
219
-
220
-
221
-
222
-
223
-
224
-
225
-
226
-
227
-
228
-
229
-
230
-
231
-
232
-
233
-
234
-
235
-
236
-
237
-
238
-
239
-
240
-
241
-
242
-
243
-
244
-
245
-
246
-
247
-
248
-
249
-
250
-
251
-
252
-
253
-
254
-
255
-
256
-
257
-
258
-
259
-
260
-
261
-
262
-
263
-
264
-
265
-
266
 |
 |

www.dell.com | support.dell.com
Dell™ OptiPlex™ 320
Quick Reference Guide
Models DCSM, DCNE