Dell 5330dn Workgroup Mono Laser Printer Wireless and Network Guide - Page 16
Wireless, WPS Settings, For Connect via PBC mode, Connect via PBC, For Connect via PIN mode, Connect
 |
View all Dell 5330dn Workgroup Mono Laser Printer manuals
Add to My Manuals
Save this manual to your list of manuals |
Page 16 highlights
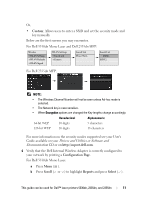
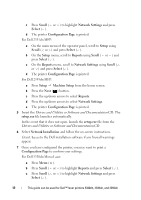
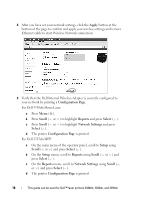
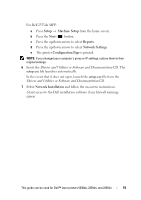
4 Press the up/down arrows to select Wireless. 5 Press the up/down arrows to select WPS Settings. 6 Select WPS mode you want. For Connect via PBC mode: a Press Connect via PBC on the touch screen. b Press to start connection. (Information window appears showing 2 minutes connection processing time.) c Press the WPS (PBC) button on the access point (or wireless router) within the 2 minutes connection. d The machine is connecting to the access point (or wireless router). e After completing the wireless network connection process, AP's SSID information appears on the display. For Connect via PIN mode: a Press Connect via PIN on the touch screen. b Press to start connection. (Information window appears showing 2 minutes connection processing time.) c An eight-digit PIN appears on the touch screen. Enter this eightdigit PIN into the computer which is connected to the access point (or wireless router). This needs to be done during the 2 minutes connection. NOTE: Need to enter the PIN into access point (or wireless router) wireless configuration page through the web brower. d The machine is connecting to the access point (or wireless router). e After completing the wireless network connection process, AP's SSID information appears on the display. 7 Insert the Drivers and Utilities or Software and Documentation CD. The setup.exe file launches automatically. In the event that it does not open, launch the setup.exe file from the Drivers and Utilities or Software and Documentation CD. 8 Select Network Installation and follow the on-screen instructions. Grant Access to the Dell installation software if any firewall warnings appear. 14 This guide can be used for Dell™ laser printers 5330dn, 2335dn, and 2355dn
-
 1
1 -
2
-
3
-
4
-
5
-
6
-
7
-
8
-
9
-
10
-
 11
11 -
 12
12 -
 13
13 -
 14
14 -
 15
15 -
 16
16 -
 17
17 -
 18
18 -
 19
19 -
 20
20 -
 21
21 -
22
-
23
-
24
-
25
-
26
-
27
-
28
-
29
-
30
-
31
-
32
-
33
-
34
-
35
-
36
-
37
-
38
-
39
-
40
-
41
-
42
-
43
-
44
-
45
-
46
-
47
-
48
-
49
-
50
-
51
-
52
-
53
-
54
-
55
-
56
-
57
-
58
-
59
-
60
-
61
-
62
-
63
-
64
-
65
-
66
-
67
-
68
 |
 |
