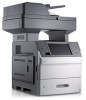
Dell 5535dn Laser Quick Reference Guide - Page 7
Getting ready to e-mail, Creating an e-mail shortcut
 |
View all Dell 5535dn Laser manuals
Add to My Manuals
Save this manual to your list of manuals |
Page 7 highlights
E-mailing Getting ready to e-mail Setting up the e-mail function For e-mail to operate, it must be turned on in the printer configuration and have a valid IP address or gateway address. To set up the e-mail function: 1 Type the printer IP address into the address field of your Web browser. Note: If you do not know the IP address of the printer, then print a network setup page and locate the IP address in the TCP/IP section. 2 Click Settings. 3 Under Default Settings, click E-mail/FTP Settings. 4 Click E-mail Settings. 5 Click Setup E-mail Server. 6 Fill in the fields with the appropriate information. 7 Click Add. Configuring the e-mail settings 1 Type the printer IP address into the address field of your Web browser. Note: If you do not know the IP address of the printer, then print a network setup page and locate the IP address in the TCP/IP section. 2 Click Settings. 3 Click E-mail/FTP Settings. 4 Click E-mail Settings. 5 Fill in the fields with the appropriate information. 6 Click Submit. Creating an e-mail shortcut Creating an e-mail shortcut using the Embedded Web Server 1 Type the printer IP address into the address field of your Web browser. Note: If you do not know the IP address of the printer, then print a network setup page and locate the IP address in the TCP/IP section. 2 Click Settings. E-mailing 7
-
 1
1 -
 2
2 -
 3
3 -
 4
4 -
 5
5 -
 6
6 -
 7
7 -
 8
8 -
 9
9 -
 10
10 -
 11
11 -
 12
12 -
13
 |
 |