Dell 966 User Guide - Page 111
See More Copy Settings
 |
View all Dell 966 manuals
Add to My Manuals
Save this manual to your list of manuals |
Page 111 highlights
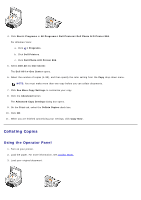
4. From the main menu, press the up or down Arrow button button. to scroll to Copy, and then press the Select 5. Press the up or down Arrow button to scroll to Copies, and then press the left or right Arrow button to specify the number of copies (1-99). NOTE: You must make more than one copy before you can collate documents. 6. Press the up or down Arrow button to scroll to On. 7. Press the Select button . to scroll to Collate, and then press the left or right Arrow button 8. Press the Start button . Using the Computer 1. Turn on your computer and printer, and make sure they are connected. 2. Load the paper. For more information, see Loading Paper. 3. Load your original document. 4. Click Start® Programs or All Programs® Dell Printers® Dell Photo AIO Printer 966. For Windows Vista: a. Click ® Programs. b. Click Dell Printers. c. Click Dell Photo AIO Printer 966. 5. Select Dell All-In-One Center. The Dell All-In-One Center opens. 6. Select the number of copies (1-99), and then specify the color setting from the Copy drop-down menu. NOTE: You must make more than one copy before you can collate documents. 7. Click See More Copy Settings to customize your copy. 8. Click the Advanced button. The Advanced Copy Settings dialog box opens. 9. On the Print tab, select the Collate Copies check box.
-
 1
1 -
2
-
3
-
4
-
5
-
6
-
7
-
8
-
9
-
10
-
11
-
12
-
13
-
14
-
15
-
16
-
17
-
18
-
19
-
20
-
21
-
22
-
23
-
24
-
25
-
26
-
27
-
28
-
29
-
30
-
31
-
32
-
33
-
34
-
35
-
36
-
37
-
38
-
39
-
40
-
41
-
42
-
43
-
44
-
45
-
46
-
47
-
48
-
49
-
50
-
51
-
52
-
53
-
54
-
55
-
56
-
57
-
58
-
59
-
60
-
61
-
62
-
63
-
64
-
65
-
66
-
67
-
68
-
69
-
70
-
71
-
72
-
73
-
74
-
75
-
76
-
77
-
78
-
79
-
80
-
81
-
82
-
83
-
84
-
85
-
86
-
87
-
88
-
89
-
90
-
91
-
92
-
93
-
94
-
95
-
96
-
97
-
98
-
99
-
100
-
101
-
102
-
103
-
104
-
105
-
 106
106 -
 107
107 -
 108
108 -
 109
109 -
 110
110 -
 111
111 -
 112
112 -
 113
113 -
 114
114 -
 115
115 -
 116
116 -
117
-
118
-
119
-
120
-
121
-
122
-
123
-
124
-
125
-
126
-
127
-
128
-
129
-
130
-
131
-
132
-
133
-
134
-
135
 |
 |
