Dell Dimension XPS 50 Reference Guide - Page 105
If Your Computer Gets Wet
 |
View all Dell Dimension XPS 50 manuals
Add to My Manuals
Save this manual to your list of manuals |
Page 105 highlights
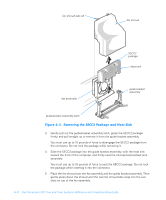
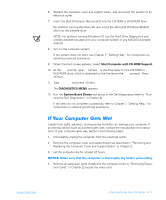
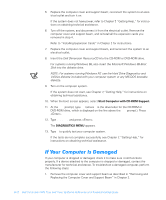
6. Replace the computer cover and support beam, and reconnect the system to an electrical outlet. 7. Insert the Dell Dimension ResourceCD into the CD-ROM or DVD-ROM drive. For systems running Windows 98, also insert the Microsoft Windows 98 Boot Disk into the diskette drive. NOTE: For systems running Windows NT, use the Hard Drive Diagnostics and Utilities diskette included with your computer system or any MS-DOS bootable diskette. 8. Turn on the computer system. If the system does not start, see Chapter 7, "Getting Help," for instructions on obtaining technical assistance. 9. When the boot screen appears, select Start Computer with CD-ROM Support. 10. At the a:\ prompt, type x: (where x is the drive letter for the CD-ROM or DVD-ROM drive, which is displayed on the line above the a:\ prompt.). Press . 11. Type diags32 and press . The DIAGNOSTICS MENU appears. 12. Run the System Board Device test group in the Dell Diagnostics (refer to "Running the Dell Diagnostics" in Chapter 4). If the tests do not complete successfully, refer to Chapter 7, "Getting Help," for instructions on obtaining technical assistance. Liquids from spills, splashes, and excessive humidity can damage your computer. If an external device (such as a printer) gets wet, contact the manufacturer for instructions. If your computer gets wet, perform the following steps: 1. Immediately unplug the computer from the electrical outlet. 2. Remove the computer cover and support beam as described in "Removing and Replacing the Computer Cover and Support Beam" in Chapter 2. 3. Let the computer dry for at least 24 hours. 4. Remove all expansion cards installed in the computer (refer to "Removing Expansion Cards" in Chapter 2) except the video card. support.dell.com Checking Inside Your Computer 6-11
-
 1
1 -
2
-
3
-
4
-
5
-
6
-
7
-
8
-
9
-
10
-
11
-
12
-
13
-
14
-
15
-
16
-
17
-
18
-
19
-
20
-
21
-
22
-
23
-
24
-
25
-
26
-
27
-
28
-
29
-
30
-
31
-
32
-
33
-
34
-
35
-
36
-
37
-
38
-
39
-
40
-
41
-
42
-
43
-
44
-
45
-
46
-
47
-
48
-
49
-
50
-
51
-
52
-
53
-
54
-
55
-
56
-
57
-
58
-
59
-
60
-
61
-
62
-
63
-
64
-
65
-
66
-
67
-
68
-
69
-
70
-
71
-
72
-
73
-
74
-
75
-
76
-
77
-
78
-
79
-
80
-
81
-
82
-
83
-
84
-
85
-
86
-
87
-
88
-
89
-
90
-
91
-
92
-
93
-
94
-
95
-
96
-
97
-
98
-
99
-
 100
100 -
 101
101 -
 102
102 -
 103
103 -
 104
104 -
 105
105 -
 106
106 -
 107
107 -
 108
108 -
 109
109 -
 110
110 -
111
-
112
-
113
-
114
-
115
-
116
-
117
-
118
-
119
-
120
-
121
-
122
-
123
-
124
-
125
-
126
-
127
-
128
-
129
-
130
-
131
-
132
-
133
-
134
-
135
-
136
-
137
-
138
-
139
-
140
-
141
-
142
-
143
-
144
-
145
-
146
-
147
-
148
-
149
-
150
-
151
-
152
-
153
-
154
-
155
-
156
-
157
-
158
-
159
-
160
-
161
-
162
-
163
-
164
-
165
-
166
-
167
-
168
-
169
-
170
-
171
-
172
-
173
-
174
-
175
-
176
-
177
-
178
-
179
-
180
-
181
-
182
-
183
-
184
-
185
-
186
-
187
-
188
-
189
-
190
-
191
-
192
-
193
-
194
-
195
-
196
 |
 |