Dell Equallogic PS4110X EqualLogic PS4110 Storage Arrays - Installation and Se - Page 12
Steps, Mounting, Array
 |
View all Dell Equallogic PS4110X manuals
Add to My Manuals
Save this manual to your list of manuals |
Page 12 highlights
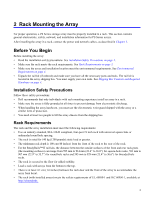
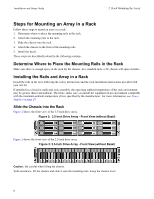
Installation and Setup Guide 2 Rack Mounting the Array Steps for Mounting an Array in a Rack Follow these steps to mount an array in a rack: 1. Determine where to place the mounting rails in the rack. 2. Attach the mounting rails to the rack. 3. Slide the chassis into the rack. 4. Attach the chassis to the front of the mounting rails. 5. Install the bezel. These steps are described in detail in the following sections. Determine Where to Place the Mounting Rails in the Rack Make sure there is enough space in the rack for the chassis. In a standard rack, a 2U chassis will span six holes. Installing the Rails and Array in a Rack Install the rails in the rack following the safety instructions and the rack installation instructions provided with your rail kit. If installed in a closed or multi-unit rack assembly, the operating ambient temperature of the rack environment may be greater than room ambient. Therefore, make sure you install the equipment in an environment compatible with the maximum ambient temperature (Tma) specified by the manufacturer. For more information, see Power Supplies on page 29. Slide the Chassis into the Rack Figure 2 shows the front view of the 3.5-inch drive array. Figure 2: 3.5-Inch Drive Array - Front View (without Bezel) Figure 3 shows the front view of the 2.5-inch drive array. Figure 3: 2.5-Inch Drive Array - Front View (without Bezel) Caution: Be careful when lifting the chassis. With assistance, lift the chassis and slide it onto the mounting rails. Keep the chassis level. 6
-
 1
1 -
2
-
3
-
4
-
5
-
6
-
 7
7 -
 8
8 -
 9
9 -
 10
10 -
 11
11 -
 12
12 -
 13
13 -
 14
14 -
 15
15 -
 16
16 -
 17
17 -
18
-
19
-
20
-
21
-
22
-
23
-
24
-
25
-
26
-
27
-
28
-
29
-
30
-
31
-
32
-
33
-
34
-
35
-
36
-
37
-
38
-
39
-
40
 |
 |
