Dell Equallogic PS4110X EqualLogic PS4110 Storage Arrays - Installation and Se - Page 32
utilities.
 |
View all Dell Equallogic PS4110X manuals
Add to My Manuals
Save this manual to your list of manuals |
Page 32 highlights
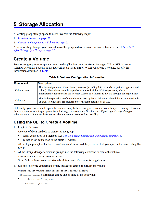
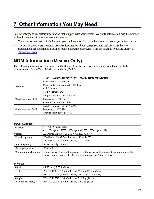
Installation and Setup Guide 5 Storage Allocation - Using the GUI, expand Volumes in the far-left panel, select the volume name, and click the Access tab. If necessary, use the CLI or the GUI to create an access control record that the computer will match. 3. To display the iSCSI target name for the volume: - Using the CLI, enter the following command: volume select volume_name show - Using the GUI, expand Volumes in the far-left panel, select the volume name, and click the Connections tab. 4. On the computer, use the iSCSI initiator utility to specify the group IP address as the iSCSI discovery address. If the initiator supports the discovery process, it will return a list of iSCSI targets that the computer can access. If the initiator does not support discovery, you must also specify the target name, and, in some cases, the standard iSCSI port number (3260). 5. Use the iSCSI initiator utility to select the desired target and log in to the target. When the computer connects to the iSCSI target, it sees the volume as a regular disk that can be formatted using the normal operating system utilities. For example, you can partition the disk and create a file system. 26
-
 1
1 -
2
-
3
-
4
-
5
-
6
-
7
-
8
-
9
-
10
-
11
-
12
-
13
-
14
-
15
-
16
-
17
-
18
-
19
-
20
-
21
-
22
-
23
-
24
-
25
-
26
-
 27
27 -
 28
28 -
 29
29 -
 30
30 -
 31
31 -
 32
32 -
 33
33 -
 34
34 -
 35
35 -
 36
36 -
 37
37 -
38
-
39
-
40
 |
 |
