Dell Inspiron 2000 Setup Guide - Page 12
Add New Hardware Wizard, Cancel
 |
View all Dell Inspiron 2000 manuals
Add to My Manuals
Save this manual to your list of manuals |
Page 12 highlights
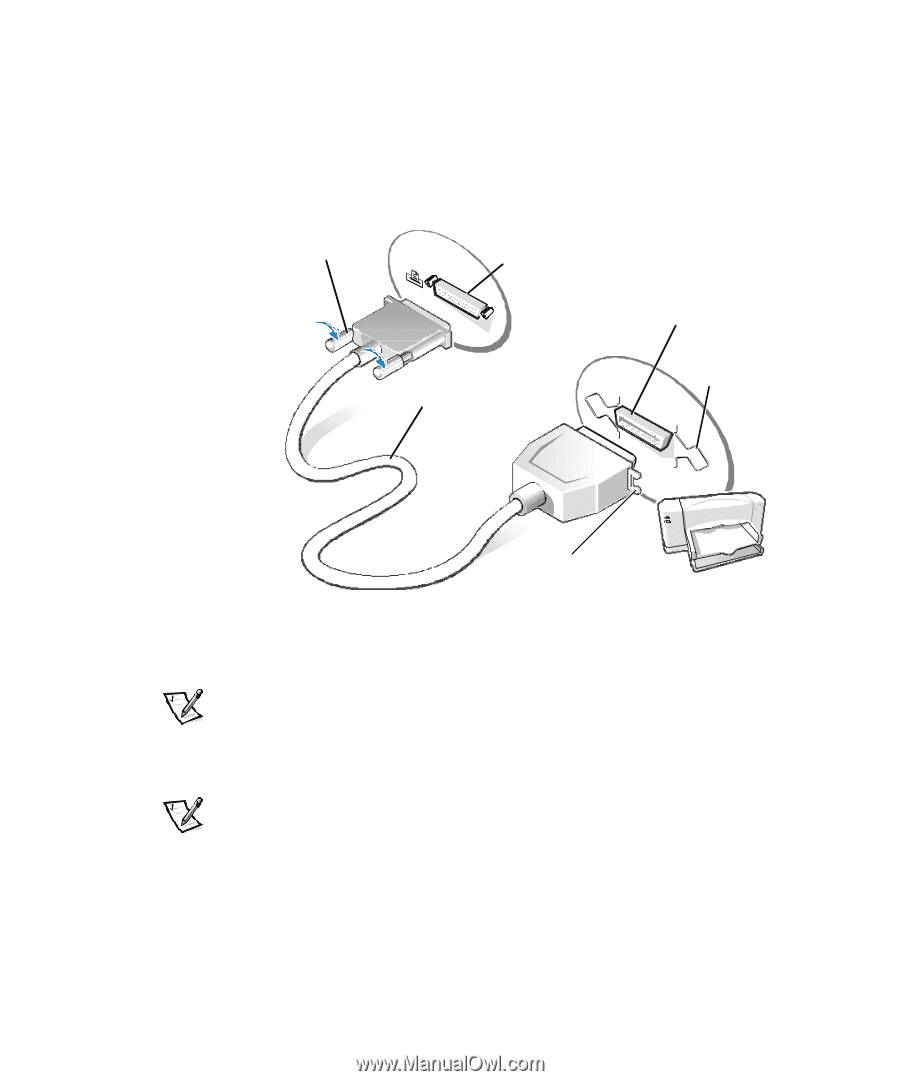
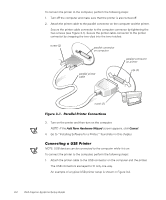
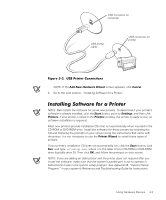
To connect the printer to the computer, perform the following steps: 1. Turn off the computer and make sure that the printer is also turned off. 2. Attach the printer cable to the parallel connector on the computer and the printer. Secure the printer cable connector to the computer connector by tightening the two screws (see Figure 3-1). Secure the printer cable connector to the printer connector by snapping the two clips into the two notches. screw (2) parallel connector on computer parallel printer cable parallel connector on printer clip (2) notch (2) 3. Turn on the printer and then turn on the computer. NOTE: If the Add New Hardware Wizard screen appears, click Cancel. 4. Go to "Installing Software for a Printer," found later in this chapter. NOTE: USB devices can be connected to the computer while it is on. To connect the printer to the computer, perform the following steps: 1. Attach the printer cable to the USB connector on the computer and the printer. The USB connectors are keyed to fit only one way. An example of a typical USB printer setup is shown in Figure 3-2. 3-2 Dell Inspiron Systems Setup Guide
-
 1
1 -
2
-
3
-
4
-
5
-
6
-
 7
7 -
 8
8 -
 9
9 -
 10
10 -
 11
11 -
 12
12 -
 13
13 -
 14
14 -
 15
15 -
 16
16 -
 17
17 -
18
 |
 |