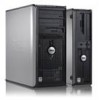
Dell OptiPlex 320 User Guide - Page 116
Using Microsoft, Windows, XP System Restore - drivers download
 |
UPC - 683728237738
View all Dell OptiPlex 320 manuals
Add to My Manuals
Save this manual to your list of manuals |
Page 116 highlights
installed version. 1. Click the Start button and click Control Panel. 2. Under Pick a Category, click Performance and Maintenance. 3. Click System. 4. In the System Properties window, click the Hardware tab. 5. Click Device Manager. 6. Right-click the device for which the new driver was installed and click Properties. 7. Click the Drivers tab. 8. Click Roll Back Driver. If Device Driver Rollback does not resolve the problem, then use System Restore (see Enabling System Restore) to return your computer to the operating state that existed before you installed the new driver. Using the Optional Drivers and Utilities CD If using Device Driver Rollback or System Restore (see Using Microsoft® Windows® XP System Restore) does not resolve the problem, then reinstall the driver from the Drivers and Utilities CD (also known as the Resource CD). NOTE: The Drivers and Utilities CD (Resource CD) is optional, and as such, may not ship with all computers. NOTE: To access device drivers and user documentation, you must use the Drivers and Utilities CD (Resource CD) while your computer is running Windows. 1. Insert the Drivers and Utilities CD. If this is your first time to use the Drivers and Utilities CD, the Installation window opens to inform you that the CD will begin the installation. Click OK and respond to the installation program prompts to complete the installation. 2. Click Next at the Welcome Dell System Owner screen. 3. Choose the appropriate selections for System Model, Operating System, Device Type, and Topic. 4. Click My Drivers in the Topic drop-down menu. The Drivers and Utilities CD scans your computer's hardware and operating system and then displays a list of device drivers for your system configuration. 5. Click the appropriate driver and follow the instructions to download the driver for your computer. To view a list of all available drivers for your computer, click Drivers in the Topic drop-down menu. To access the help files on the Drivers and Utilities CD, click the question mark button or the Help link at the top of the screen. Using Microsoft® Windows® XP System Restore The Microsoft Windows XP operating system provides System Restore to allow you to return your computer to an earlier operating state (without affecting data files) if changes to the hardware, software, or other system settings have left the computer in an undesirable operating state. See the Windows Help and Support Center for information on using System Restore. For information about accessing the Windows Help and Support Center, see Finding Information. NOTICE: Make regular backups of your data files. System Restore does not monitor your data files or recover them. Creating a Restore Point 1. Click the Start button and click Help and Support. 2. Click System Restore. 3. Follow the instructions on the screen.
-
 1
1 -
2
-
3
-
4
-
5
-
6
-
7
-
8
-
9
-
10
-
11
-
12
-
13
-
14
-
15
-
16
-
17
-
18
-
19
-
20
-
21
-
22
-
23
-
24
-
25
-
26
-
27
-
28
-
29
-
30
-
31
-
32
-
33
-
34
-
35
-
36
-
37
-
38
-
39
-
40
-
41
-
42
-
43
-
44
-
45
-
46
-
47
-
48
-
49
-
50
-
51
-
52
-
53
-
54
-
55
-
56
-
57
-
58
-
59
-
60
-
61
-
62
-
63
-
64
-
65
-
66
-
67
-
68
-
69
-
70
-
71
-
72
-
73
-
74
-
75
-
76
-
77
-
78
-
79
-
80
-
81
-
82
-
83
-
84
-
85
-
86
-
87
-
88
-
89
-
90
-
91
-
92
-
93
-
94
-
95
-
96
-
97
-
98
-
99
-
100
-
101
-
102
-
103
-
104
-
105
-
106
-
107
-
108
-
109
-
110
-
 111
111 -
 112
112 -
 113
113 -
 114
114 -
 115
115 -
 116
116 -
 117
117 -
 118
118 -
 119
119 -
 120
120 -
 121
121 -
122
-
123
-
124
-
125
-
126
-
127
-
128
-
129
-
130
-
131
-
132
-
133
-
134
-
135
-
136
-
137
-
138
-
139
-
140
 |
 |
