Dell OptiPlex GX60 Setup and Quick Reference Guide - Page 20
Running the Dell Diagnostics, My Drivers, Topic, Diagnostics Menu - drivers download
 |
View all Dell OptiPlex GX60 manuals
Add to My Manuals
Save this manual to your list of manuals |
Page 20 highlights
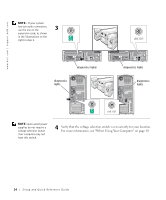
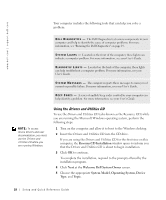
Drivers for Your Computer To display a list of device drivers for your computer, perform the following steps: 1 Click My Drivers in the Topic pull-down menu. The Drivers and Utilities CD scans your computer's hardware and operating system, and then a list of device drivers for your system configuration is displayed on the screen. 2 Click the appropriate driver and follow the instructions to download the driver to your computer. To view all available drivers for your computer, click Drivers from the Topic pull-down menu. Running the Dell Diagnostics The Dell Diagnostics is a program that tests various components in your computer. Run this program whenever you have a computer problem to help you identify the source of the problem.You can run the Dell Diagnostics from your hard drive or the Drivers and Utilities CD. NOTICE: If your hard drive fails, run the Dell IDE Hard Drive Diagnostics (see "Running the Dell IDE Hard Drive Diagnostics" on page 20). 1 Turn on your computer (if your computer is already on, restart it). 2 When F2 = Setup appears in the upper-right corner of the screen, press . The diagnostics initialization begins immediately; then the Diagnostics Menu appears. 3 Select the appropriate diagnostic option for your computer. To use the diagnostics, follow instructions on the screen. Changing the Boot Sequence To run the Dell Diagnostics from the Drivers and Utilities CD, perform the following steps to enable your computer to boot from the CD: 1 Insert the Drivers and Utilities CD into the CD drive. 2 Turn on (or restart) your computer. Setup and Quick Reference Guide 19
-
 1
1 -
2
-
3
-
4
-
5
-
6
-
7
-
8
-
9
-
10
-
11
-
12
-
13
-
14
-
 15
15 -
 16
16 -
 17
17 -
 18
18 -
 19
19 -
 20
20 -
 21
21 -
 22
22 -
 23
23 -
 24
24 -
 25
25 -
26
-
27
-
28
-
29
-
30
-
31
-
32
-
33
-
34
-
35
-
36
-
37
-
38
-
39
-
40
-
41
-
42
-
43
-
44
-
45
-
46
-
47
-
48
-
49
-
50
-
51
-
52
-
53
-
54
-
55
-
56
-
57
-
58
-
59
-
60
-
61
-
62
-
63
-
64
-
65
-
66
-
67
-
68
-
69
-
70
-
71
-
72
-
73
-
74
-
75
-
76
-
77
-
78
-
79
-
80
-
81
-
82
-
83
-
84
-
85
-
86
-
87
-
88
-
89
-
90
-
91
-
92
-
93
-
94
-
95
 |
 |