Dell PU705 User Guide - Page 10
Setting Up Your Dell Travel Mouse With Bluetooth Technology Part 2, Setting Up Your Dell Travel - passkey
 |
View all Dell PU705 manuals
Add to My Manuals
Save this manual to your list of manuals |
Page 10 highlights
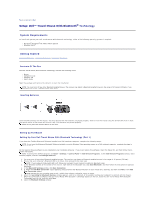
Setting Up Your Dell Travel Mouse With Bluetooth Technology (Part 2) If you have the Widcomm Bluetooth Software installed on a Dell notebook computer, complete the following steps: NOTE: If you have the Toshiba Bluetooth Software installed or use the Windows Vista operating system on a Dell notebook computer, complete the steps in part 1 or part 3. All the required mouse software is pre-installed on your notebook computer. If you must restore this software, insert the Setup CD, and then follow the onscreen instructions. NOTE: To uninstall the SetPoint program, click Start ® Settings ® Control Panel ® Add/Remove Programs. In the Add/Remove Programs window, select SetPoint program, and then click Change/Remove. 1. You must turn off any other Bluetooth-enabled mouse. The receiver may detect a Bluetooth-enabled mouse in the range of 10 meters (30 feet). 2. Ensure that your computer's Bluetooth LED is on (blue), then proceed to the next step. NOTE: If your computer's Bluetooth LED is off, follow your computer's user manual to enable the Bluetooth radio. 3. In the Windows taskbar at the bottom of the screen, right-click on the Bluetooth icon, click Start Using Bluetooth, and then follow the instructions to activate Bluetooth. 4. In the Bluetooth Settings window, click Next. 5. In the Bluetooth Service Selection window, select Human Interface Device, and then click Next. 6. When the Bluetooth Device Selection window appears, press and hold the Bluetooth button on your mouse for 2 seconds, and then wait for a minimum of 20 seconds until Dell Travel Mouse With Bluetooth Technology appears in the list. 7. In the Bluetooth Device Selection window, double-click Dell Travel Mouse With Bluetooth Technology to let your computer connect with your mouse. 8. In the Confirmation Required window, Click here before the countdown reaches zero to confirm that the correct mouse is connected. Setting Up Your Dell Travel Mouse With Bluetooth Technology (Part 3) If you have the Windows Vista operating system installed on a Dell notebook computer, complete the following steps: NOTE: If you have the Widcomm Bluetooth Software or the Toshiba Bluetooth Software installed on a Dell notebook computer, complete the steps in part 1 or part 2. All the required mouse software is pre-installed on your notebook computer. If you must restore this software, insert the Setup CD, and then follow the onscreen instructions. NOTE: To uninstall the SetPoint program, click Start ® Settings ® Control Panel ® Add/Remove Programs. In the Add/Remove Programs window, select SetPoint program, and then click Change/Remove. 1. You must turn off any other Bluetooth-enabled mouse. The receiver may detect a Bluetooth-enabled mouse in the range of 10 meters (30 feet). 2. Ensure that your computer's Bluetooth LED is on (blue), then proceed to the next step. NOTE: If your computer's Bluetooth LED is off, follow your computer's user manual to enable the Bluetooth radio. 3. Click Start ® Settings ® Control Panel. Ensure that the Control Panel window is switched to Classic View, and then double-click Bluetooth devices. 4. In the Bluetooth Devices window, click Add. 5. Press and hold the Bluetooth button on your mouse for 2 seconds. The blue LED on the mouse starts blinking. Select the My device is set up and ready to be found option, and then click Next. 6. When the Add Bluetooth Devices Wizard window appears, wait for a minimum of 20 seconds until Dell Travel Mouse with Bluetooth Technology appears in the list. Select Dell Travel Mouse with Bluetooth Technology from the list and then click Next. 7. In the next page, check Don't use a passkey, and click Next. 8. In the next page, click Finish to connect your computer to the mouse. NOTE: If you failed to setup the mouse, repeat the steps again. To confirm mouse functionality perform simple operations such as a button/key press and cursor motion. For details about using your mouse, refer to Mouse: Usage. If your mouse is NOT working, refer to Mouse: Troubleshooting. Back to Contents Page
-
 1
1 -
2
-
3
-
4
-
 5
5 -
 6
6 -
 7
7 -
 8
8 -
 9
9 -
 10
10 -
 11
11 -
 12
12 -
 13
13 -
 14
14
 |
 |