Dell PowerConnect Brocade 1020 Brocade Adapters Installation and Reference Man - Page 88
Replacing an adapter, Installing transceivers
 |
View all Dell PowerConnect Brocade 1020 manuals
Add to My Manuals
Save this manual to your list of manuals |
Page 88 highlights
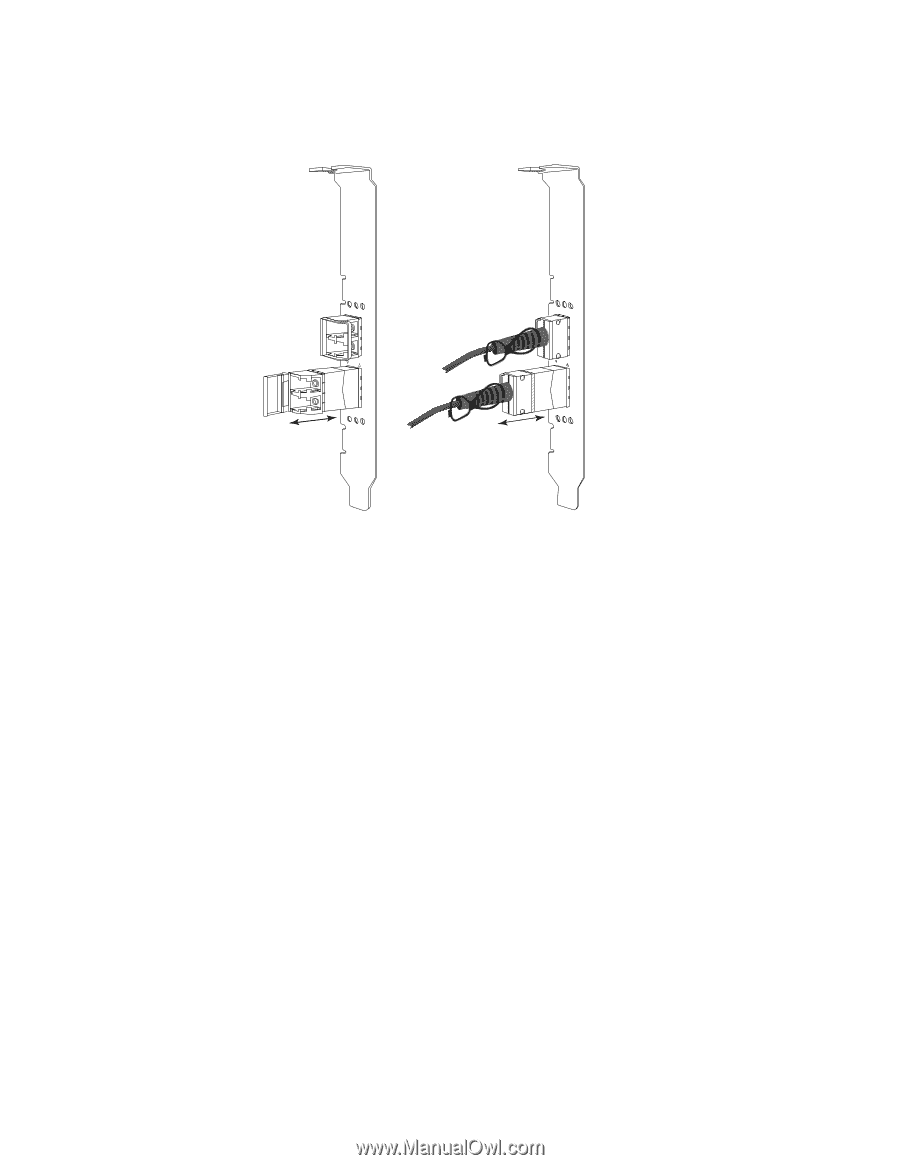
2 Stand-up adapters A B . 0 PORT 1 0 PORT 1 FIGURE 10 Removing or installing fiber optic and copper SFPs Installing transceivers 1. Orient the SFP in front of its slot on the adapter so that it can slide into the adapter receiver slot. The SFP can only be oriented one way into the slot. 2. Carefully guide the SFP into the adapter's receiver until it seats. • For optical SFPs close the bail to latch the SFP into the receiver. • For copper SFPs, push the SFP into the receiver until it clicks into place. Replacing an adapter If you are replacing an adapter, perform the following steps. 1. Make a backup of your system data. 2. Power down the host. Unplug all power cords and network cables. 3. Remove all covers necessary from the system to access the PCIe slot where you want to install the adapter. Refer to documentation provided with your system to locate PCIe slots and cover removal procedures. 4. Unlatch the mounting bracket for the installed adapter or remove the screw (if applicable) securing it to the case. 5. Pull the adapter gently from PCIe connectors. 6. Install the new adapter following the appropriate steps for your adapter under "Stand-up adapters" on page 56. All configuration settings for the old adapter in the slot will automatically apply to the new adapter. 60 Brocade Adapters Installation and Reference Manual 53-1002144-01
-
 1
1 -
2
-
3
-
4
-
5
-
6
-
7
-
8
-
9
-
10
-
11
-
12
-
13
-
14
-
15
-
16
-
17
-
18
-
19
-
20
-
21
-
22
-
23
-
24
-
25
-
26
-
27
-
28
-
29
-
30
-
31
-
32
-
33
-
34
-
35
-
36
-
37
-
38
-
39
-
40
-
41
-
42
-
43
-
44
-
45
-
46
-
47
-
48
-
49
-
50
-
51
-
52
-
53
-
54
-
55
-
56
-
57
-
58
-
59
-
60
-
61
-
62
-
63
-
64
-
65
-
66
-
67
-
68
-
69
-
70
-
71
-
72
-
73
-
74
-
75
-
76
-
77
-
78
-
79
-
80
-
81
-
82
-
 83
83 -
 84
84 -
 85
85 -
 86
86 -
 87
87 -
 88
88 -
 89
89 -
 90
90 -
 91
91 -
 92
92 -
 93
93 -
94
-
95
-
96
-
97
-
98
-
99
-
100
-
101
-
102
-
103
-
104
-
105
-
106
-
107
-
108
-
109
-
110
-
111
-
112
-
113
-
114
-
115
-
116
-
117
-
118
-
119
-
120
-
121
-
122
-
123
-
124
-
125
-
126
-
127
-
128
-
129
-
130
-
131
-
132
-
133
-
134
-
135
-
136
-
137
-
138
-
139
-
140
-
141
-
142
-
143
-
144
-
145
-
146
-
147
-
148
-
149
-
150
-
151
-
152
-
153
-
154
-
155
-
156
-
157
-
158
-
159
-
160
-
161
-
162
-
163
-
164
-
165
-
166
-
167
-
168
-
169
-
170
-
171
-
172
-
173
-
174
-
175
-
176
-
177
-
178
-
179
-
180
-
181
-
182
-
183
-
184
-
185
-
186
-
187
-
188
-
189
-
190
-
191
-
192
-
193
-
194
-
195
-
196
-
197
-
198
-
199
-
200
-
201
-
202
-
203
-
204
-
205
-
206
-
207
-
208
-
209
-
210
-
211
-
212
-
213
-
214
-
215
-
216
-
217
-
218
-
219
-
220
-
221
-
222
-
223
-
224
-
225
-
226
-
227
-
228
-
229
-
230
-
231
-
232
-
233
-
234
-
235
-
236
-
237
-
238
-
239
-
240
-
241
-
242
-
243
-
244
-
245
-
246
-
247
-
248
-
249
-
250
-
251
-
252
-
253
-
254
-
255
-
256
-
257
-
258
-
259
-
260
-
261
-
262
-
263
-
264
-
265
-
266
-
267
-
268
-
269
-
270
-
271
-
272
 |
 |