Dell PowerConnect W Clearpass 100 Software Adding IP Addresses to Visitor Acco - Page 5
Print Template Customization
 |
View all Dell PowerConnect W Clearpass 100 Software manuals
Add to My Manuals
Save this manual to your list of manuals |
Page 5 highlights
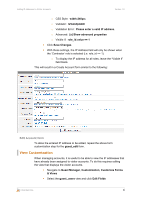
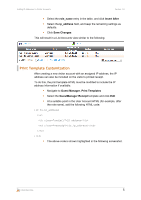
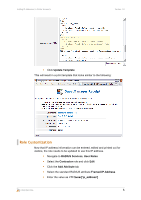
Adding IP Addresses to Visitor Accounts Version 1.0 Select the role_name entry in the table, and click Insert After Select the ip_address field, and keep the remaining settings as defaults. Click Save Changes This will result in a List Accounts view similar to the following: Print Template Customization After creating a new visitor account with an assigned IP address, the IP address can also be included on the visitor's printed receipt. To do this, the print template HTML must be modified to include the IP address information if available. Navigate to Guest Manager, Print Templates Select the GuestManager Receipt template and click Edit At a suitable point in the User Account HTML (for example, after the role name), add the following HTML code: {if $u.ip_address} IP address {$u.ip_address} {/if} The above code is shown highlighted in the following screenshot. CONFIDENTIAL 5
-
 1
1 -
 2
2 -
 3
3 -
 4
4 -
 5
5 -
 6
6 -
 7
7 -
 8
8
 |
 |
