Dell PowerEdge 4600 Microprocessor Upgrade Installation Guide - Page 7
Installation and Troubleshooting, Guide, Installation and, Troubleshooting Guide, User's Guide - memory
 |
View all Dell PowerEdge 4600 manuals
Add to My Manuals
Save this manual to your list of manuals |
Page 7 highlights
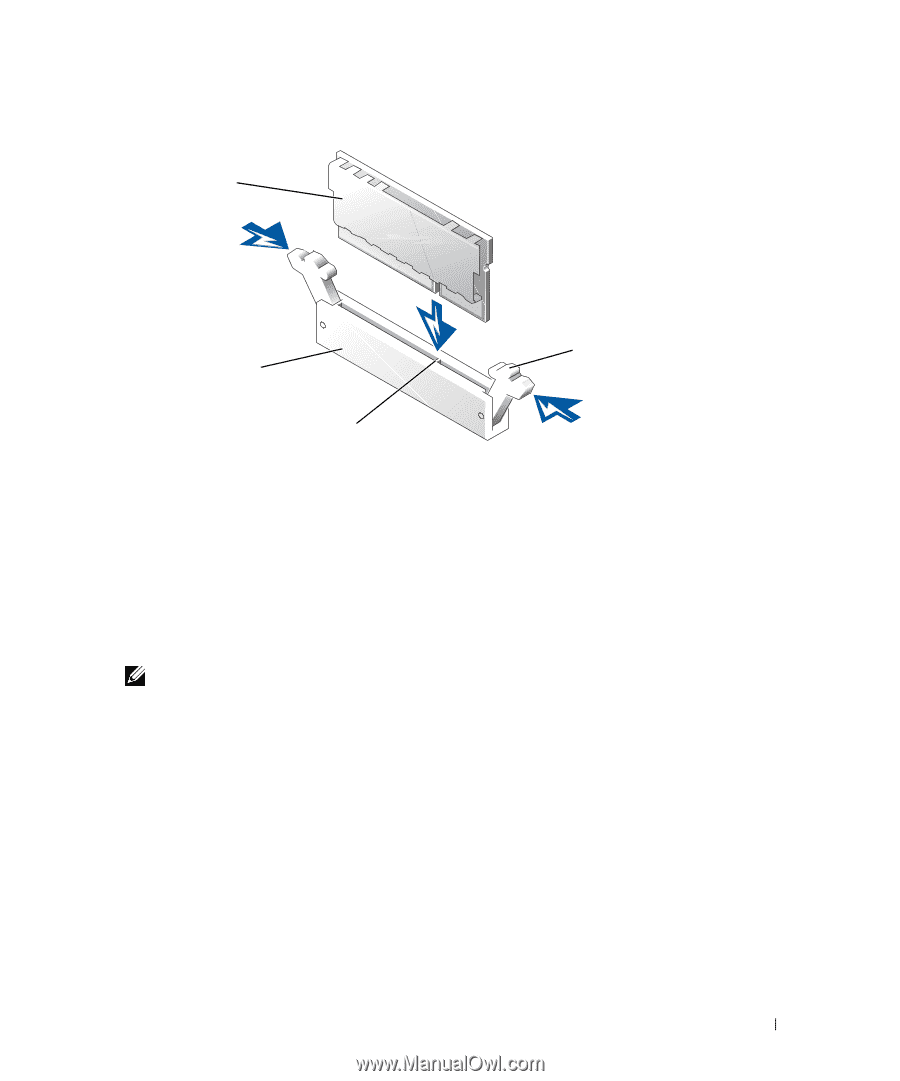
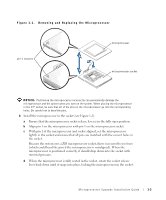
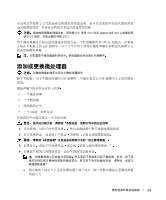
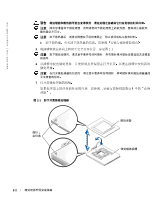
Figure 1-2. Installing a VRM VRM VRM connector connector key latches (2) 15 Replace the cooling shroud, if applicable (see your Installation and Troubleshooting Guide). 16 Close the system doors, or replace the system cover (see your Installation and Troubleshooting Guide). 17 Reconnect your system and peripherals to their electrical outlets, and turn them on. As the system boots, it detects the presence of the new processor and automatically changes the system configuration information in the System Setup program. NOTE: After you access the inside of the system, the chassis intrusion detector will cause an alert message to be displayed at the next system startup. This message is stored in the system's nonvolatile random-access memory (NVRAM). To clear this message log, see your systems management software documentation. 18 Enter the System Setup program and ensure that the microprocessor categories match the new system configuration. For instructions about using the System Setup program, see your User's Guide. 19 Run the system diagnostics to verify that the new microprocessor is operating correctly. See your Installation and Troubleshooting Guide for information about running the diagnostics and troubleshooting any problems that may occur. Microprocessor Upgrade Installation Guide 1-5
-
 1
1 -
 2
2 -
 3
3 -
 4
4 -
 5
5 -
 6
6 -
 7
7 -
 8
8 -
 9
9 -
 10
10 -
 11
11 -
 12
12 -
13
-
14
-
15
-
16
-
17
-
18
-
19
-
20
-
21
-
22
-
23
-
24
-
25
-
26
-
27
-
28
-
29
-
30
-
31
-
32
-
33
-
34
-
35
-
36
-
37
-
38
-
39
-
40
-
41
-
42
-
43
-
44
-
45
-
46
-
47
-
48
-
49
-
50
-
51
-
52
-
53
-
54
-
55
-
56
 |
 |