Dell PowerEdge PDU Metered LCD Cabling PowerEdge R710 - Page 7
Cabling a PowerEdge R710 without a CMA
 |
View all Dell PowerEdge PDU Metered LCD manuals
Add to My Manuals
Save this manual to your list of manuals |
Page 7 highlights
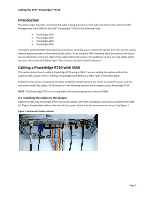
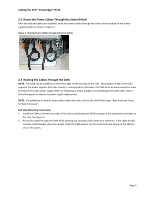
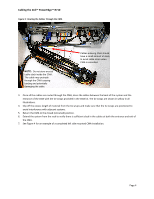
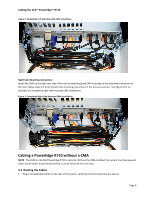
Cabling the Dell™ PowerEdge™ R710 Figure 4: Completed Left Side Mounted CMA Installation Right Side Mounting Instructions Install the CMA on the right rear side of the rails by attaching both CMA housings to the attachment brackets on the rails. Follow steps 2‐6 from the left side mounting instructions in the previous section. See Figure 5 for an example of a completed right side mounted CMA installation. Figure 5: Completed Right Side Mounted CMA Installation Cabling a PowerEdge R710 without a CMA NOTE: The CMA on the Dell PowerEdge R710 is optional. Without the CMA installed, the system must be powered down and all cables disconnected before it can be removed from the rack. 3.1 Routing the Cables 1. Plug in all applicable cables to the rear of the system, verifying that all connections are secure. Page 5
-
 1
1 -
 2
2 -
 3
3 -
 4
4 -
 5
5 -
 6
6 -
 7
7 -
 8
8 -
 9
9
 |
 |
