Dell PowerEdge R740xd2 EMC PowerEdge RAID Controller S140 Users Guide - Page 33
Deleting a virtual disk
 |
View all Dell PowerEdge R740xd2 manuals
Add to My Manuals
Save this manual to your list of manuals |
Page 33 highlights
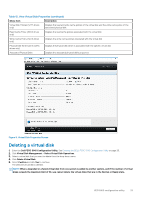
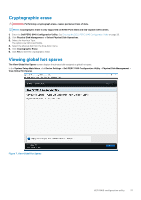
Table 12. View Virtual Disk Properties (continued) Menu Item Description Virtual Disk Policies (SATA drives only) Displays the read and write cache policies of the virtual disk and the write cache policy of the associated physical disk Read Cache Policy (SATA drives only) Displays the read cache policies associated with the virtual disk Write Cache Policy (SATA drives only) Displays the write cache policies associated with the virtual disk Physical Disk Write Cache (SATA drives only) Displays the physical disk which is associated with the specific virtual disk Associated Physical Disks Displays the associated physical disk's properties Figure 5. Virtual Disk Properties Screen Deleting a virtual disk 1. Enter the Dell PERC S140 Configuration Utility. See Entering the DELL PERC S140 Configuration Utility on page 26. 2. Click Virtual Disk Management > Select Virtual Disk Operations. 3. Select a virtual disk that you want to delete from the drop-down menu. 4. Click Delete Virtual Disk. 5. Select Confirm and click Yes to continue. The selected virtual disk is deleted. NOTE: When a degraded or a failed virtual disk from one system is added to another system, and if the number of virtual disks exceeds the maximum limit of 30, you cannot delete the virtual disks that are in the Normal or Ready state. UEFI RAID configuration utility 33
-
 1
1 -
2
-
3
-
4
-
5
-
6
-
7
-
8
-
9
-
10
-
11
-
12
-
13
-
14
-
15
-
16
-
17
-
18
-
19
-
20
-
21
-
22
-
23
-
24
-
25
-
26
-
27
-
 28
28 -
 29
29 -
 30
30 -
 31
31 -
 32
32 -
 33
33 -
 34
34 -
 35
35 -
 36
36 -
 37
37 -
 38
38 -
39
-
40
-
41
-
42
-
43
-
44
-
45
-
46
-
47
-
48
-
49
-
50
-
51
-
52
-
53
 |
 |
