Dell PowerEdge XL 5133-4 Dell PowerEdge M I/O Aggregator Getting Started Guide - Page 16
Unpacking the Aggregator, Package Contents, Unpacking Steps, Installing and Configuring
 |
View all Dell PowerEdge XL 5133-4 manuals
Add to My Manuals
Save this manual to your list of manuals |
Page 16 highlights
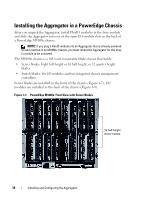
Unpacking the Aggregator Package Contents When unpacking each switch, ensure that the following items are included: • One PowerEdge M I/O Aggregator switch blade • One USB type A-to-DB-9 female cable • Getting Started Guide • Safety and Regulatory Information • Warranty and Support Information • Software License Agreement Unpacking Steps NOTE: Before unpacking the switch, inspect the container and immediately report any evidence of damage. 1 Place the container on a clean, flat surface and cut all straps securing the container. 2 Open the container or remove the container top. 3 Carefully remove the switch from the container and place it on a secure and clean surface. 4 Remove all packing material. 5 Inspect the product and accessories for damage. Installing and Configuring the Aggregator After you unpack the Aggregator, refer to the flow chart in Figure 1-6 for an overview of the steps you must follow to install the blade and perform the initial configuration. 16 Installing and Configuring the Aggregator
-
 1
1 -
2
-
3
-
4
-
5
-
6
-
7
-
8
-
9
-
10
-
 11
11 -
 12
12 -
 13
13 -
 14
14 -
 15
15 -
 16
16 -
 17
17 -
 18
18 -
 19
19 -
 20
20 -
 21
21 -
22
-
23
-
24
-
25
-
26
-
27
-
28
-
29
-
30
-
31
-
32
-
33
-
34
-
35
-
36
-
37
-
38
 |
 |