Dell PowerVault MD3000i Dell PowerVault MD3000/MD3000i RAID Controller Pass - Page 3
RAID Controllers Using First-Generation Firmware Version 06., RAID Controllers Using Second- - serial cable
 |
View all Dell PowerVault MD3000i manuals
Add to My Manuals
Save this manual to your list of manuals |
Page 3 highlights
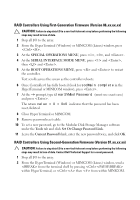
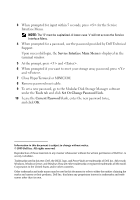
RAID Controllers Using First-Generation Firmware (Version 06.xx.xx.xx) CAUTION: Failure to stop data I/O to a non-fault-tolerant array before performing the following steps may result in loss of data. 1 Stop all I/O to the array. 2 From the HyperTerminal (Windows) or MINICOM (Linux) window, press . 3 At the SPECIAL OPERATIONS MENU, press , , and . 4 At the SERIAL INTERFACE MODE MENU, press and , then and . 5 At the BOOT OPERATIONS MENU, press and to restart the controller. Text scrolls across the screen as the controller reboots. 6 Once Controller 0 has fully booted (look for sodMain complete in the HyperTerminal or MINICOM window), press . 7 At the -> prompt, type clearSYMbolPassword (must use exact case) and press . The return value = 0 = 0x0 indicates that the password has been reset /deleted. 8 Close HyperTerminal or MINICOM. 9 Remove password reset cable. 10 To set a new password, go to the Modular Disk Storage Manager software under the Tools tab and click Set Or Change Password Link. 11 Leave the Current Password blank, enter the new password twice, and click OK. RAID Controllers Using Second-Generation Firmware (Version 07.xx.xx.xx) CAUTION: Failure to stop data I/O to a non-fault-tolerant array before performing the following steps may result in loss of data. Contact Dell Technical Support for a reset password. 1 Stop all I/O to the array. 2 From the HyperTerminal (Windows) or MINICOM (Linux) window, send a from the terminal shell by pressing within HyperTerminal, or then from within MINICOM.
-
 1
1 -
 2
2 -
 3
3 -
 4
4
 |
 |
