Dell PowerVault Storage Area Network Dell DR Series System Administrator's Gui - Page 119
Verifying the Current Software Version, Upgrading the DR Series System Software
 |
View all Dell PowerVault Storage Area Network manuals
Add to My Manuals
Save this manual to your list of manuals |
Page 119 highlights
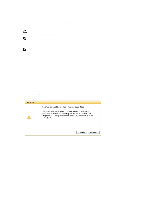
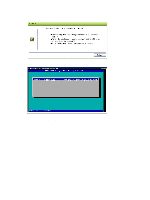
Verifying the Current Software Version To verify the currently installed version of the DR Series system software, complete the following: NOTE: You can verify the version of the installed DR Series system software in the Dashboard page (in the System Information pane), the Support page (in the Support Information pane), and the Software Upgrade page (in the Software Information pane). The following procedure documents the process from the Software Upgrade page. 1. In the navigation panel, select Support and click Software Upgrade (or select Support→ Software Upgrade. The Software Upgrade page is displayed. 2. Verify the currently installed DR Series system software version listed as Current Version in the Software Information pane (all previously installed versions are listed under Upgrade History, showing the version number and timestamp when installed). Upgrading the DR Series System Software To upgrade the DR Series system software, complete the following: NOTE: The DR Series system only supports the copying of upgrade images and diagnostics files to and from the system using WinSCP. The DR Series system does not support the copying or deleting of any other file types using WinSCP. To use WinSCP to copy DR Series software upgrade and diagnostics log files, ensure that the File Protocol mode is set to SCP (Secure Copy) mode. NOTE: You can use other SCP tools with the DR Series system, but you cannot use these other SCP tools to copy other types of files to or from the DR Series system. 1. Using the browser, go to support.dell.com, navigate to the DR4000 product page, and enter your service tag. 2. In the Dell DR Series Drivers & Downloads page, click Find Drivers & Downloads. The Drivers & Downloads page displays a listing of downloadable firmware, utilities, applications, and drivers for the DR Series system. 3. Locate the IDM section of the Drivers & Downloads page, which includes the Dell-Utility (DR Series Upgrade File) in the format, DR4x00-x.x.x.x-xxxxx.tar.gz, and showing its release date and version. 4. Click Download File, click For Single File Download via Browser, and click Download Now. The File Download dialog is displayed. 5. Click Save to download the latest system software upgrade file to the DR Series system that is running the browser session started by the DR Series administrator. 6. Using the DR Series system GUI, select Support, and click the Software Upgrade link (or select Support → Software Upgrade). The Software Upgrade page is displayed. 7. Type the path of the software upgrade file in the Select the upgrade file from local disk (or click Browse..., and navigate to the location where you downloaded the system software upgrade file). 8. Select the software upgrade file, and click Open. 9. Click Start Upgrade. When you initiate a DR Series system software upgrade, the navigation panel displays only the Support page and the Software Upgrade option. The administrator that initiated the software upgrade (known as the initiator administrator) sees a System Information pane that displays an alert and upgrade status, and the Current Version and Upgrade History versions of the DR Series system software listed in the Software Info pane as shown in Figure 1. 119
-
 1
1 -
2
-
3
-
4
-
5
-
6
-
7
-
8
-
9
-
10
-
11
-
12
-
13
-
14
-
15
-
16
-
17
-
18
-
19
-
20
-
21
-
22
-
23
-
24
-
25
-
26
-
27
-
28
-
29
-
30
-
31
-
32
-
33
-
34
-
35
-
36
-
37
-
38
-
39
-
40
-
41
-
42
-
43
-
44
-
45
-
46
-
47
-
48
-
49
-
50
-
51
-
52
-
53
-
54
-
55
-
56
-
57
-
58
-
59
-
60
-
61
-
62
-
63
-
64
-
65
-
66
-
67
-
68
-
69
-
70
-
71
-
72
-
73
-
74
-
75
-
76
-
77
-
78
-
79
-
80
-
81
-
82
-
83
-
84
-
85
-
86
-
87
-
88
-
89
-
90
-
91
-
92
-
93
-
94
-
95
-
96
-
97
-
98
-
99
-
100
-
101
-
102
-
103
-
104
-
105
-
106
-
107
-
108
-
109
-
110
-
111
-
112
-
113
-
 114
114 -
 115
115 -
 116
116 -
 117
117 -
 118
118 -
 119
119 -
 120
120 -
 121
121 -
 122
122 -
 123
123 -
 124
124 -
125
-
126
-
127
-
128
-
129
-
130
-
131
-
132
-
133
-
134
-
135
-
136
-
137
-
138
-
139
-
140
-
141
-
142
-
143
-
144
-
145
-
146
-
147
-
148
-
149
-
150
-
151
-
152
-
153
-
154
-
155
-
156
-
157
-
158
-
159
-
160
-
161
-
162
-
163
-
164
-
165
-
166
-
167
-
168
-
169
-
170
-
171
-
172
-
173
-
174
-
175
-
176
 |
 |
