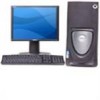
Dell Precision 670 Quick Reference Guide - Page 26
Running the Dell Diagnostics, Boot Device Menu, Boot Sequence, Dell Diagnostics - windows 7 driver
 |
View all Dell Precision 670 manuals
Add to My Manuals
Save this manual to your list of manuals |
Page 26 highlights
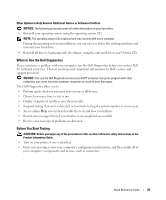
www.dell.com | support.dell.com Running the Dell Diagnostics It is recommended that you print these procedures before you begin. 1 Open the Dell Diagnostics on your hard drive or from the Drivers and Utilities CD. From your hard drive: a Shut down and restart the computer. b When F2 = Setup appears in the upper-right corner of the screen, press . If you wait too long and the Microsoft® Windows® logo appears, continue to wait until you see the Windows desktop. Then shut down your computer and try again. After the system boots to the Dell Diagnostics, go to step 2. From the Drivers and Utilities CD: a Shut down and restart the computer. b When F2 = Setup appears in the upper-right corner of the screen, press . If you wait too long and the Microsoft Windows logo appears, continue to wait until you see the Windows desktop. Then shut down your computer and try again. NOTE: This feature changes the boot sequence for one time only. On the next start-up, the computer boots according to the devices specified in system setup. The Boot Device Menu appears. c Insert the Drivers and Utilities CD. d Change the Boot Sequence to use the IDE CD-ROM device as the first device in the boot sequence. The Dell Diagnostics Menu appears. e Select Dell 32-bit Diagnostics from the numbered list. If multiple versions are listed, select the version appropriate for your computer. 2 When the Dell Diagnostics main menu appears, select the type of test you want to perform. 26 Quick Reference Guide
-
 1
1 -
2
-
3
-
4
-
5
-
6
-
7
-
8
-
9
-
10
-
11
-
12
-
13
-
14
-
15
-
16
-
17
-
18
-
19
-
20
-
 21
21 -
 22
22 -
 23
23 -
 24
24 -
 25
25 -
 26
26 -
 27
27 -
 28
28 -
 29
29 -
 30
30 -
 31
31 -
32
-
33
-
34
-
35
-
36
-
37
-
38
-
39
-
40
-
41
-
42
-
43
-
44
-
45
-
46
-
47
-
48
-
49
-
50
-
51
-
52
-
53
-
54
-
55
-
56
-
57
-
58
-
59
-
60
-
61
-
62
-
63
-
64
-
65
-
66
-
67
-
68
-
69
-
70
-
71
-
72
-
73
-
74
-
75
-
76
-
77
-
78
-
79
-
80
-
81
-
82
-
83
-
84
-
85
-
86
-
87
-
88
-
89
-
90
-
91
-
92
-
93
-
94
-
95
-
96
-
97
-
98
-
99
-
100
-
101
-
102
-
103
-
104
-
105
-
106
-
107
-
108
-
109
-
110
-
111
-
112
-
113
-
114
-
115
-
116
-
117
-
118
-
119
-
120
-
121
-
122
-
123
-
124
-
125
-
126
-
127
-
128
-
129
-
130
-
131
-
132
-
133
-
134
-
135
-
136
-
137
-
138
-
139
-
140
-
141
-
142
-
143
-
144
-
145
-
146
-
147
-
148
-
149
-
150
-
151
-
152
-
153
-
154
-
155
-
156
-
157
-
158
-
159
-
160
-
161
-
162
-
163
-
164
-
165
-
166
-
167
-
168
 |
 |
