Dell Vostro 2520 Owner's Manual - Page 27
Installing the System Board, Connect the LCD cable, power connector cable, USB board cable
 |
View all Dell Vostro 2520 manuals
Add to My Manuals
Save this manual to your list of manuals |
Page 27 highlights
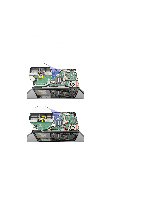
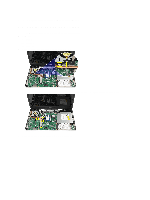
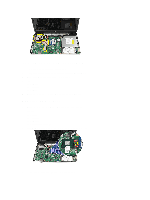
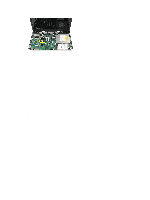
4. Remove the screws that secure the system board. 5. Lift up the system board at an angle and slide it out from the LAN, VGA, HDMI, and USB sockets. Installing the System Board 1. Insert the system board with the LAN, VGA, HDMI, and USB connectors into their respective sockets and align the system board in place. 2. Install the screw that secure the system board in place. 3. Connect the LCD cable, power connector cable, USB board cable, audio board cable, coin-cell battery cable, and the speaker cable. 4. Install: 27
-
 1
1 -
2
-
3
-
4
-
5
-
6
-
7
-
8
-
9
-
10
-
11
-
12
-
13
-
14
-
15
-
16
-
17
-
18
-
19
-
20
-
21
-
 22
22 -
 23
23 -
 24
24 -
 25
25 -
 26
26 -
 27
27 -
 28
28 -
 29
29 -
 30
30 -
 31
31 -
 32
32 -
33
-
34
-
35
-
36
-
37
-
38
-
39
-
40
-
41
-
42
-
43
-
44
-
45
-
46
-
47
-
48
-
49
-
50
-
51
-
52
-
53
-
54
-
55
 |
 |

4.
Remove the screws that secure the system board.
5.
Lift up the system board at an angle and slide it out from the LAN, VGA, HDMI, and USB sockets.
Installing the System Board
1.
Insert the system board with the LAN, VGA, HDMI, and USB connectors into their respective sockets and align the
system board in place.
2.
Install the screw that secure the system board in place.
3.
Connect the LCD cable, power connector cable, USB board cable, audio board cable, coin-cell battery cable, and
the speaker cable.
4.
Install:
27