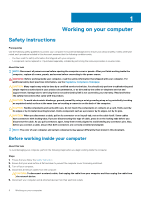
Dell Vostro 3590 Without optical drive Service Manual - Page 10
Secure Digital Card, Removing the Secure Digital card
 |
View all Dell Vostro 3590 manuals
Add to My Manuals
Save this manual to your list of manuals |
Page 10 highlights
Component Optical-drive connector board Screw type M2x2 Big Head Power-adapter port Power-button board M2x3 M2x2 Big Head Power button with fingerprint reader (optional) M2x2 Big Head Solid-state drive to thermal plate M2x2 Big Head Solid-state drive System board Touchpad Wireless-card bracket M2x0.8x2.2 M2x4 M2x2 M2x3 Quantity 1 1 1 1 1 1 1 6 1 Secure Digital Card Removing the Secure Digital card Prerequisites 1. Follow the procedure in Before working inside your computer Steps 1. Push the secure digital card to release it from the computer. 2. Slide the secure digital card out of the computer. Screw image 10 Removing and installing components
-
 1
1 -
2
-
3
-
4
-
 5
5 -
 6
6 -
 7
7 -
 8
8 -
 9
9 -
 10
10 -
 11
11 -
 12
12 -
 13
13 -
 14
14 -
 15
15 -
16
-
17
-
18
-
19
-
20
-
21
-
22
-
23
-
24
-
25
-
26
-
27
-
28
-
29
-
30
-
31
-
32
-
33
-
34
-
35
-
36
-
37
-
38
-
39
-
40
-
41
-
42
-
43
-
44
-
45
-
46
-
47
-
48
-
49
-
50
-
51
-
52
-
53
-
54
-
55
-
56
-
57
-
58
-
59
-
60
-
61
-
62
-
63
-
64
-
65
-
66
-
67
-
68
-
69
-
70
-
71
-
72
-
73
-
74
-
75
-
76
-
77
-
78
-
79
-
80
-
81
-
82
-
83
-
84
-
85
-
86
 |
 |

Component
Screw type
Quantity
Screw image
Optical-drive connector board
M2x2 Big Head
1
Power-adapter port
M2x3
1
Power-button board
M2x2 Big Head
1
Power button with fingerprint
reader (optional)
M2x2 Big Head
1
Solid-state drive to thermal plate
M2x2 Big Head
1
Solid-state drive
M2x0.8x2.2
1
System board
M2x4
1
Touchpad
M2x2
6
Wireless-card bracket
M2x3
1
Secure Digital Card
Removing the Secure Digital card
Prerequisites
1.
Follow the procedure in
Before working inside your computer
Steps
1.
Push the secure digital card to release it from the computer.
2.
Slide the secure digital card out of the computer.
10
Removing and installing components