Dell W5300n Dell™ Workgroup Laser Printer W5300 Owner's Manual - Page 36
Replacing the shield
 |
View all Dell W5300n manuals
Add to My Manuals
Save this manual to your list of manuals |
Page 36 highlights
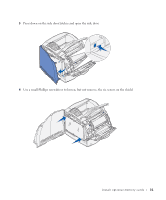
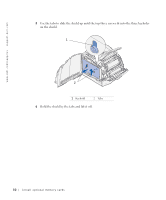
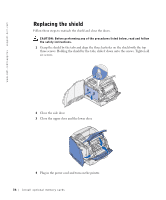
www.dell.com/supplies | support.dell.com Replacing the shield Follow these steps to reattach the shield and close the doors. CAUTION: Before performing any of the procedures listed below, read and follow the safety instructions. 1 Grasp the shield by the tabs and align the three keyholes on the shield with the top three screws. Holding the shield by the tabs, slide it down onto the screws. Tighten all six screws. 2 Close the side door. 3 Close the upper door and the lower door. 4 Plug in the power cord and turn on the printer. 36 Install optional memory cards
-
 1
1 -
2
-
3
-
4
-
5
-
6
-
7
-
8
-
9
-
10
-
11
-
12
-
13
-
14
-
15
-
16
-
17
-
18
-
19
-
20
-
21
-
22
-
23
-
24
-
25
-
26
-
27
-
28
-
29
-
30
-
 31
31 -
 32
32 -
 33
33 -
 34
34 -
 35
35 -
 36
36 -
 37
37 -
 38
38 -
 39
39 -
 40
40 -
 41
41 -
42
-
43
-
44
-
45
-
46
-
47
-
48
-
49
-
50
-
51
-
52
-
53
-
54
-
55
-
56
-
57
-
58
-
59
-
60
-
61
-
62
-
63
-
64
-
65
-
66
-
67
-
68
-
69
-
70
-
71
-
72
-
73
-
74
-
75
-
76
-
77
-
78
-
79
-
80
-
81
-
82
-
83
-
84
-
85
-
86
 |
 |
36
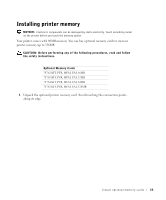
Install optional memory cards
www.dell.com/supplies | support.dell.com
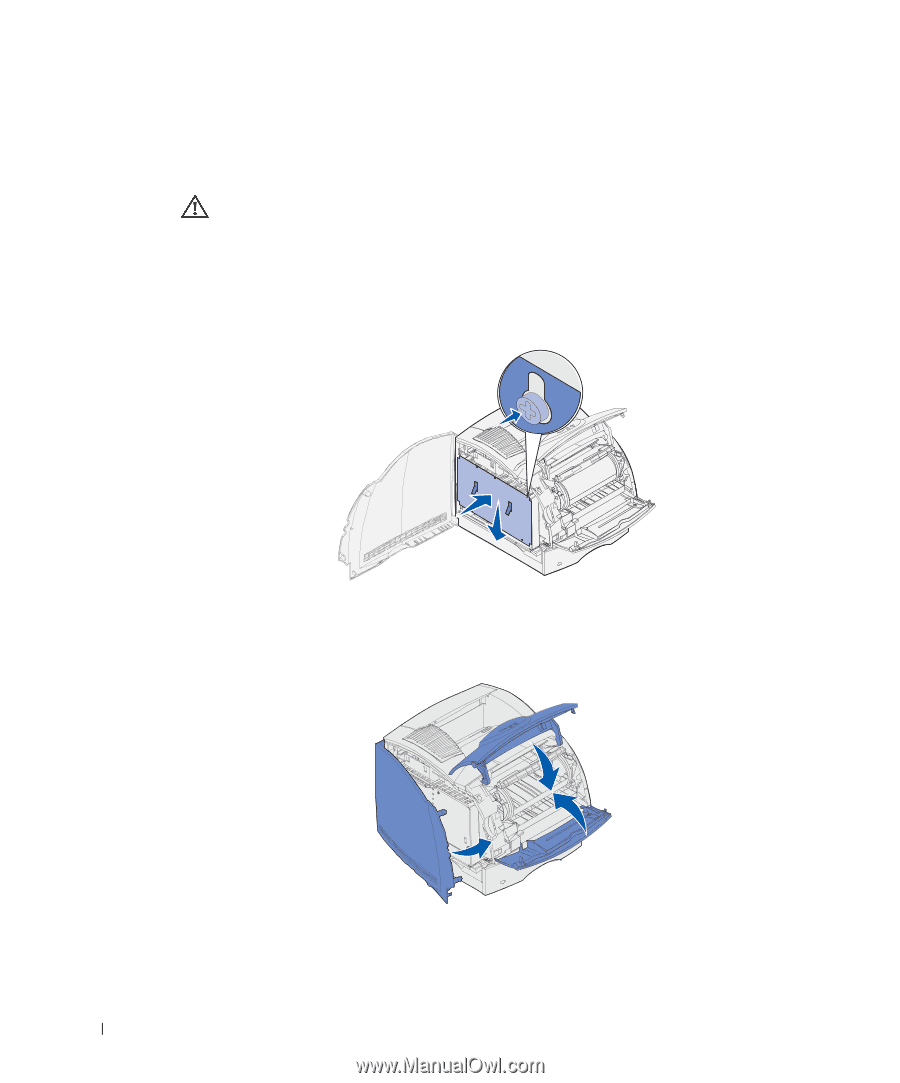
Replacing the shield
Follow these steps to reattach the shield and close the doors.
CAUTION: Before performing any of the procedures listed below, read and follow
the safety instructions.
1
Grasp the shield by the tabs and align the three keyholes on the shield with the top
three screws. Holding the shield by the tabs, slide it down onto the screws. Tighten all
six screws.
2
Close the side door.
3
Close the upper door and the lower door.
4
Plug in the power cord and turn on the printer.