Dell XPS /Dimension Gen 2 Service Manual
Dell XPS /Dimension Gen 2 Manual
 |
View all Dell XPS /Dimension Gen 2 manuals
Add to My Manuals
Save this manual to your list of manuals |
Dell XPS /Dimension Gen 2 manual content summary:
- Dell XPS /Dimension Gen 2 | Service Manual - Page 1
Dell™ Dimension™ XPS Service Manual Before You Begin Opening the Computer Cover Technical Overview Technical Specifications Advanced Troubleshooting System Setup Removing and Installing Parts Closing the Computer Cover Notes, Notices, and Cautions NOTE: A NOTE indicates important information that - Dell XPS /Dimension Gen 2 | Service Manual - Page 2
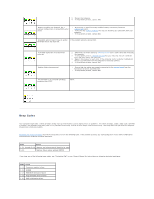
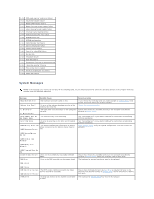
Back to Contents Page Advanced Troubleshooting Dell™ Dimension™ XPS Service Manual Diagnostic Lights Beep Codes System Messages Diagnostic Lights To help you troubleshoot a problem, your computer has four lights labeled "A," "B," "C," and "D" on the back panel. The lights can be yellow or green. - Dell XPS /Dimension Gen 2 | Service Manual - Page 3
computer starts normally, troubleshoot the last card removed from the computer for resource conflicts. 4. If the problem persists, contact Dell. l Ensure that following table. If the problem persists, see "Contacting Dell" in your Owner's Manual for instructions on obtaining technical assistance. - Dell XPS /Dimension Gen 2 | Service Manual - Page 4
failure 3-2-4 Keyboard Controller Test failure 3-3-1 NVRAM power loss 3-3-2 NVRAM configuration 3-3-4 Video Memory Test Enable Cache The cache memory is not operating. See "Contacting Dell" in your Owner's Manual for instructions on obtaining technical assistance. CH-2 Timer Error An error - Dell XPS /Dimension Gen 2 | Service Manual - Page 5
BIOS has detected a stuck key. Ensure that nothing is resting on the keyboard; if a key appears to be stuck, carefully pry it up. If the problem persists, you may need to replace the keyboard. An error occurred with the keyboard connector. Ensure that nothing is resting on the keyboard; if a key - Dell XPS /Dimension Gen 2 | Service Manual - Page 6
Dell™ Dimension™ XPS Service Manual instructions in the Owner's Manual. NOTICE: Only a certified service technician should perform repairs on your computer. Damage due to servicing that is not authorized by Dell down your computer, press and hold the power button for 4 seconds. NOTICE: To disconnect - Dell XPS /Dimension Gen 2 | Service Manual - Page 7
CAUTION: To guard against electrical shock, always unplug your computer from the electrical outlet before opening the cover. 6. Open the computer cover. NOTICE: Before touching anything inside your computer, ground yourself by touching an unpainted metal surface, such as the metal at the back of the - Dell XPS /Dimension Gen 2 | Service Manual - Page 8
Back to Contents Page Closing the Computer Cover Dell™ Dimension™ XPS Service Manual 1. Ensure that all cables are connected, and fold cables out of the way. 2. Ensure that no tools or extra parts are left inside the computer. 3. Close the computer cover: a. Pivot the cover down and into position. - Dell XPS /Dimension Gen 2 | Service Manual - Page 9
Back to Contents Page Opening the Computer Cover Dell™ Dimension™ XPS Service Manual CAUTION: Before you begin any of the procedures in this section, follow the safety instructions in your Owner's Manual. CAUTION: To guard against electrical shock, always unplug your computer from the electrical - Dell XPS /Dimension Gen 2 | Service Manual - Page 10
Back to Contents Page Removing and Installing Parts Dell™ Dimension™ XPS Service Manual Memory AGP Cards Processor Airflow Shroud System Board Front Panel Battery PCI Cards Drives Processor Power Supply Drive Door Memory You can increase your computer memory by installing memory modules on the - Dell XPS /Dimension Gen 2 | Service Manual - Page 11
Dell is covered under your computer warranty. Installing Memory CAUTION: Before you begin any of the procedures in this section, follow the safety instructions in your Owner's Manual. 1. Follow the instructions , ensuring that it fits into the vertical guides at each end of the connector. Press - Dell XPS /Dimension Gen 2 | Service Manual - Page 12
the amount of memory (RAM) listed. PCI Cards CAUTION: Before you begin any of the procedures in this section, follow the safety instructions in your Owner's Manual. Your Dell™ computer provides slots for up to four 32-bit, 33-MHz cards. For more information, see "Specifications." NOTE: For optimum - Dell XPS /Dimension Gen 2 | Service Manual - Page 13
card is full-length, insert the end of the card into the card guide bracket as you lower the card toward its connector on the system board. The notch in the top of the card or filler bracket fits around the alignment guide. 10. Press the retention arm into place, securing the card(s) in the computer - Dell XPS /Dimension Gen 2 | Service Manual - Page 14
the empty card-slot opening. If you need a filler bracket, contact Dell. NOTE: You must install filler brackets over empty card-slot openings the safety instructions in your Owner's Manual. Your Dell™ computer provides a connector for an AGP card. Removing an AGP Card 1. Follow the instructions in " - Dell XPS /Dimension Gen 2 | Service Manual - Page 15
to four of the following: l Either two IDE hard drives or two Serial ATA hard drives l Two CD or DVD drives Your computer also supports this drive combination: l Two Serial ATA drives in either a RAID level 0 configuration or a RAID level 1 configuration l One IDE hard drive l Two CD or DVD drives - Dell XPS /Dimension Gen 2 | Service Manual - Page 16
Before you begin any of the procedures in this section, follow the safety instructions in your Owner's Manual. Removing a Hard Drive 1. Follow the instructions in "Before You Begin." 2. Open the computer cover. 3. Disconnect the power and hard-drive cables from the drive. 4. Press in on the tabs on - Dell XPS /Dimension Gen 2 | Service Manual - Page 17
for your computer. 3. Follow the instructions in "Before You Begin." 4. Open place until you hear it click securely. 7. Connect the power and hard-drive cables to the drive. 8. Check all documentation that came with the drive for instructions on installing any software required for drive operation - Dell XPS /Dimension Gen 2 | Service Manual - Page 18
the computer cover. 3. Disconnect the power and floppy-drive cables from the back of the floppy drive. 4. Press inward on the two tabs on the sides of the drive, slide the drive upward, and remove it from the floppy-drive bay. Installing a Floppy Drive 1. Follow the instructions in "Before You Begin - Dell XPS /Dimension Gen 2 | Service Manual - Page 19
: Before you begin any of the procedures in this section, follow the safety instructions in your Owner's Manual. Removing a CD/DVD Drive 1. Follow the instructions in "Before You Begin." 2. Open the computer cover. 3. Disconnect the power and CD/DVD drive cables from the back of the drive. 4. Press - Dell XPS /Dimension Gen 2 | Service Manual - Page 20
rails is not attached inside the computer cover, contact Dell. 5. If you are installing a replacement drive and until the tabs securely click into position. 7. Connect the power and CD/DVD drive cables to the drive. If that came with the drive for instructions on installing any software required for - Dell XPS /Dimension Gen 2 | Service Manual - Page 21
devices to electrical outlets, and turn them on. Processor CAUTION: Before you perform this procedure, follow the safety instructions in your Owner's Manual. Installing the Processor NOTE: It is recommended that only a technically knowledgeable person perform this procedure. CAUTION: The processor - Dell XPS /Dimension Gen 2 | Service Manual - Page 22
If you installed a processor replacement kit from Dell, return the original heat sink assembly and processor to Dell in the same package in which your replacement kit sufficient time to cool before you touch it. 1. Follow the instructions in "Before You Begin." 2. Open the computer cover. 3. Remove the - Dell XPS /Dimension Gen 2 | Service Manual - Page 23
with the thermal grease facing upward. NOTICE: If you are installing a processor upgrade kit from Dell, discard the original heat sink. If you are not installing a processor upgrade kit from Dell, reuse the original heat sink when you install your new processor. 5. Pull the release lever straight - Dell XPS /Dimension Gen 2 | Service Manual - Page 24
instructions in your Owner's Manual. Removing the System Board NOTICE: The system board and metal tray are connected and are removed as one piece. 1. Follow the instructions the existing system board to make sure that you have the correct part. 6. Remove the system board screw. 7. Pull up on the two - Dell XPS /Dimension Gen 2 | Service Manual - Page 25
your computer and devices to electrical outlets, and turn them on. Power Supply CAUTION: Before you begin any of the procedures in this section, follow the safety instructions in your Owner's Manual. Removing the Power Supply NOTICE: Before disconnecting a device from the computer, wait 10 to 20 - Dell XPS /Dimension Gen 2 | Service Manual - Page 26
Connect the power supply cables and the card fan cable. 6. Replace the card fan. 7. Install the card. 8. Close the computer cover and restart the computer. Front Panel CAUTION: Before you begin any of the procedures in this section, follow the safety instructions in your Owner's Manual. Removing the - Dell XPS /Dimension Gen 2 | Service Manual - Page 27
, perform the removal procedure in reverse. Drive Door CAUTION: Before you begin any of the procedures in this section, follow the safety instructions in your Owner's Manual. Removing the Drive Door 1. Open the drive door. 2. Unsnap the top bracket hinge and pull the top of the drive door outward - Dell XPS /Dimension Gen 2 | Service Manual - Page 28
. Ensure that the hinge tabs are away from the door bracket. 2. Attach the door bracket/door hinge assembly to the door, starting with the lower part of each door hinge. - Dell XPS /Dimension Gen 2 | Service Manual - Page 29
door to the computer, starting with the bottom bracket hinge. Battery CAUTION: Before you begin this procedure, follow the safety instructions in your Owner's Manual. A coin-cell battery maintains computer configuration, date, and time information. The battery can last several years. If you have to - Dell XPS /Dimension Gen 2 | Service Manual - Page 30
NOTICE: To connect a network cable, first plug the cable into the network wall jack and then plug it into the computer. 8. Connect your computer and devices to electrical outlets, and turn them on. 9. Enter system setup and restore the settings you recorded in step 1. 10. Properly dispose of the old - Dell XPS /Dimension Gen 2 | Service Manual - Page 31
Dell™ Dimension™ XPS Service Manual Processor Computer Information Audio Drives Controls and Lights Physical Memory Video Expansion Bus Connectors Power only with the Intel Pentium 4 processor Extreme Edition 3.20 GHz supporting Hyper-Threading technology. 400-MHz DDR SDRAM four 128 MB, 256 - Dell XPS /Dimension Gen 2 | Service Manual - Page 32
drive, serial ATA drive, CD drive, DVD drive, RAID three 3.5-inch drive bays Connectors External connectors: Serial Power DC power supply: Wattage Heat dissipation Voltage Backup battery 460 W 1000 BTU/hr fixed-voltage power supply-110 V at 50/60 Hz manual selection and auto-sensing power supplies - Dell XPS /Dimension Gen 2 | Service Manual - Page 33
Width Depth Weight Environmental Temperature: Operating Storage Relative humidity Maximum vibration: Operating Storage Maximum shock: Operating Storage Altitude: Operating Storage Back to Contents Page 22.2 cm (8.7 inches) 48.8 cm (19.2 inches) 19 kg (42 lbs) 10° to 35°C (50° to 95°F) NOTE: At 35°C - Dell XPS /Dimension Gen 2 | Service Manual - Page 34
Dell™ Dimension™ XPS Service Manual DELL™ logo appears, press immediately. If you wait too long and the operating system logo appears, continue to wait until you see the Microsoft® Windows® desktop of your computer, including installed hardware, power conservation, and security features. Fields - Dell XPS /Dimension Gen 2 | Service Manual - Page 35
not bootable, or if no floppy disk is in the drive, the computer generates an error message. Hard Drive The computer attempts to boot from the primary the drive, or if no operating system is on the CD, the computer generates an error message. PXE (This option is available only for the future boot - Dell XPS /Dimension Gen 2 | Service Manual - Page 36
support Hyper-Threading. The default setting is Disabled. NOTE: If your computer has a processor capable of supporting Hyper computer uses the AGP card. Power Management Suspend Mode The options are S1 or S3. AC Power Recovery Determines what happens when AC power is restored to the computer - Dell XPS /Dimension Gen 2 | Service Manual - Page 37
keyboard errors when set to Report. The default setting is Report. Auto Power On Sets time and days of week to automatically turn on the computer. is not bootable, or if no floppy disk is in the drive, the computer generates an error message. l Hard Drive - The computer attempts to boot from the - Dell XPS /Dimension Gen 2 | Service Manual - Page 38
CD has no operating system, the computer generates an error message. l PXE - you can run the Dell Diagnostics on the Dell Dimension Resource CD, but you wait until you see the Microsoft Windows desktop. Then shut down your computer follow the safety instructions in your Owner's Manual. 1. Follow the - Dell XPS /Dimension Gen 2 | Service Manual - Page 39
, and turn them on. Clearing CMOS Settings CAUTION: Before you begin any of the procedures in this section, follow the safety instructions in your Owner's Manual. 1. Follow the procedures in "Before You Begin." 2. Reset the current CMOS settings: a. Locate the CMOS jumper (CMOS) on the system board - Dell XPS /Dimension Gen 2 | Service Manual - Page 40
Back to Contents Page Technical Overview Dell™ Dimension™ XPS Service Manual Inside View of Your Computer System Board Components Power Supply DC Connector Pin Assignments Inside View of Your Computer System Board Components - Dell XPS /Dimension Gen 2 | Service Manual - Page 41
Power Supply DC Connector Pin Assignments DC Power Connector P1 Pin Number Signal name 18-AWG Wire 1 +5 VDC Red - Dell XPS /Dimension Gen 2 | Service Manual - Page 42
17 N/C 18 +5 VDC Red 19 N/C 20 +5 VDC Red 21 TSFC (1) Brown 22 +5 VDC Red 23 +3.3 VDC Blue and white 24 COM Black DC Power Connector P2 Pin Number Signal Name 18-AWG Wire 1 +3.3 VDC Blue and white 2 +3.3 VDC Blue and white 3 +3.3 VDC Blue and white 4 +3.3 VDC Blue - Dell XPS /Dimension Gen 2 | Service Manual - Page 43
4 COM Black 5 COM Black 6 +5 VDC Red 7 +5 VDC Red 8 N/C 9 +12 VB Orange 10 COM Black 11 COM Black 12 +5 VDC Red DC Power Connector P4 Pin Number Signal Name 18-AWG Wire 1 N/C 2 COM Black 3 COM Black 4 +3.3 VDC Orange 5 +5 VDC Red 6 +12 VDC Yellow Back to - Dell XPS /Dimension Gen 2 | Service Manual - Page 44
Back to Contents Page Dell™ Dimension™ XPS Service Manual NOTE: A NOTE indicates important information that helps you make better use of your computer. NOTICE: A NOTICE indicates either potential damage to hardware or loss of data and tells you how to avoid the problem. CAUTION: A CAUTION indicates
-
 1
1 -
 2
2 -
 3
3 -
 4
4 -
 5
5 -
 6
6 -
 7
7 -
8
-
9
-
10
-
11
-
12
-
13
-
14
-
15
-
16
-
17
-
18
-
19
-
20
-
21
-
22
-
23
-
24
-
25
-
26
-
27
-
28
-
29
-
30
-
31
-
32
-
33
-
34
-
35
-
36
-
37
-
38
-
39
-
40
-
41
-
42
-
43
-
44
 |
 |

Dell™ Dimension™ XPS Service Manual
Before You Begin
Opening the Computer Cover
Technical Overview
Technical Specifications
Advanced Troubleshooting
System Setup
Removing and Installing Parts
Closing the Computer Cover
Notes, Notices, and Cautions
Abbreviations and Acronyms
For a complete list of abbreviations and acronyms, see the
Dell Dimension Help
file.
Information in this document is subject to change without notice.
©
2003
–2004 Dell Inc. All rights reserved.
Reproduction in any manner whatsoever without the written permission of Dell Inc.
is strictly forbidden.
Trademarks used in this text:
Dell
, the
DELL
logo, and
Dimension
are trademarks of Dell Inc.;
Intel
,
Pentium,
and
Celeron
are registered trademarks of Intel Corporation;
Microsoft
and
Windows
are registered trademarks of Microsoft Corporation.
Other trademarks and trade names may be used in this document to refer to either the entities claiming the marks and names or their products. Dell Inc. disclaims any
proprietary interest in trademarks and trade names other than its own.
January 2004
Rev. A02
NOTE:
A NOTE indicates important information that helps you make better use of your computer.
NOTICE:
A NOTICE indicates either potential damage to hardware or loss of data and tells you how to avoid the problem.
CAUTION:
A CAUTION indicates a potential for property damage, personal injury, or death.