Dell XPS 420 Owner's Manual - Page 45
How to Copy a Blu-ray Disc™ BD Media, Using Blank CDs and DVDs - blu ray
 |
View all Dell XPS 420 manuals
Add to My Manuals
Save this manual to your list of manuals |
Page 45 highlights
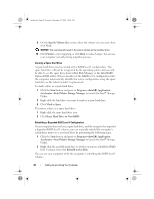
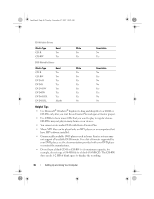
book.book Page 45 Tuesday, November 27, 2007 10:29 AM NOTE: Most commercial DVDs have copyright protection and cannot be copied using Roxio Creator Plus. 1 Open Roxio Creator Plus. 2 Under the Copy tab, click Disc Copy. 3 To copy the CD or DVD: • If you have one CD/DVD drive, ensure that the settings are correct, and then click Disc Copy. The computer reads your source CD or DVD and copies the data to a temporary folder on your computer hard drive. When prompted, insert a blank CD or DVD into the drive and click OK. • If you have two CD/DVD drives, select the drive into which you have inserted your source CD or DVD, and then click Disc Copy. The computer copies the data from the source CD or DVD to the blank CD or DVD. Once you have finished copying the source CD or DVD, the CD or DVD that you have created automatically ejects. How to Copy a Blu-ray Disc™ (BD) Media For information on how to use the BD media, refer to the manual that accompanies the product. Using Blank CDs and DVDs CD-RW drives can write to CD recording media only (including high-speed CD-RW media) while DVD-writable drives can write to both CD and DVD recording media. Use blank CD-Rs to record music or permanently store data files. After the maximum storage capacity of a CD-R is reached, you cannot write to that CD-R again (see the Sonic documentation for more information). Use blank CD-RWs if you plan to erase, rewrite, or update information on the CD later. Blank DVD+/-Rs can be used to permanently store large amounts of data. After you create a DVD+/-R disc, you may not be able to write to that disc again if the disc is finalized or closed during the final stage of the disc creation process. Use blank DVD+/-RWs if you plan to erase, rewrite, or update information on the disc later. Setting Up and Using Your Computer 45
-
 1
1 -
2
-
3
-
4
-
5
-
6
-
7
-
8
-
9
-
10
-
11
-
12
-
13
-
14
-
15
-
16
-
17
-
18
-
19
-
20
-
21
-
22
-
23
-
24
-
25
-
26
-
27
-
28
-
29
-
30
-
31
-
32
-
33
-
34
-
35
-
36
-
37
-
38
-
39
-
 40
40 -
 41
41 -
 42
42 -
 43
43 -
 44
44 -
 45
45 -
 46
46 -
 47
47 -
 48
48 -
 49
49 -
 50
50 -
51
-
52
-
53
-
54
-
55
-
56
-
57
-
58
-
59
-
60
-
61
-
62
-
63
-
64
-
65
-
66
-
67
-
68
-
69
-
70
-
71
-
72
-
73
-
74
-
75
-
76
-
77
-
78
-
79
-
80
-
81
-
82
-
83
-
84
-
85
-
86
-
87
-
88
-
89
-
90
-
91
-
92
-
93
-
94
-
95
-
96
-
97
-
98
-
99
-
100
-
101
-
102
-
103
-
104
-
105
-
106
-
107
-
108
-
109
-
110
-
111
-
112
-
113
-
114
-
115
-
116
-
117
-
118
-
119
-
120
-
121
-
122
-
123
-
124
-
125
-
126
-
127
-
128
-
129
-
130
-
131
-
132
-
133
-
134
-
135
-
136
-
137
-
138
-
139
-
140
-
141
-
142
-
143
-
144
-
145
-
146
-
147
-
148
-
149
-
150
-
151
-
152
-
153
-
154
-
155
-
156
-
157
-
158
-
159
-
160
-
161
-
162
-
163
-
164
-
165
-
166
-
167
-
168
-
169
-
170
-
171
-
172
-
173
-
174
-
175
-
176
-
177
-
178
-
179
-
180
-
181
-
182
-
183
-
184
-
185
-
186
-
187
-
188
-
189
-
190
-
191
-
192
-
193
-
194
-
195
-
196
-
197
-
198
-
199
-
200
-
201
-
202
-
203
-
204
-
205
-
206
-
207
-
208
-
209
-
210
-
211
-
212
-
213
-
214
-
215
-
216
-
217
-
218
-
219
-
220
-
221
-
222
-
223
-
224
-
225
-
226
 |
 |