Dell XPS 8500 Owner's Manual (PDF) - Page 115
System Board, Prerequisites, Removing the System Board - bios
 |
View all Dell XPS 8500 manuals
Add to My Manuals
Save this manual to your list of manuals |
Page 115 highlights
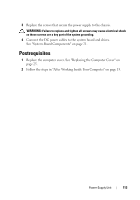
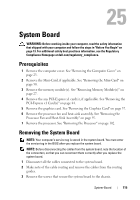
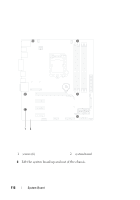
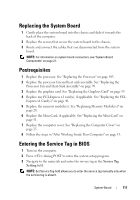
25 System Board WARNING: Before working inside your computer, read the safety information that shipped with your computer and follow the steps in "Before You Begin" on page 13. For additional safety best practices information, see the Regulatory Compliance Homepage at dell.com/regulatory_compliance. Prerequisites 1 Remove the computer cover. See "Removing the Computer Cover" on page 23. 2 Remove the Mini-Card, if applicable. See "Removing the Mini-Card" on page 50. 3 Remove the memory module(s). See "Removing Memory Module(s)" on page 27. 4 Remove the any PCI-Express x1 card(s), if applicable. See "Removing the PCI-Express x1 Card(s)" on page 44. 5 Remove the graphics card. See "Removing the Graphics Card" on page 37. 6 Remove the processor fan and heat-sink assembly. See "Removing the Processor Fan and Heat-Sink Assembly" on page 97. 7 Remove the processor. See "Removing the Processor" on page 102. Removing the System Board NOTE: Your computer's service tag is stored in the system board. You must enter the service tag in the BIOS after you replace the system board. NOTE: Before disconnecting the cables from the system board, note the location of the connectors, so that you can reconnect them correctly after you replace the system board. 1 Disconnect all the cables connected to the system board. 2 Make note of the cable routing and remove the cables from the routing guides. 3 Remove the screws that secure the system board to the chassis. System-Board 115
-
 1
1 -
2
-
3
-
4
-
5
-
6
-
7
-
8
-
9
-
10
-
11
-
12
-
13
-
14
-
15
-
16
-
17
-
18
-
19
-
20
-
21
-
22
-
23
-
24
-
25
-
26
-
27
-
28
-
29
-
30
-
31
-
32
-
33
-
34
-
35
-
36
-
37
-
38
-
39
-
40
-
41
-
42
-
43
-
44
-
45
-
46
-
47
-
48
-
49
-
50
-
51
-
52
-
53
-
54
-
55
-
56
-
57
-
58
-
59
-
60
-
61
-
62
-
63
-
64
-
65
-
66
-
67
-
68
-
69
-
70
-
71
-
72
-
73
-
74
-
75
-
76
-
77
-
78
-
79
-
80
-
81
-
82
-
83
-
84
-
85
-
86
-
87
-
88
-
89
-
90
-
91
-
92
-
93
-
94
-
95
-
96
-
97
-
98
-
99
-
100
-
101
-
102
-
103
-
104
-
105
-
106
-
107
-
108
-
109
-
 110
110 -
 111
111 -
 112
112 -
 113
113 -
 114
114 -
 115
115 -
 116
116 -
 117
117 -
 118
118 -
 119
119 -
 120
120 -
121
-
122
-
123
-
124
-
125
-
126
-
127
-
128
-
129
-
130
-
131
-
132
-
133
-
134
-
135
-
136
 |
 |