Denon D-M37SBK Owners Manual - English - Page 15
Once Connections are, Completed
 |
View all Denon D-M37SBK manuals
Add to My Manuals
Save this manual to your list of manuals |
Page 15 highlights
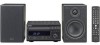
Getting Started Connections Setup Playback Setting the Timer Other Functions Troubleshooting Specifications n Connecting the AM loop antenna 1 Push the lever. 2 Insert the conductor. 3 Return the lever. USB Port NOTE • Make sure the AM loop antenna lead terminals do not touch metal parts of the panel. • Do not connect two FM antennas simultaneously. Connecting the Power Cord ENGLISH USB Power cord (Supplied) To household power outlet (AC 120 V, 60 Hz) NOTE • It is not possible to connect and use a computer via the RCD-M37's USB port using a USB cable. • For details about USB memory devices, see "Playable USB Memory Formats" (vpage 20). NOTE • Only use the supplied power cord. • Be sure the power cord is unplugged from the power outlet before connecting or disconnecting it to the AC IN. Once Connections are Completed Turning the Power On (vpage 13) 11
-
 1
1 -
2
-
3
-
4
-
5
-
6
-
7
-
8
-
9
-
 10
10 -
 11
11 -
 12
12 -
 13
13 -
 14
14 -
 15
15 -
 16
16 -
 17
17 -
 18
18 -
 19
19 -
 20
20 -
21
-
22
-
23
-
24
-
25
-
26
-
27
-
28
-
29
-
30
-
31
-
32
-
33
-
34
-
35
-
36
-
37
-
38
-
39
 |
 |
