Dewalt D55141FNBN Instruction Manual - Page 12
OPERATING PROCEDURES, Start-up Fig. 1, Shut-down Fig. 1, MAINTENANCE
 |
View all Dewalt D55141FNBN manuals
Add to My Manuals
Save this manual to your list of manuals |
Page 12 highlights
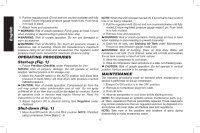
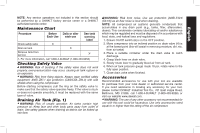
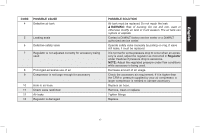
English 6. Pull the regulator knob (D) out and turn counterclockwise until fully closed. Ensure regulated pressure gauge reads 0 psi. Push knob in to lock in place. 7. Attach hose and accessories. Warning: Risk of unsafe operation. Firmly grasp air hose in hand when installing or disconnecting to prevent hose whip. Warning: Risk of unsafe operation. Do not use damaged or worn accessories. Warning: Risk of Bursting. Too much air pressure causes a hazardous risk of bursting. Check the manufacturer's maximum pressure rating for air tools and accessories. The regulator outlet pressure must never exceed the maximum pressure rating. Operating Procedures Start-up (Fig. 1) 1. Follow Pre-Start Checklist under Preparation for Use. NOTICE: Risk of property damage. Do not operate in vertical position. Vertical position is for storage only. 2. Move the Auto/Off switch to the AUTO position and allow tank pressure to build. Motor will stop when tank pressure reaches cut‑out pressure. CAUTION: Risk of unsafe operation. Compressed air from the unit may contain water condensation and oil mist. Do not spray unfiltered air at an item that could be damaged by moisture. Some air operated tools or devices may require filtered air. Read the instructions for the air tool or device. 3. Adjust regulator (D) to desired setting. See Regulator under Features. Shut-down (Fig. 1) 1. Move Auto/Off switch (A) to the OFF position. NOTE: If finished using compressor, follow Steps 2 - 6. NOTE: When the unit has been turned off, it is normal to hear a short hiss of air being released. 2. Pull the regulator knob (D) out and turn counterclockwise until fully closed. Ensure regulated pressure gauge reads 0 psi. Push knob in to lock in place. 3. Remove hose and accessory. Warning: Risk of unsafe operation. Firmly grasp air hose in hand when installing or disconnecting to prevent hose whip. 4. Drain the air tank, see Draining Air Tank under Maintenance. Ensure air tank pressure gauge reads 0 psi. Warning: Risk of bursting. Drain air tank daily. Water will condense in air tank. If not drained, water will corrode and weaken the air tank causing a risk of air tank rupture. 5. Allow the compressor to cool down. 6. Wipe air compressor clean and store in a safe, non-freezing area. CAUTION: Risk of unsafe operation. Do not operate in vertical position. Vertical position is for storage only. Maintenance The following procedures must be followed when maintenance or service is performed on the air compressor. 1. Ensure On/Off switch is in the OFF position. 2. Remove air compressor plug from outlet. 3. Drain air tank. 4. Allow air compressor to cool down before starting service. NOTE: All compressed air systems contain maintenance parts (e.g., oil, filters, separators) that are periodically replaced. These used parts may contain substances that are regulated and must be disposed of in accordance with local, state, and federal laws and regulations. NOTE: Take note of the positions and locations of parts during disassembly to make reassembly easier. 12
-
 1
1 -
2
-
3
-
4
-
5
-
6
-
 7
7 -
 8
8 -
 9
9 -
 10
10 -
 11
11 -
 12
12 -
 13
13 -
 14
14 -
 15
15 -
 16
16 -
 17
17 -
18
-
19
-
20
-
21
-
22
-
23
-
24
-
25
-
26
-
27
-
28
-
29
-
30
-
31
-
32
-
33
-
34
-
35
-
36
-
37
-
38
-
39
-
40
-
41
-
42
-
43
-
44
-
45
-
46
-
47
-
48
-
49
-
50
-
51
-
52
-
53
-
54
-
55
-
56
 |
 |
