Dewalt D55154 Instruction Manual - Page 17
Checking Air Filter Element Fig. 1, Draining Air Tank Fig. 1, Compressor Pump Oil Fig. 1
 |
View all Dewalt D55154 manuals
Add to My Manuals
Save this manual to your list of manuals |
Page 17 highlights
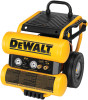
English Warning: Risk of bursting. If the safety valve does not work properly, over-pressurization may occur, causing air tank rupture or an explosion. Before starting compressor, pull the ring on the safety valve to make sure that the safety valve operates freely. If the valve is stuck or does not operate smoothly, it must be replaced with the same type of valve. Checking Air Filter Element (Fig. 1) Warning: Hot surfaces. Risk of burn. Aftercooler, pump head, and surrounding parts are very hot, do not touch (see the Hot Surfaces identified in Fig. 2). Allow compressor to cool prior to servicing. 1. Ensure the On/Off switch (A) is in the OFF position. 2. Allow unit to cool. 3. Remove air filter (N) from unit. 4. Carefully pry filter top from base. 5. Remove element from filter base. 6. If element needs cleaning, blow out with air. Replace if needed. Purchase replacement parts from your local dealer or authorized service center. Always use identical replacement parts. 7. Place element back in filter base. 8. Snap filter top to filter base. 9. Reassemble air filter to unit. Ensure exhaust outlet points down. CAUTION: Risk of unsafe operation. Do not operate without air inlet filter Draining Air Tank (Fig. 1) Warning: Risk of unsafe operation. Risk from noise. Air tanks contain high pressure air. Keep face and other body parts away from outlet of drain. Use safety glasses [ANSI Z87.1 (CAN/CSA Z94.3)] when draining as debris can be kicked up into face. Use ear protection [ANSI S12.6 (S3.19)] as air flow noise is loud when draining. NOTE: All compressed air systems generate condensate that accumulates in any drain point (e.g. tanks, filter, aftercoolers, dryers). This condensate contains lubricating oil and/or substances which may be regulated and must be disposed of in accordance with local, state, and federal laws and regulations. 1. Ensure On/Off switch is in the OFF position. 2. Move compressor into an inclined position so drain valve (J) is at the lowest point (this will assist in removing moisture, dirt, etc. from air tanks) 3. Place a suitable container under the drain valve to catch discharge. 4. Grasp knurled knob on drain valve. 5. Slowly rotate knob to gradually bleed air from air tank. Warning: Risk of bursting. Drain air tank daily. Water will condense in air tank. If not drained, water will corrode and weaken the air tank causing a risk of air tank rupture. CAUTION: Risk of property damage. Drain water from air tank may contain oil and rust, which can cause stains. 6. When air tank pressure gauge reads 10 PSI (68,9 kPa), rotate valve to the fully open position. 7. Close drain valve when finished. Compressor Pump Oil (Fig. 1) checking oil Warning: Hot surfaces. Risk of burn. Aftercooler, pump head, and surrounding parts are very hot, do not touch (see the Hot Surfaces identified in Fig. 2). Allow compressor to cool prior to servicing. 1. Ensure On/Off switch is in the OFF position. 2. Place unit on a flat level surface. 3. Remove dipstick (K) and wipe clean. 17
-
 1
1 -
2
-
3
-
4
-
5
-
6
-
7
-
8
-
9
-
10
-
11
-
 12
12 -
 13
13 -
 14
14 -
 15
15 -
 16
16 -
 17
17 -
 18
18 -
 19
19 -
 20
20 -
 21
21 -
 22
22 -
23
-
24
-
25
-
26
-
27
-
28
-
29
-
30
-
31
-
32
-
33
-
34
-
35
-
36
-
37
-
38
-
39
-
40
-
41
-
42
-
43
-
44
-
45
-
46
-
47
-
48
-
49
-
50
-
51
-
52
-
53
-
54
-
55
-
56
-
57
-
58
-
59
-
60
-
61
-
62
-
63
-
64
-
65
-
66
-
67
-
68
-
69
-
70
-
71
-
72
-
73
-
74
-
75
-
76
 |
 |
