Dewalt DCF6201 Instruction Manual - Page 5
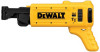
Installing and Removing the Magazine, from the Screwgun Fig. 2, OPERATION, ASSEMBLY AND ADJUSTMENTS - collated screw magazine
 |
View all Dewalt DCF6201 manuals
Add to My Manuals
Save this manual to your list of manuals |
Page 5 highlights
English INTENDED USE This collated drywall magazine attachment is designed to be used with the DCF620 or DCF621 DEWALT cordless screwgun for professional driving of collated screws. DO NOT use under wet conditions or in presence of flammable liquids or gases. This collated drywall magazine attachment is a professional power tool. DO NOT let children come into contact with the tool. Supervision is required when inexperienced operators use this tool. ASSEMBLY AND ADJUSTMENTS WARNING: To reduce the risk of injury, turn unit off and disconnect it from power source before installing and removing accessories, before adjusting or when making repairs. An accidental start-up can cause injury. Fitting the Collated Screwdriver Bit (Fig. 1, 2) NOTICE: For proper operation only use DEWALT collated screwdriver bit (catalog #: DWA6PHC2). 1. Remove the nose cone from the screwgun. 2. To remove the bit and bit holder: a. Grab the bit holder. b. Push it into the gear case depressing the sleeve. c. Rotate the bit holder until the clutch engages. d. While holding the sleeve depressed, pull the bit holder out. NOTE: Refer to and follow all instructions on changing bits and holders in your screwgun manual. 3. Push and rotate the provided collated screwdriving bit (H) into the spindle until ball lock snaps in groove of the bit shank. Installing and Removing the Magazine from the Screwgun (Fig. 2) With the the nose cone removed and provided driver bit (H) installed, push the magazine over the bit onto the screw driver until the magazine clicks into place and ensure that it does not disengage. FIG. 2 H G NOTE: make sure the screw driver control lever is set to forward rotation before use. To remove the magazine, press and hold the release buttons (G) on both sides of the accessory and pull accessory off the screwgun. OPERATION WARNING: To reduce the risk of injury, turn unit off and disconnect it from power source before installing and removing accessories, before adjusting or when making repairs. An accidental start-up can cause injury. 3 Page dimensions: 8.5 x 5.5
-
 1
1 -
 2
2 -
 3
3 -
 4
4 -
 5
5 -
 6
6 -
 7
7 -
 8
8 -
 9
9 -
 10
10 -
 11
11 -
12
-
13
-
14
-
15
-
16
-
17
-
18
-
19
-
20
-
21
-
22
-
23
-
24
-
25
-
26
-
27
-
28
-
29
-
30
-
31
-
32
 |
 |
