Dewalt DCF6201 Instruction Manual - Page 8
Rotating the Collated Attachment, MAINTENANCE, Cleaning - parts
 |
View all Dewalt DCF6201 manuals
Add to My Manuals
Save this manual to your list of manuals |
Page 8 highlights
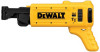
English The magazine is designed to drive screws completely into work piece only. Once screwgun is lifted, adjustments to screw must be made by first removing magazine. Rotating the Collated Attachment This attachment has the ability to rotate without being taken off the drywall screwgun. To rotate, grip the top portion with one hand, while holding the drywall screwgun with the other then rotate. An audible "click" indicates the magazine is in each of the available positions. MAINTENANCE WARNING: To reduce the risk of injury, turn unit off and disconnect it from power source before installing and removing accessories, before adjusting or when making repairs. An accidental start-up can cause injury. Cleaning WARNING: Blow dirt and dust out of all air vents with clean, dry air at least once a week. To minimize the risk of eye injury, always wear ANSI Z87.1 approved eye protection when performing this. WARNING: Never use solvents or other harsh chemicals for cleaning the non-metallic parts of the tool. These chemicals may weaken the plastic materials used in these parts. Use a cloth dampened only with water and mild soap. Never let any liquid get inside the tool; never immerse any part of the tool into a liquid. For best performance regularly clean magazine by: 1. Remove advancing mechanism from collated magazine (see Removing and Installing the Advancing Mechanism instructions). 2. Remove shoe from advancing mechanism. 3. Remove return spring from magazine. 4. Submerge parts in soapy water for 10 minutes. 5. Remove and thoroughly rinse parts. 6. Allow parts to air dry. 7. Reassemble and continue use. REMOVING AND INSTALLING THE ADVANCING MECHANISM (FIG. 8) CAUTION: The advancing mechanism is spring loaded. Two hands must be used to remove the advancing mechanism. The spring may eject from the mechanism. To remove advancing mechanism: 1. Remove collated magazine attachment from screwdriver. 2. Slightly depress advancing mechanism (D) by pushing on the shoe (E) with one hand. 3. Keeping pressure on the shoe (E) with the other hand depress service button (F). 4. Slowly release pressure from the shoe (E) until the advancing mechanism is out of the collated magazine. 6 Page dimensions: 8.5 x 5.5
-
 1
1 -
2
-
 3
3 -
 4
4 -
 5
5 -
 6
6 -
 7
7 -
 8
8 -
 9
9 -
 10
10 -
 11
11 -
 12
12 -
 13
13 -
14
-
15
-
16
-
17
-
18
-
19
-
20
-
21
-
22
-
23
-
24
-
25
-
26
-
27
-
28
-
29
-
30
-
31
-
32
 |
 |
