Dewalt DCF6201 Instruction Manual - Page 9
Repairs, Register Online, Accessories
 |
View all Dewalt DCF6201 manuals
Add to My Manuals
Save this manual to your list of manuals |
Page 9 highlights
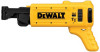
English FIG. 8 K D J FI E L To install the advancing mechanism: 1. With the collated magazine attachment removed from screwgun, align the tabs (I) on the shoe with the slots (J) in the collated housing. 2. Push in slightly, then align the spring (K) with the pocket in the advancing mechanism. 3. Push advancing mechanism in until you hear the "click" of the service button. NOTE: The lever arm (L) should be in the up position (as shown in figure 8) before the advancing mechanism is installed. If in the down position, the advancing mechanism will be locked in place. 4. Cycle the advancing mechanism several times by hand to ensure proper function before installing it onto your screwgun for use. Accessories WARNING: Since accessories, other than those offered by DEWALT, have not been tested with this product, use of such accessories with this tool could be hazardous. To reduce the risk of injury, only DEWALT recommended accessories should be used with this product. Recommended accessories for use with your tool are available at extra cost from your local dealer or authorized service center. If you need assistance in locating any accessory, please contact DEWALT Industrial Tool Co., 701 East Joppa Road, Towson, MD 21286, call 1-800-4-DEWALT (1-800-433-9258) or visit our website: www. dewalt.com. Repairs To assure product SAFETY and RELIABILITY, repairs, maintenance and adjustment (including brush inspection and replacement) should be performed by a DEWALT factory service center, a DEWALT authorized service center or other qualified service personnel. Always use identical replacement parts. Register Online Thank you for your purchase. Register your product now for: • WARRANTY SERVICE: Registering your product will help you obtain more efficient warranty service in case there is a problem with your product. • CONFIRMATION OF OWNERSHIP: In case of an insurance loss, such as fire, flood or theft, your registration of ownership will serve as your proof of purchase. • FOR YOUR SAFETY: Registering your product will allow us to contact you in the unlikely event a safety notification is required under the Federal Consumer Safety Act. Register online at www.dewalt.com/register. 7 Page dimensions: 8.5 x 5.5
-
 1
1 -
2
-
3
-
 4
4 -
 5
5 -
 6
6 -
 7
7 -
 8
8 -
 9
9 -
 10
10 -
 11
11 -
 12
12 -
 13
13 -
 14
14 -
15
-
16
-
17
-
18
-
19
-
20
-
21
-
22
-
23
-
24
-
25
-
26
-
27
-
28
-
29
-
30
-
31
-
32
 |
 |
