Dewalt DCS350D1 Instruction Manual - Page 15
LED Worklight Fig. 6, Hang Hook Fig. 2, Proper Hand Position Fig. 7, Cutting Fig. 8
 |
View all Dewalt DCS350D1 manuals
Add to My Manuals
Save this manual to your list of manuals |
Page 15 highlights
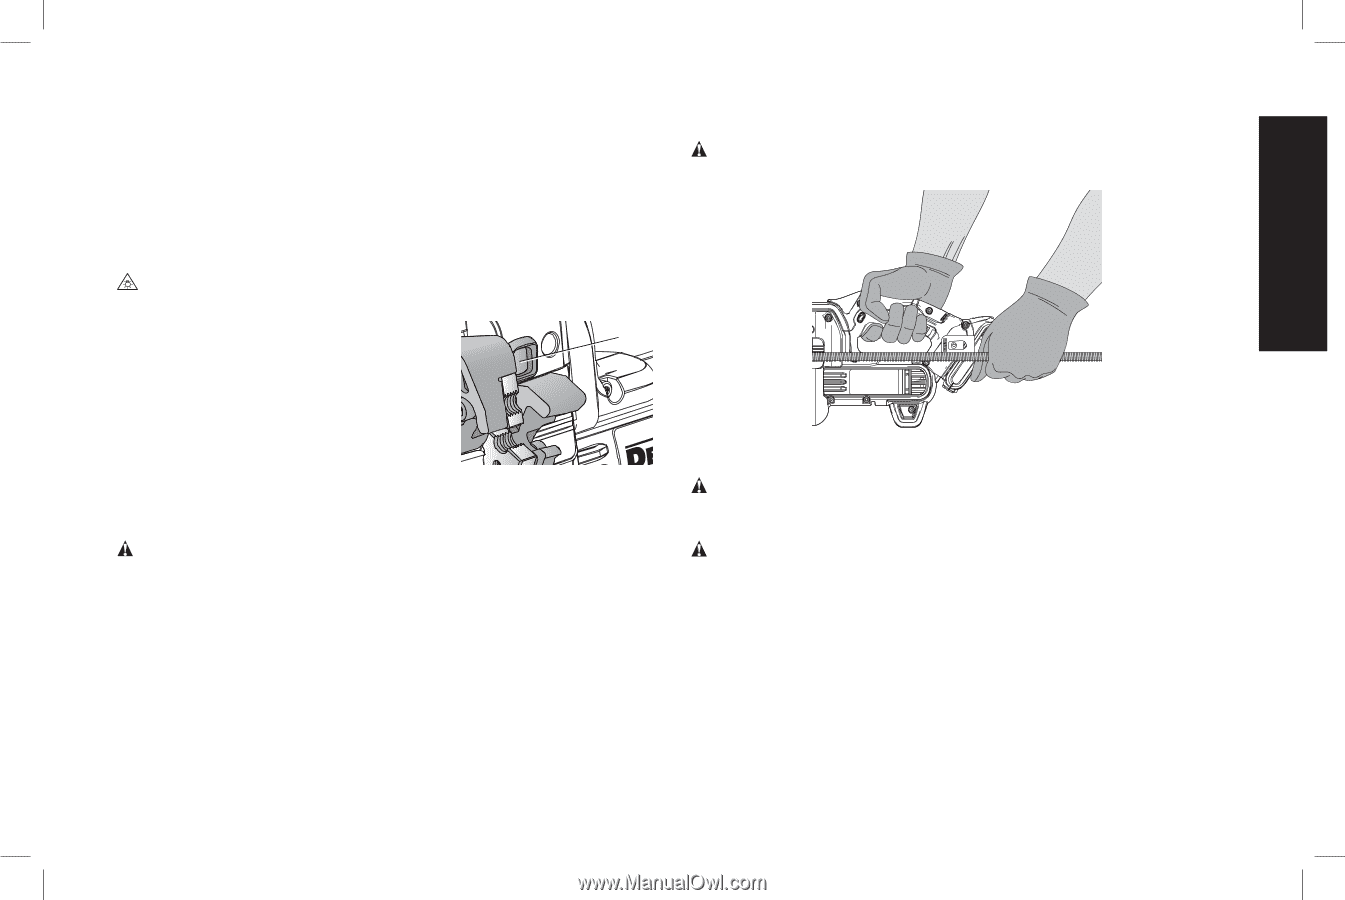
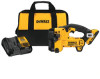
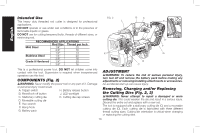
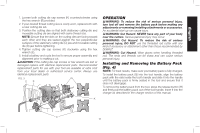
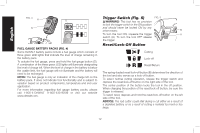
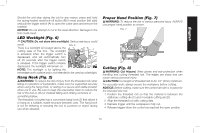
English Should the unit stop during the cut for any reason, press and hold the spring-loaded reset/lock-off button (B) in reset position (left side) and pull the trigger switch (A) to open the cutter jaws and remove the material. NOTICE: Do not attempt to cut in the reset direction. Damage to the tool could result. LED Worklight (Fig. 6) CAUTION: Do not stare into worklight. Serious eye injury could result. FIG. 6 There is a worklight (J) located above the J cutting area of the tool. The worklight is activated when the trigger switch is depressed, and will automatically turn off 20 seconds after the trigger switch is released. If the trigger switch remains depressed, the worklight will remain on. NOTE: The worklight is for lighting the immediate work surface and is not intended to be used as a flashlight. Hang Hook (Fig. 2) WARNING: To reduce the risk of injury from the threaded rod cutter falling on operators or bystanders, make sure it is supported securely when using the hang hook, or resting in a secure and stable location when not in use. Be sure to keep the area below clear to reduce the risk of the tool or off-cut material falling and striking someone or something below. The threaded rod cutter has a convenient hang hook (F) that allows it to hang on a suitable, stable structure between uses. The hang hook is not for tethering or securing the tool to a person or object during use when elevated. Proper Hand Position (Fig. 7) WARNING: To reduce the risk of serious personal injury, ALWAYS use proper hand position as shown. FIG. 7 Cutting (Fig. 8) WARNING: Cut Hazard. Wear gloves and eye protection when handling and cutting threaded rod. The edges are sharp and can cause serious personal injury. CAUTION: Cut length of threaded rod to be 1/4" (6mm) minimum. For accurate work, always secure the workpiece before cutting. NOTICE: Before cutting, make sure the correct die size is in place for the intended size rod. 1. Position the threaded rod so that the material is between the stationary cutting die (C) and moveable cutting die (D). 2. Align the threaded rod with cutting dies. 3. Depress trigger until the workpiece is fully cut. 4. Release trigger when the cutter has reached the open position. 13
-
 1
1 -
2
-
3
-
4
-
5
-
6
-
7
-
8
-
9
-
 10
10 -
 11
11 -
 12
12 -
 13
13 -
 14
14 -
 15
15 -
 16
16 -
 17
17 -
 18
18 -
 19
19 -
 20
20 -
21
-
22
-
23
-
24
-
25
-
26
-
27
-
28
-
29
-
30
-
31
-
32
-
33
-
34
-
35
-
36
-
37
-
38
-
39
-
40
-
41
-
42
-
43
-
44
-
45
-
46
-
47
-
48
-
49
-
50
-
51
-
52
-
53
-
54
-
55
-
56
 |
 |