Dirt Devil ND40100 Revision 1 (6/2010) - Page 2
Maintenance, Table Of Contents, Introduction, Quick Connect System - manual
 |
View all Dirt Devil ND40100 manuals
Add to My Manuals
Save this manual to your list of manuals |
Page 2 highlights
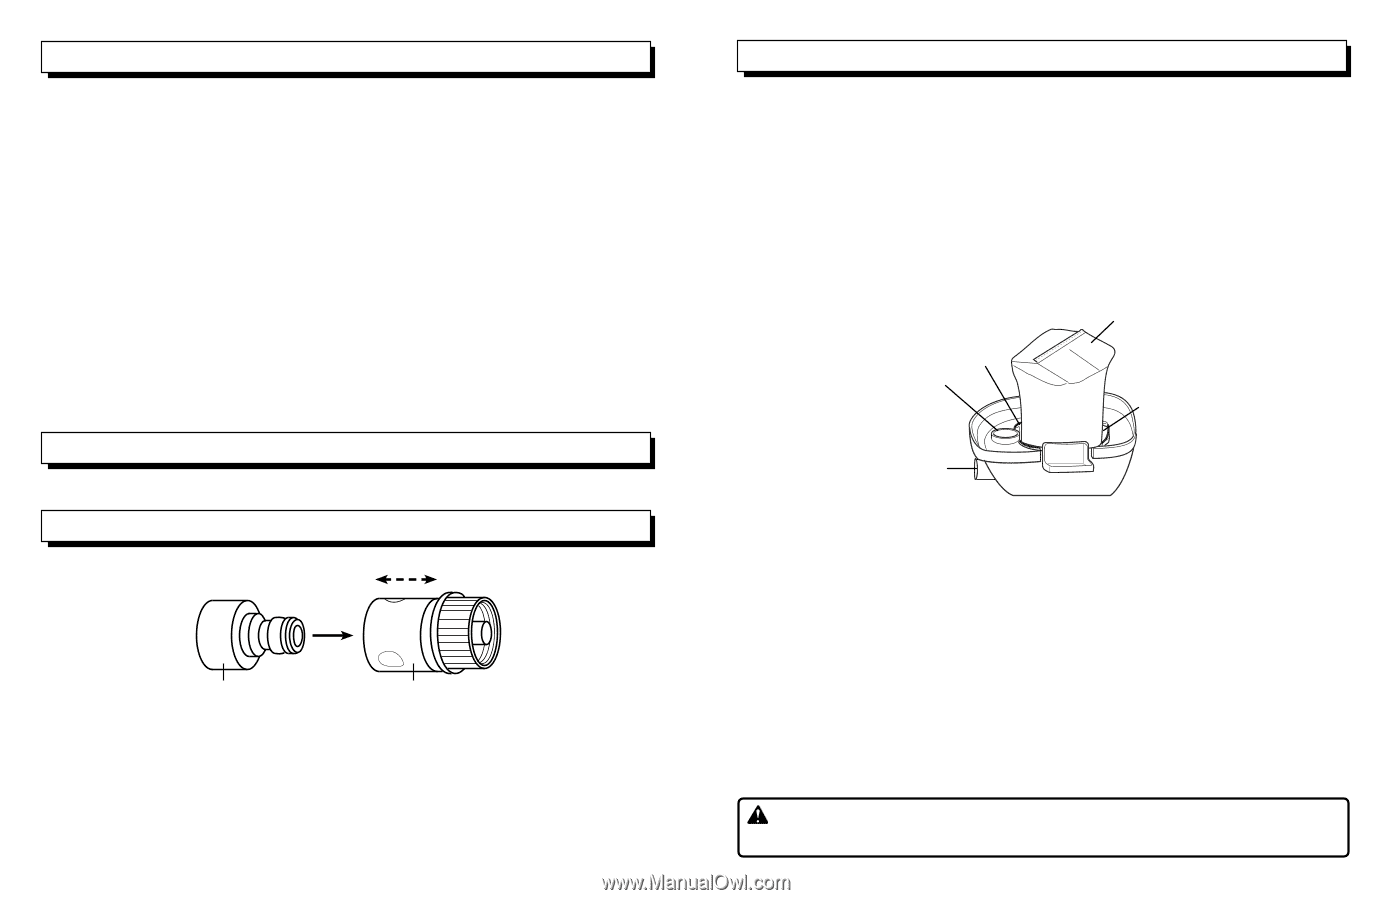
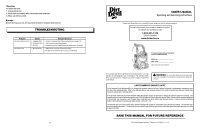
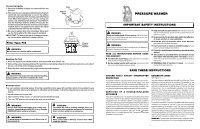
TABLE OF CONTENTS Pressure Washer Introduction & Quick Connect System...2 Important Safety Instructions...3 Specific Safety Rules and Symbols...4-5 Electrical...6 Features...7 Assembly...7-8 Operation...9-10 Maintenance...11 Troubleshooting...12 Reference Figures...13-15 Wet/Dry Vac Important Safety Instructions...16 Features...17 Operation...17-18 Maintenance...19 Troubleshooting...20 introduction This product has many features for making its use more pleasant and enjoyable. Safety, performance, and dependability have been given top priority in the design of this product making it easy to maintain and operate. QUICK CONNECT SYSTEM Pull A B This Pressure Washer's metal hose coupler has been replaced by an easy to use quick connect. The quick connect system consists of a male end nozzle (A) and a female end coupler (B), and will come assembled and attached to the Pressure Washer. With the hose faucet turned off, disconnect the female coupler from the nozzle by pulling back on the collar in the direction away from the pressure washer. Secure the female coupler to the hose end by tightening the threads of the two pieces. Attach the garden hose with assembled female hose coupler to the unit by pulling the collar back & moving the female coupler over top the male end nozzle. When use of the pressure washer is complete, unthread the garden hose from the female coupler and leave the entire quick connect system attached onto the unit for easy-to-access onboard storage. Note: Any other reference to the metal hose coupler later in the manual should be substituted with the included quick connect system that is explained above. 2 MAINTENANCE Filter Your filter should be cleaned often to maintain peak vac performance. NOTE: The filter is made of high quality material designed to stop small particles such as sawdust. Handle the filter carefully when removing to clean or installing a new filter. Do not tear the filter during removal or installation if your intent is to reuse the filter. Easy to Replace Filter 1. Extend the retainer band around the plastic posts on the lid. 2. Remove filter bag off the filter cage. 3. Place the replacement filter on the filter cage until open end touches bottom of lid. 4. Release the retainer band from the plastic post on the lid, holding the filter bag secure to the lid. 5. Make sure the retainer band is positioned on the filter bag covering the black printed line. Retainer Band Lid Motor Housing (upside-down) Filter Bag Plastic Post IMPORTANT: To avoid damage to the fan and motor, always reinstall the filter before using the vac for dry material pick-up. Take the dirty filter to a disposal container and gently brush away small dirt particles that may be adhering to the filter material. IMPORTANT: After cleaning, check the filter for tears or small holes. Do not use a filter with holes or tears in it. Even a small hole can allow a lot of dust to come out of your vac. Replace it immediately. Installation Before installing the filter on the vac, clean the area of the lid so that the retainer band will seal the bag against the lid and stop small particles from bypassing the filter bag. If the filter is clean and not damaged, replace it on the filter cage. If it cannot be reused, place a new filter over the filter cage. Replace the retainer band around the filter. Make sure the retainer band is positioned on the filter, and the filter completely covers the filter cage. Also, make sure the edges of the filter are completely secured under the retainer band. WARNING: Do not remove the filter cage and float. The float prevents liquid from entering the impeller and damaging the motor. The cage prevents fingers from touching the moving impeller. 19
-
 1
1 -
 2
2 -
 3
3 -
 4
4 -
 5
5 -
 6
6 -
 7
7 -
 8
8 -
9
-
10
-
11
 |
 |