Dirt Devil ND40100 Revision 1 (6/2010) - Page 7
Features, Assembly
 |
View all Dirt Devil ND40100 manuals
Add to My Manuals
Save this manual to your list of manuals |
Page 7 highlights
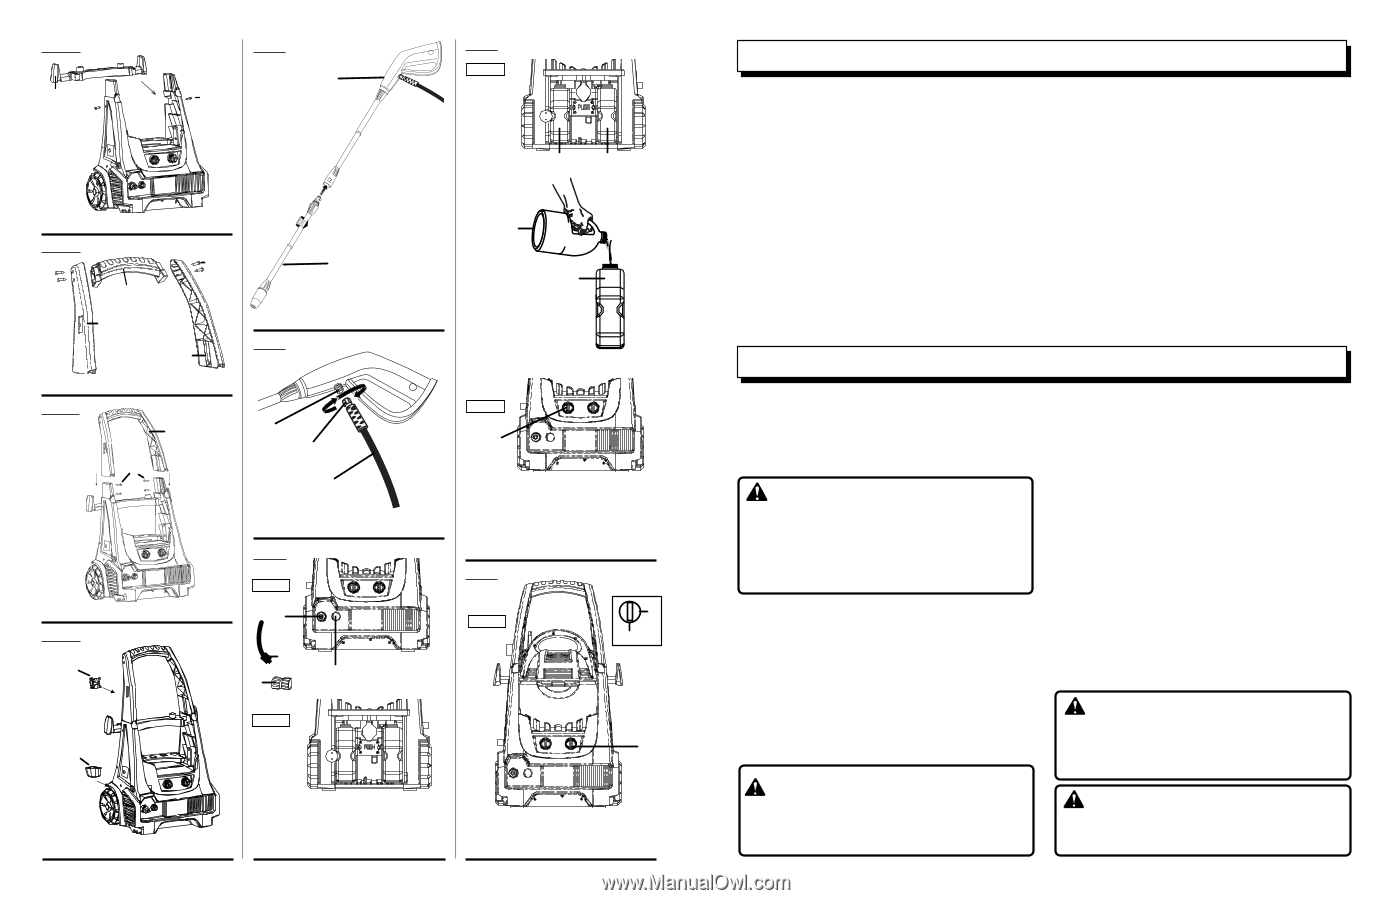
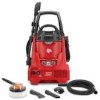
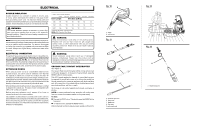
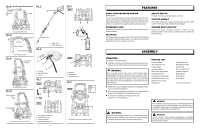
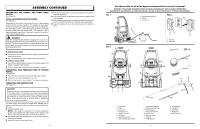
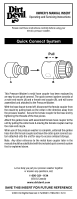
Fig. 4a Assembly instructions and process: Fig. 5 Accessories shelf A Screw Fig. 8 BACK B B Accessories Shelf Assembly Fig. 4b Screws B Handle grip Upper left handle Upper right handle Fig. 4c Upper Handle Assembly Upper Handle Assembly Screws Fig. 6 A - Trigger handle B - Variable spray wand A c b A - Hose inlet B - High pressure hose C - Hex nut Fig. 7 Assembly for Upper Handle Fig. 4d Spray wand upper FRONT D A B C Spray wand lower BACK A B FRONT C A - Detergent B - Detergent tank C. Detergent tank switch Fig. 9 FRONT On Off A Spray wand upper and lower assembly A - High-pressure extension hose B - Pressure washer outlet C - Garden hose coupler D - Pressure washer water inlet 14 A - On/off switch. Turn counter-clockwise to turn on. FEATURES KNOW YOUR pressure washer See Figure 3. The safe use of this product requires an understanding of the information on the tool and in this operator's manual as well as a knowledge of the project you are attempting. Before use of this product, familiarize yourself with all operating features and safety rules. detergent tank Remove the cap from the detergent tank to add detergent to the pressure washer. GFCI Plug The pressure washer is equipped with a GFCI plug to guard against the hazards of ground fault currents. This plug does not protect against short circuits, overloads, or shocks. ON/off switch This switch turns the pressure washer on and off. trigger handle The trigger handle has a gripping surface that provides added control of the spray wand and helps reduce fatigue. trigger with lock-out Pulling the trigger releases a stream of water for high pressure cleaning. The lock-out provides protection against unauthorized use. ASSEMBLY UNPACKING This product requires assembly. n Carefully remove the product and any accessories from the box. Make sure that all items listed in the packing list are included. WARNING: Do not use this product if any parts on the Packing List are already assembled to your product when you unpack it. Parts on this list are not assembled to the product by the manufacturer and require customer installation. Use of a product that may have been improperly assembled could result in serious personal injury. n Inspect the product carefully to make sure no breakage or damage occurred during shipping. n Do not discard the packing material until you have carefully inspected and satisfactorily operated the product. n If any parts are damaged or missing, please call 1-800-321-1134 for assistance. WARNING: If any parts are damaged or missing do not operate this product until the parts are replaced. Use of this product with damaged or missing parts could result in serious personal injury. PACKING LIST Pressure Washer High Pressure Hose Trigger Handle Accessory Shelf Variable Fan Spray Wand Detergent Tank (2) Spray Wand Holder Upper Spray Wand Holder Lower Garden Hose Coupler Handle Grip Handle Upper Left Handle Upper Right Screws (10) Nozzle Cleaning Tool Operator's Manual Wedge Brush* Rotary Brush* Turbo Wand* *In select models only WARNING: Do not attempt to modify this product or create accessories not recommended for use with this product. Any such alteration or modification is misuse and could result in a hazardous condition leading to possible serious personal injury. WARNING: Do not connect to power supply until assembly is complete. Failure to comply could result in accidental starting and possible serious personal injury. 7
-
 1
1 -
 2
2 -
 3
3 -
 4
4 -
 5
5 -
 6
6 -
 7
7 -
 8
8 -
 9
9 -
 10
10 -
 11
11
 |
 |