Dymo LabelManager® 280 User Guide 1 - Page 13
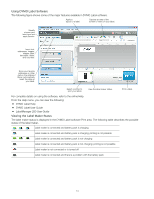
Using the Label Maker with Your Computer, Installing DYMO Label Software - labelmanager 280 label maker
 |
View all Dymo LabelManager® 280 manuals
Add to My Manuals
Save this manual to your list of manuals |
Page 13 highlights
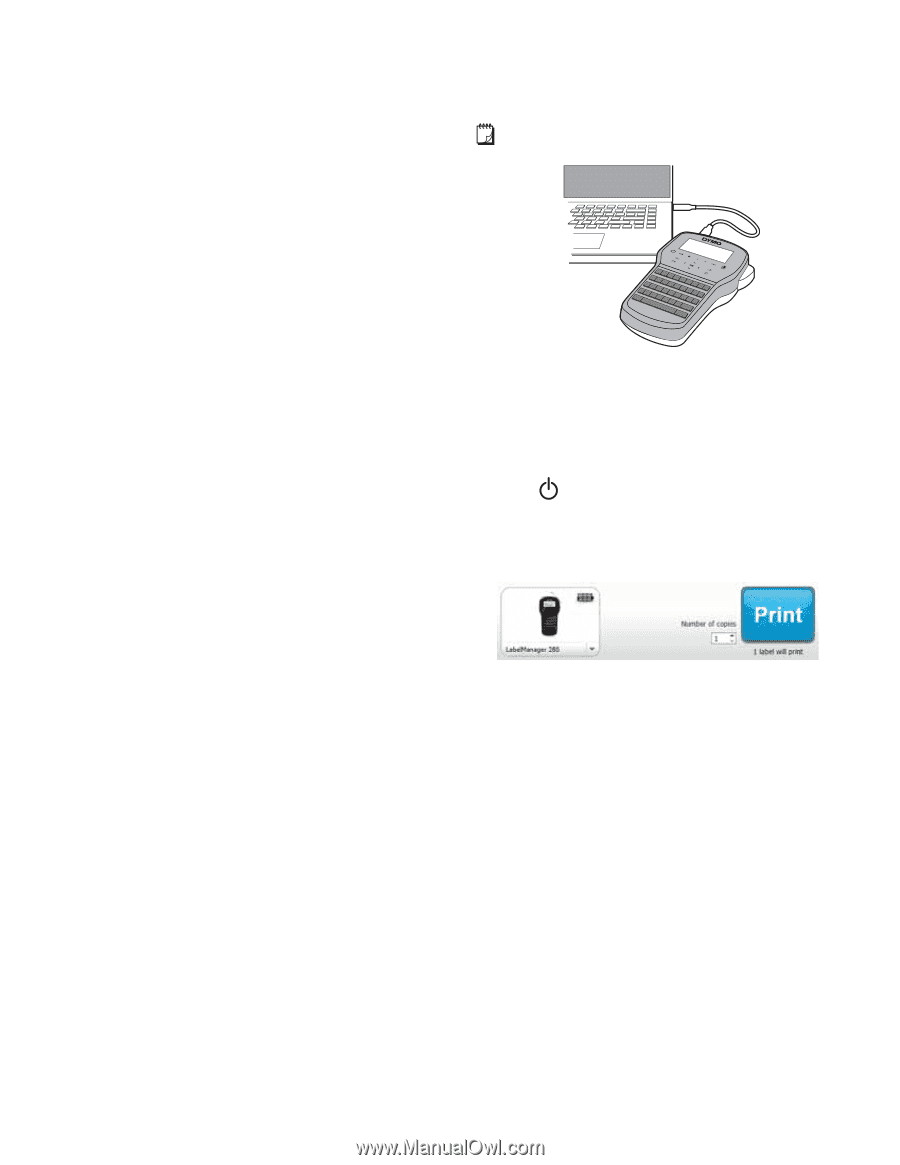
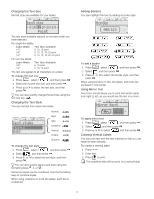
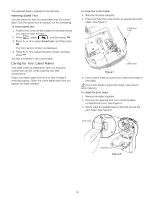
Using the Label Maker with Your Computer The label maker can be used as a standalone label printer or you can print labels directly from your computer using the latest version of DYMO Label™ software. Installing DYMO Label Software Do not connect the label maker to your computer until prompted by the software installer. To install the software on a Windows® system 1 Download the latest version of DYMO Label software from LM280.dymo.com. 2 Close all open Microsoft Office applications. 3 Double-click the Installer icon. After a few seconds, the installation screen appears. 4 Click Install and follow the instructions in the installer. To install the software on a Mac OS® system 1 Download the latest version of DYMO Label software from LM280.dymo.com. 2 Double-click the Installer icon and follow the onscreen instructions. Connecting the Label Maker to your Computer The label maker connects to your computer using the USB connection located on the top of the label maker. Do not connect the label maker to your computer until prompted by the software installer. Figure 9 To connect the label maker to your computer 1 Plug the USB cable into the USB port on the top of the label maker. See Figure 9. 2 Plug the other end of the USB cable into an available USB port on your computer. 3 Press to turn on the label maker. 4 If you have more than one DYMO label printer installed, do the following: a Click the printer image in the DYMO Label software Print area. All of the label printers that are installed on your computer are displayed. b Select the LabelManager 280 label maker. You are now ready to print labels from DYMO Label software. For more information, see Using DYMO Label Software on the next page. 13
-
 1
1 -
2
-
3
-
4
-
5
-
6
-
7
-
 8
8 -
 9
9 -
 10
10 -
 11
11 -
 12
12 -
 13
13 -
 14
14 -
 15
15 -
 16
16 -
 17
17
 |
 |